…And lo! It came to pass that I needed to set up a local environment built on IIS.
Many things (like communicating with a MS SQL server) can be emulated or replicated on a *nix environment, in which case the Vagrant workflow I’ve spent a lot of time and energy switching over to would work fine. In this case, however, I needed the environment to be specifically Windows-based, because the plugin I was planning on building was going to make use of COM functions to pull in and execute Visual Basic scripts that just wouldn’t run on anything other than Windows.
First, I asked my fellow devs. We do a lot of Microsoft work; maybe someone had a recipe or a Vagrant box I could use. No dice.
Vagrant is great because you can have different boxes emulating different environments. Your local machine’s filesystem (the “host” environment) can interact natively with the emulated operating system (the “guest” environment). My goal was to stick with Vagrant, somehow, to allow changes I make on my host to be reflected on the guest and then be able to see those changes in a browser. When no response was forthcoming, I took to Google. Surely someone has tried building on a virtualized Windows machine using Vagrant on OSX. Surely.
When I couldn’t find any answers on Google, I tried cobbling together what I could to build my own. What follows is how I have my local IIS Vagrant WordPress machine working. Your mileage may vary. It is, by no means, the best solution, and if you know of ways to improve the setup–particularly in syncing files between the two different filesystems–I’d be interested to hear them in the comments. At any rate, this method and this box works for me and I’m actively using it as a development environment.
Step One: Get a Box
The first thing I needed to do was get a VirtualBox image. You can find a whole repository of box images at atlas.hashicorp.com. I looked, couldn’t find a Windows server, looked again, and finally found something. The trick was in the search terms–the search functionality isn’t great. The one I finally went with was a Windows 2012 Server image. Once I knew what box I was using, I could initialize my new Vagrant server:
vagrant init lmayorga1980/windows-2012r2
That downloads the box (which will probably take more than an hour, so grab a book) and sets up your initial Vagrantfile. At this point, you could vagrant up and start up your machine. However, since it’s Windows, we don’t actually want to do that just yet…
Step Two: Set up your Windows Environment
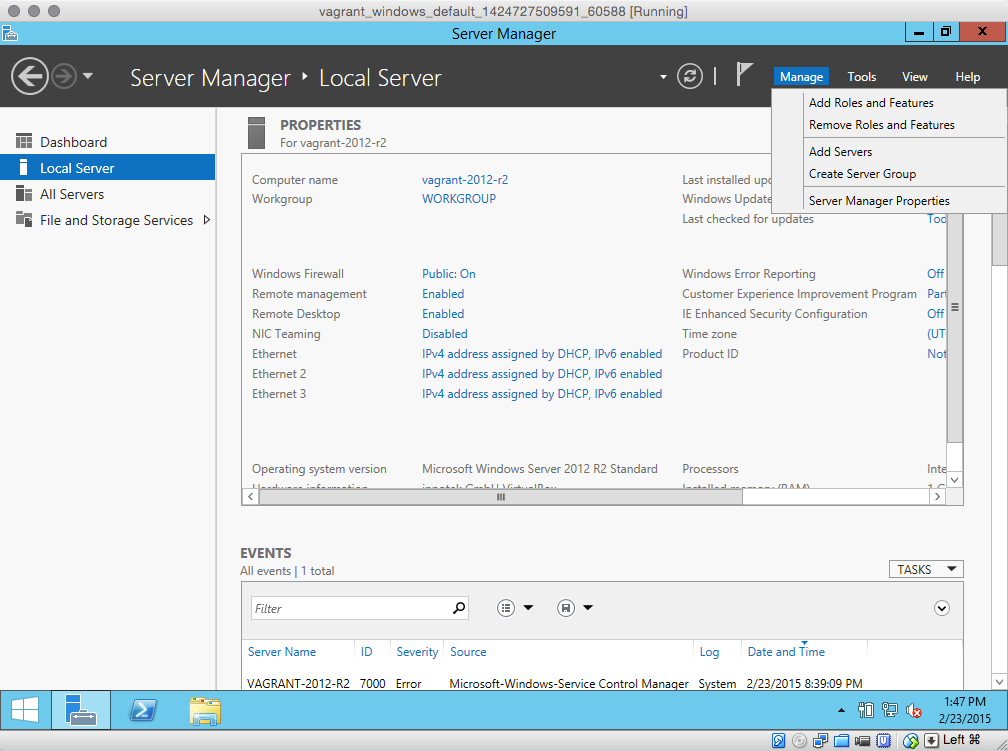
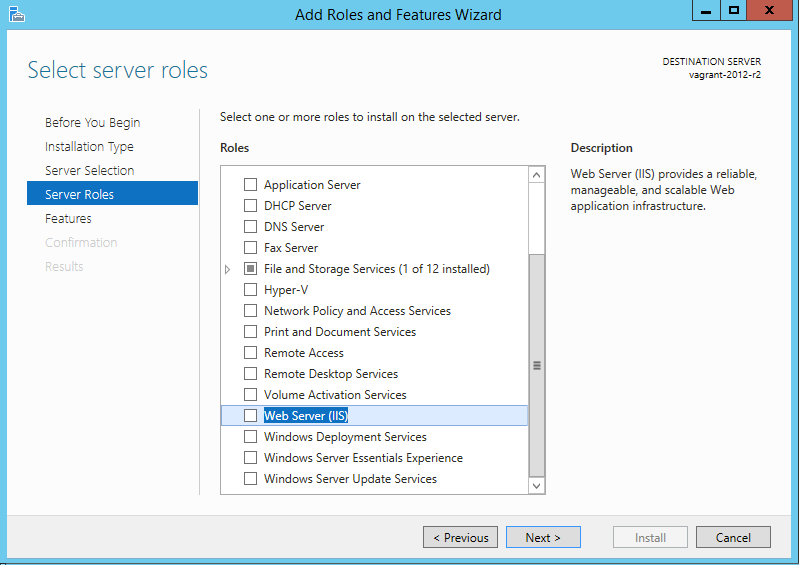
Out of the box, your new Windows server won’t come with IIS installed. That’s something that can be added through the Server Manager program that you’ll have a shortcut for in your Start bar. To do this, you’ll need to go to Manage → Add Roles and Features.

Once you have IIS installed, you’ll be able to go to the Tools dropdown in Server Manager and select Internet Information Services (IIS) Manager. That’s where you’ll be living for most of the time you will be setting up IIS.
Now, your Windows server will work great if the type of site you’re building is an ASP.NET site. If it’s not, you’ll have problems. I thought there’d be no issue whatsoever just downloading the WordPress software, extracting it, and setting up a site in the built-in IIS Manager tool.
I was wrong.
The first thing I had to learn the hard way was that there was this thing called a web.config file which is a little like an .htaccess file on an Apache server–except that if an .htaccess file on an Apache server doesn’t exist, the Apache-based site still works. If no web.config file exists, the entire site blows up.
And web.config files are really tetchy. They are simple xml files, but they need to be set up just so and when you’re doing more complex things on a WordPress site (like rewrite rules), you’re bound to run into issues. They’re also extremely hard to troubleshoot. One opaque error code reads like every other opaque error code and if you don’t know what you’re doing it’s a lot to jump into.
Thankfully, there’s a wizard!
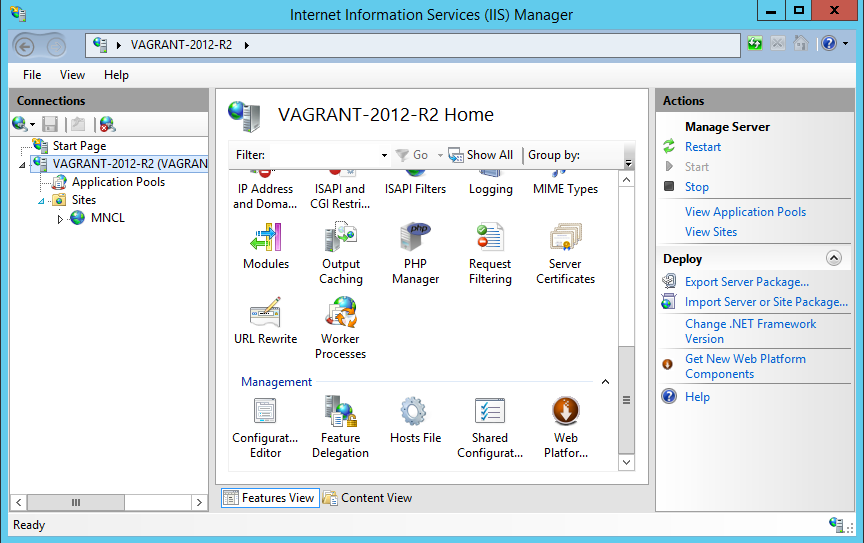
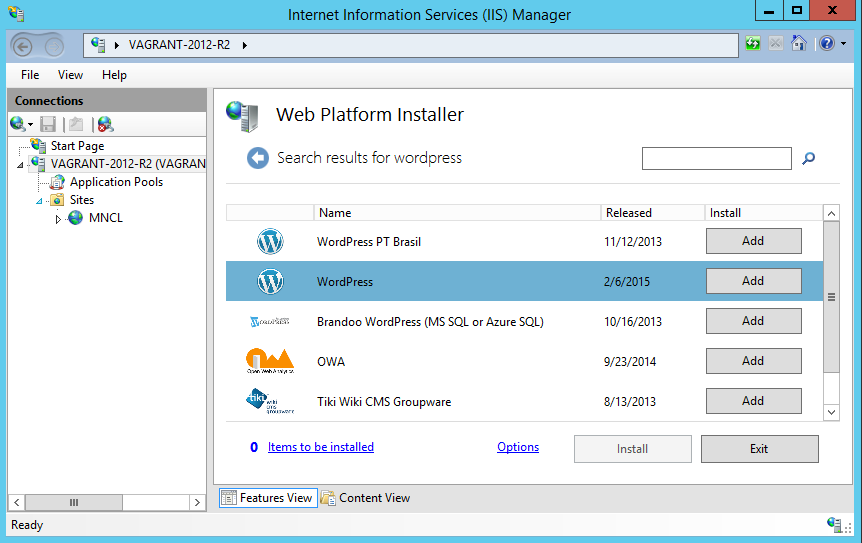
The Web Platform Installer is a download, if your machine doesn’t already have it, and it becomes just another icon in the Control Panel-like interface you get for each site you create in the IIS Manager. When you open the Web Platform Installer for the first time you’ll be greeted by a bunch of stuff you can install that you probably don’t care much about, but do a search for WordPress and you’ll get an option to install WordPress.
Before you install WordPress, though, you can add some of the other components we’ll need for a WordPress site. While it’s possible to install MySQL and PHP manually, you’re better off using the Web Platform Installer to install them so you know they are set up correctly. I installed PHP and MySQL manually the first time around, but when I found the Web Platform Installer, I reinstalled both of them through that. That gave me another Control Panel icon where I could configure and look at the PHP settings.
Now, you can install WordPress, and in so doing, you get a fresh web.config file pre-configured for you for free. The actual WordPress settings you use don’t really matter a whole lot–the process is a little like the regular 5-minute install…if the 5-minute install was a Windows installer. You also have to set your own secret keys but since this is just a dev environment, these don’t matter a whole lot. When you’re done, it builds the database user and initializes the WordPress database. It generates a randomized database name, user, and password, and gives you that information on the final screen.
The version of WordPress you get from the Web Platform Installer might be a little out of date (it was for me, anyway), which is something you might want to be aware of. After seeing this a whole bunch of times, I was just happy to finally see a WordPress setup screen:

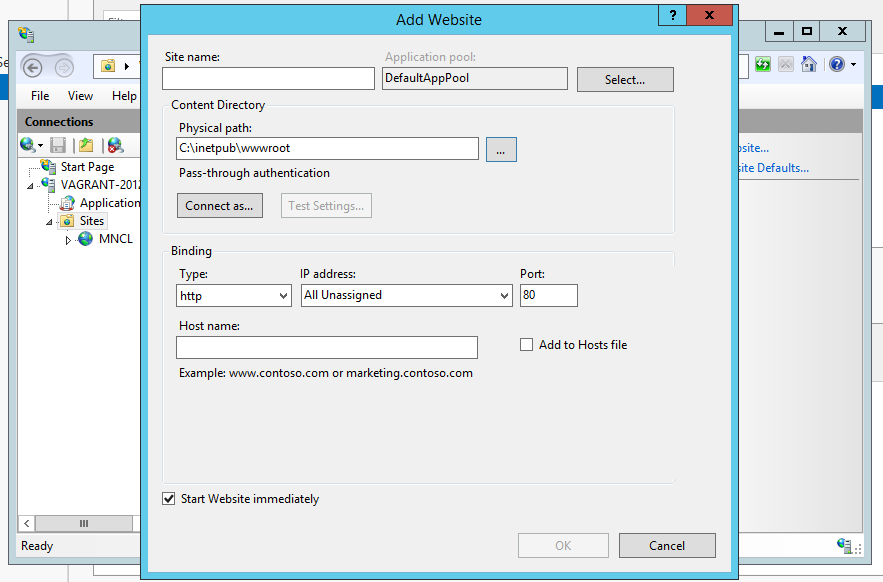
When installing WordPress, you’ll need to define what IIS site you’re installing WordPress to. There’s a default site built for you, but you may want to create a new one so you can customize the domain you want to use for your test environment. You can also create your site first (right clicking on Sites or click Add New Site from the right sidebar), and then select that site when you install WordPress.
Before you can call this step done, though, you need to go into your control panel and disable the firewall. This seems pretty crazy to me, but you won’t be able to ping your box from outside the virtual machine itself until you disable the firewall, even if it shows up on the network. No ping, no website.
Step Three: VirtualBox Network hacking
At this point you have a running WordPress site, right? So you should be able to just pop it into a browser and go.
Yeah, about that.
I found it a lot more difficult to bring the Windows machine up on the network to the point that I could actually browse to it in a browser than I expected. With VVV, you just say “make me a site,” and the script takes care of everything else for you.
What’s more, the box you get with VVV is pre-configured to work on your network; with the hosts updater plugin installed, when you make and provision a new site, it sets up your hosts file for you with a pingable IP address representing the virtual machine.
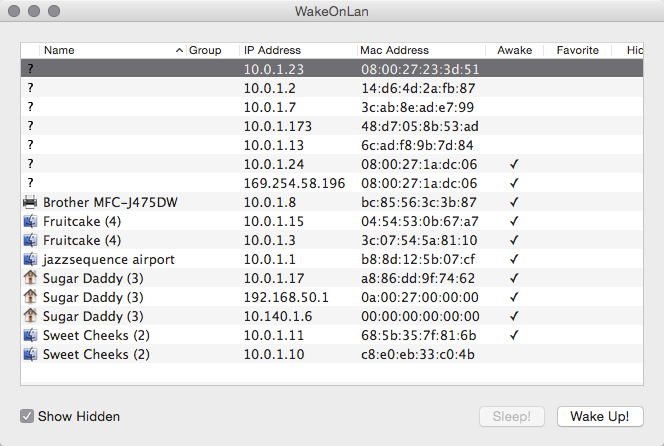
It wasn’t so smooth when I created my Windows machine. I ended up using a program I had lying around called WakeOnLAN. This app just gives you a really simple GUI that shows you the various devices on your network. This is handy when you’re trying to identify what IP address a new virtual machine might be occupying if you didn’t already know.
Combining the VirtualBox Network Setting screen for the box with WakeOnLAN, you can find the MAC address of your virtual machine and figure out what IP address(es) it’s using.It’s possible, unless you hard-code an IP address, that the IP address could change. If that happens, you can figure out what IP to change it to in your hosts file and make the change quickly.
After messing around with the virtual machine’s settings quite a bit, I ultimately got it on the network by creating a new bridged network adapter to my Windows Virtual Box’s settings.
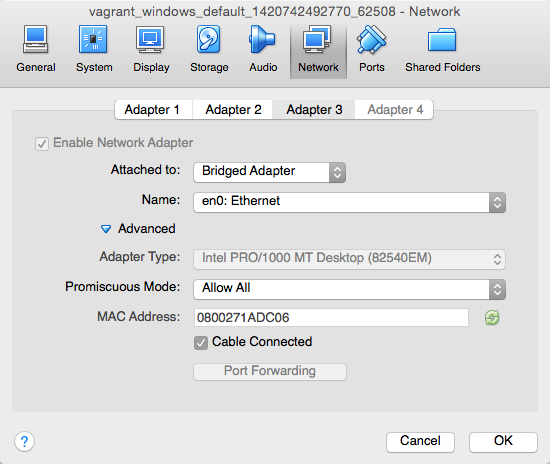
I kept the two other adapters mostly because I didn’t want to mess anything up, but it’s the bridged adapter that ultimately got an IP address that I could ping and set up in my host machine’s hosts file. This has the side effect of not being able to use the hosts-updater Vagrant plugin. I have to manually add the IP address of this box to my /etc/hosts file on my Mac. At this point in the process, you should be able to actually see the site you have running in your Windows box.
Step Four: Syncing files
You might think at this point that we’re past the hard part. I mean, none of this stuff is obvious, right? The very least we should need to worry about is the shared folders with the guest machine.
However, worry we must because you see, grasshopper, if you’re on a Mac, you’ve got a completely different filesystem than the guest machine. Whereas with a Linux box, like the Ubuntu machine you get with VVV, the filesystem between the guest and the host is compatible and you can mount drives from the host machine natively on the guest machine, such fancy tools are useless on a Windows box.
Oh, you get shared folders, but they aren’t mounted by default on startup. That’s okay, because that’s a setting you can change, but IIS will hate you and your dog if you try to run a site off of a network shared folder. I spent hours trying to get this to work, to no avail. I even installed various NTFS for Mac tools to try to get my Mac to maybe read files from shared folders on the Windows machine instead of the other way around, but I had no luck with anything.
Finally, I had the idea what if you just used Dropbox to sync files? Using a separate service/application to sync files automatically in the background would take the filesystem differences out of the equation. While I didn’t actually go with Dropbox — too much difficulty trying to migrate my whole Vagrant environment into Dropbox — I used the next best thing: BitTorrent Sync.
If you aren’t familiar with BitTorrent Sync, it works with the same premise as Dropbox, however, rather than having a single folder where you dump all the stuff you want to sync and all those synced files going to a central server, BitTorrent Sync lets you sync any folder and only syncs the files in the synced folder with the machine (or machines) that have been set up to receive those files.
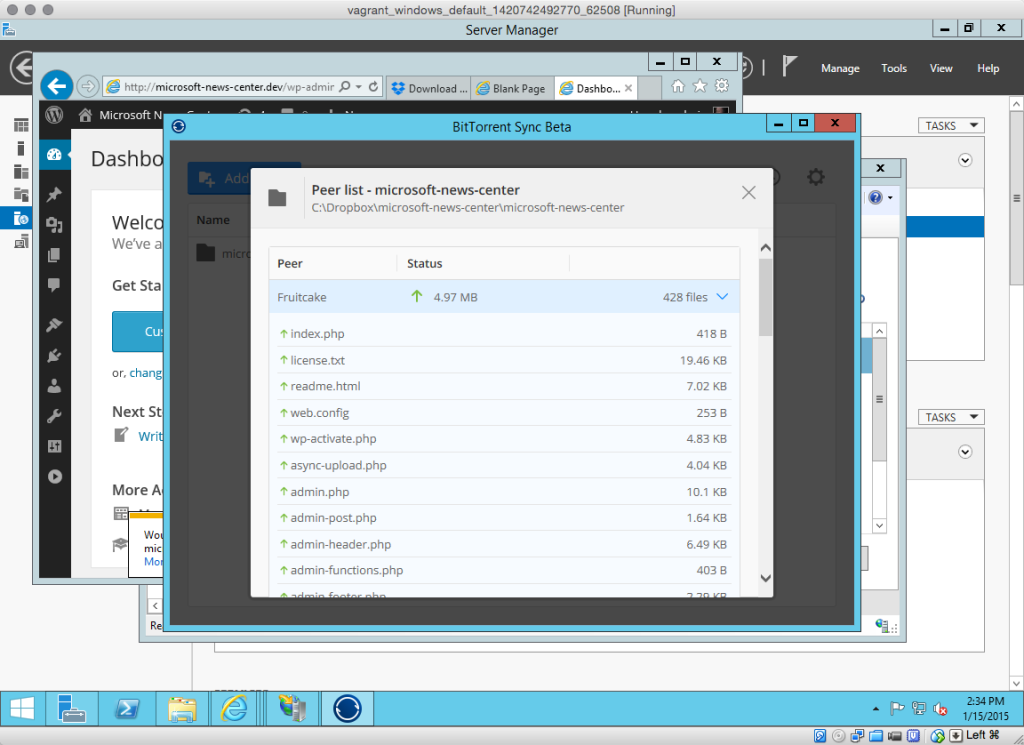
Like BitTorrent itself, there are peers — machines receiving the data — and there’s a seed (kind of) — the machine sending the data. Unlike BitTorrent, though, the transfer can go both ways; Sync will check the newer of two files and update whichever version is older on the machine that has older files. This is almost exactly what we want — something that will update the files on my guest machine (the Windows box) when I make changes on the host machine (my local Mac).
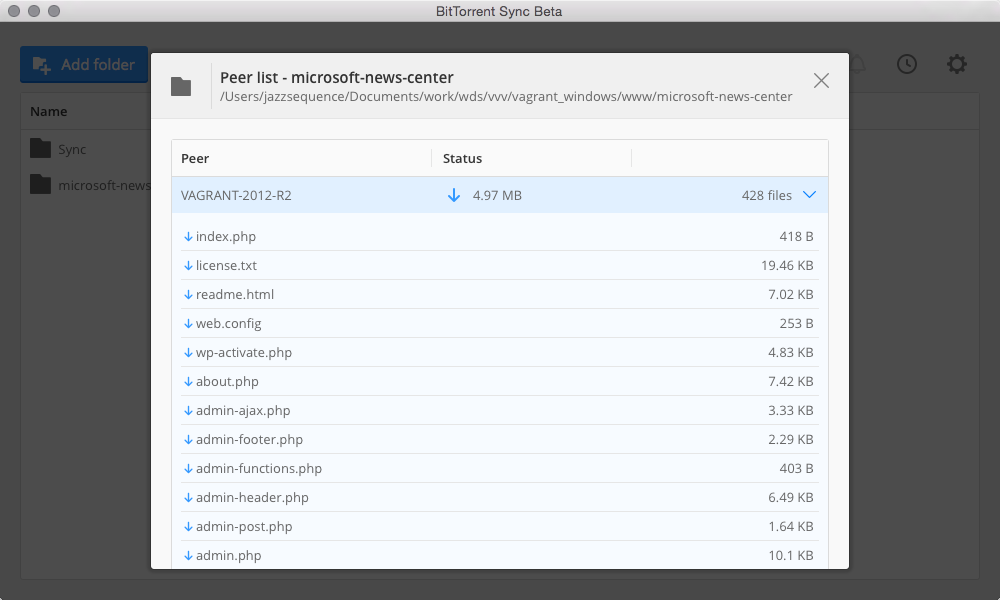
In this case, I synced the wp-content folder instead of the whole WordPress environment, so it’s basically set up the same way the project I was working on works (in which the wp-content folder is our Git repository). BitTorrent Sync tells me when files are transferring and I can drill down and see what files are being synced on either machine.
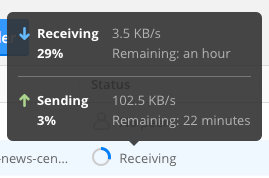
You also get progress meters for the sending/receiving processes and how fast those files are being transferred (similar to using a BitTorrent client):
Caveats and final thoughts
Obviously, this isn’t ideal. Ideally, I could just use a shared folder and the files would be used for the IIS server. If anyone has a walkthrough or tutorial on how to get that set up on a Mac, I’d love to see it. Using BitTorrent Sync was a last-ditch effort before throwing in the towel completely and just cowboy coding on a live Windows dev box.
It’s also not instantaneous. You’ll expect the changes you make to the files to be there as soon as you hit refresh, but you need to wait for the file(s) to sync with the server (e.g. the Windows virtual machine) before you’ll see the change. That will generally only take a second or two, same as if you had an automatic deployment set up for git pushes and needed to wait for the deployment to hit the server. It takes a bit to get used to.
The virtualized Windows server can also be really slow. Maybe this is just a side effect of running the GUI instead of doing everything with the commandline like you would do on a Linux virtual machine and working with limited resources. It’s something you’ll need to get used to and deal with. It can be painfully slow at times. I try to avoid running the GUI unless I can help it, but it is necessary for the initial setup process and if you need to make environment changes later.
The box you download from the Vagrant box repository has some SSH support built in, but it’s based on Cygwin, a library that allows Windows to emulate Unix commands, which isn’t reliable in this setup. Many of the services and installers you’ll be using just can’t be run (easily) from an emulated Unix commandline, and the commandline interface itself has some weird issues.
For example, after vagrant ssh‘ing into the Windows server, I would type a command and then try to use the backspace to delete a typo — except that it wouldn’t display that what I typed was being deleted (although it actually was). I gave up with SSH shortly after that as I didn’t want to be in a situation where I was trying to guess whether what I was typing is what the box was executing.
Hopefully, despite the frustration involved, my process will at least give you a head start on building an IIS box in a Vagrant environment (or maybe I will have successfully scared you off enough that you won’t spend as long as I have in trying to get it to work). Maybe you’ve got a tried and tested process that eliminates all this headache — when I looked for tutorials, I came up empty, so I’m more than happy to learn if there’s a better way. Let me know in the comments!
Hey there, great article, however I was checking the current BitTorrent Sync version and it appears like only the pro version allows unlimited folders to be synced. Did you purchase the pro or are you using an old version?
I’m not using the Pro version and I haven’t run into any restrictions yet. To be fair, I’ve only got a couple folders synced. I’ve probably had it around since before they launched Pro, but I’ve got the latest version and haven’t noticed any significant difference in how it works.
Having spent way to many hours trying to get different syncing techniques to work with IIS, I was very happy to find your article. Resilio Sync, as it is called today, worked smoother than I could imagine.
A thousans thanks!