

BuddyPress comes with all the profile and group pages it needs to access core settings and content. Sometimes you add a plugin to your site that’s not a BuddyPress plugin but you want to have a page on the profile to display this extra content. If you are a plugin developer, you can add support for BuddyPress using this same technique. Adding BuddyPress custom pages to profiles doesn’t have to be complicated!
Let’s say you have a portfolio plugin and you want to put a tab/page on a user profile and include the portfolio items. If your portfolio items are a custom post type then you can add a post loop on the page and pass in a query for the displayed BuddyPress user.
The following image is what we will accomplish in this tutorial:
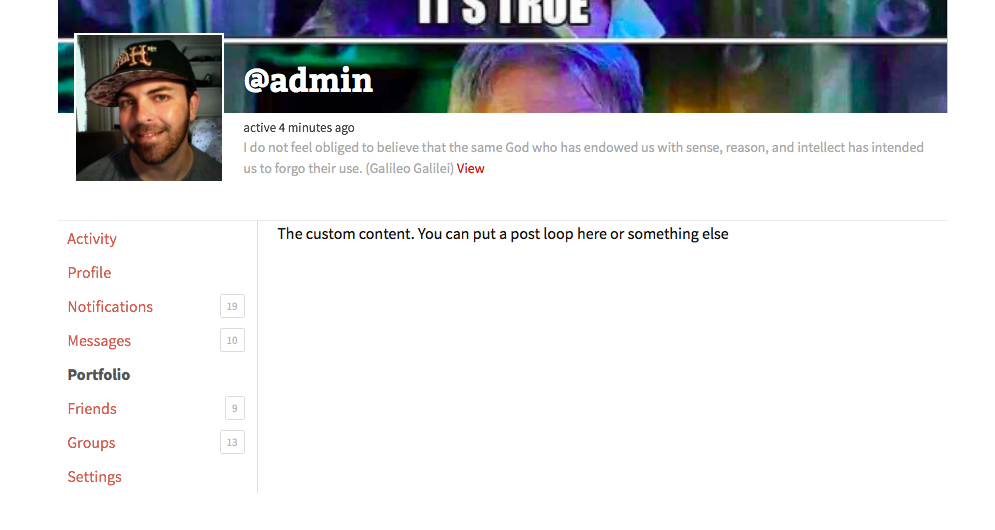

Sometimes you add a plugin to your site that’s not a BuddyPress plugin, but you want to have a page on the profile to display this extra content.
Custom Profile Tab
Profile tabs are created by passing and array or arguments to bp_core_new_nav_item(). You can specify the name on the tab, the slug when you visit this page, the position in relation to the other tabs, css id and the callback function that runs when a user visits this URL. The position is the placement in the user navigation. Navigation items are positioned by incremented of ten. We pass fifty and that would be in the 5th position. If you wanted an item in between 5th and 6th, you can pass 51-59. The argument 'show_for_displayed_user' is for a profile tab you only want a logged in user to see on their on profile.
function bp_custom_user_nav_item() {
    global $bp;

    $args = array(
            'name' => __('Portfolio', 'buddypress'),
            'slug' => 'portfolio',
            'default_subnav_slug' => 'portfolio',
            'position' => 50,
            'show_for_displayed_user' => false,
            'screen_function' => 'bp_custom_user_nav_item_screen',
            'item_css_id' => 'portfolio'
    );

    bp_core_new_nav_item( $args );
}
add_action( 'bp_setup_nav', 'bp_custom_user_nav_item', 99 );
Screen Callback Function
Mentioned previously, you create a call back function that runs when a user visits the page. In this function you add an action to a function that does the rendering. Also, you can load a default template that contains the walls and ceiling of the profile page. This plugins.php file contains the member header and user navigation. It makes it super easy get a page up and then fill in the content area. If you were to load your own template file you’d lose the member header and user navigation. So, stick with plugins.php!
The 'default_subnav_slug' argument is to set which subnavigation item you want to land on when clicking the tab. You can choose to add subpages to a page, pass in 'parent_slug' argument and bp_core_new_nav_item() will make the page a subpage.
How does this actually work? You hook your render function to ‘bp_template_content’, in the plugins.php template that loads there is a do_action for 'bp_template_content' and then the render function shows your content.
function bp_custom_user_nav_item_screen() {
    add_action( 'bp_template_content', 'bp_custom_screen_content' );
    bp_core_load_template( apply_filters( 'bp_core_template_plugin', 'members/single/plugins' ) );
}
Screen Content Function
In the callback function there is an action 'bp_template_content' that we hook our render function too. In this function is where you put the content you want to display. This is a user profile so you will want to make the content pertain to the displayed user.
function bp_custom_screen_content() {

   echo 'the custom content.
    You can put a post loop here,
    pass $user_id with bp_displayed_user_id()';

}
BuddyPress internal APIs make it trivial to add custom pages. Check out this simple example plugin that includes the code above. If you have any issues comment below and I’ll try to help out.