


Options are great. It’s always a wonderful thing to have options. I think most of us likely grew up being told that having options was important–for instance, fallback options, or when Plan A falls apart. Sometimes, though, too many options can create headaches and confusion. Maybe each new choice sitting in front of us looks as appealing as the one which came before it and in a mad dash to make the right choice, we create some kind of Frankenstein’s Monster combination of all of the choices.
We all know how that story turned out, right?
Hated fire.
Smashed things.
Threw a girl into a pond.
Please don’t throw a girl into a pond.
Instead, let’s focus on one choice– Visual Composer — and how we can tame this beast to turn it from a Frankenstein’s Monster into a Frankenstein’s Masterpiece.


Visual Composer: The Default Elements
First, let’s start off with what Visual Composer (VC) is and what it’s meant to do. A blurb on the homepage of VC’s website lets the user know:
Build complex, content rich pages in minutes instead of weeks. No programming knowledge required! Forget about fighting with [shortcodes].
Sounds great, doesn’t it? For the end-user this means that incredible and dynamic pages should be able to be easily created in no time flat. When you first activate VC, though, the interface can be a bit overwhelming if not downright confusing to users:
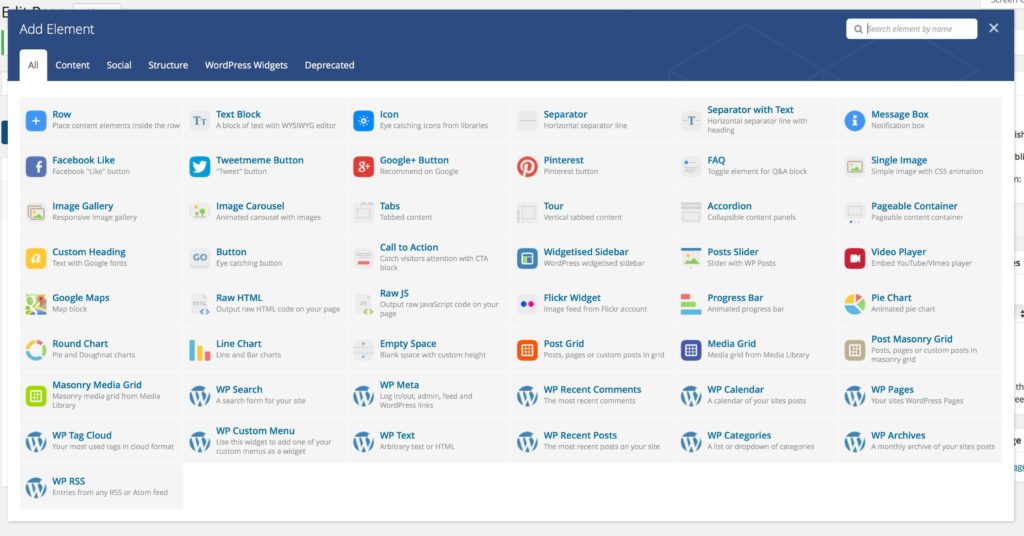

Hoo-boy, that’s a lot of things to click! Not only is that a lot of things to click, but it may be more than you (or your clients) may need or want. If you don’t need to use all of these VC elements, then not only will there be confusion on the user’s part but you may also be loading unnecessary scripts attached to some of these elements. This brings us to…
Visual Composer: Customizing The Default Elements
The situation above is what we here at WebDevStudios ran into when we first began experimenting with Visual Composer. There were so many options and we knew that our clients would not need to use–like a pie chart or a WordPress Tag Cloud (barf) in any of the dynamic pages we were building.
So, with the guidance of Rami Abraham, Ben Lobaugh, and Brad Parbs, we crafted a plugin which would slim down the VC interface from the above screenshot to this:
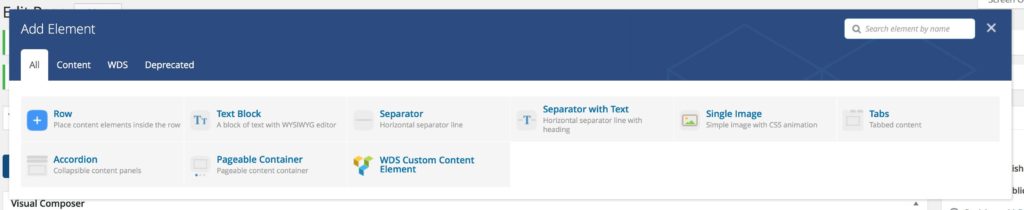

Ahh… a sigh of relief.
The core of what we did was eliminating a large number of those default VC elements in favor of the basics–rows, text blocks, images, and a few other handy tools.
The reasoning behind this was simple: Our clients will require highly customized elements and we want to be able to present those elements in the most convenient way possible. So, rather than wrestling with default VC elements to mold them into what we need them to be, we decided to start from scratch and build out our own Visual Composer elements tailor-fit to our client’s needs.
In doing this, not only did we simplify the interface, but we also cut down on overhead as we’re not calling and loading any additional scripts required for these elements to be used. But how did we do it?
First, we need to create a base plugin to house all of our tweaks. Using generator-plugin-wp, we can create a plugin pretty quickly to get started.
Take a look at this snippet and we’ll walk through it:
[snippet slug=visual-composer-plugin lang=php]
What we need to pay attention to is what is happening on lines 100, 137, and 214. This is the process that will need to be completed when adding any custom element using this plugin.
The lines noted above correspond specifically to the removal of default VC elements and pull the logic directly from a secondary file within our /includes/ directory. Let’s pay close attention to line 32 and the accompanying function being called on line 137:
[snippet slug=visual-composer-plugin-tweaks lang=php]
First, we’ve created a function to grab all of the shortcodes which exist by default in Visual Composer.
Remember the blurb above about no longer needing to fight with shortcodes? This is somewhat true; the average user will no longer need to see shortcodes, but Visual Composer is actually powered by shortcodes. Essentially, the VC elements built in by default and the VC elements we will build are just shortcodes with a fancy UI.
Next, instead of telling Visual Composer which elements we want to remove, we’re telling it which elements we want to keep. We provide our desired keeper elements in an array, then loop through and remove anything not in our list.
We found that there can sometimes be a few stragglers when doing this, which is why you see the additional $to_remove variable and the second vc_remove_element() function being called later on.
Pro-Tip: If you don’t know the shortcode name for an element you want removed, you don’t need to search through the code to find it. Simply add the element to your page, then switch from Backend Editor to Classic Mode!

Visual Composer: Creating a Custom Element
Here’s where the real fun comes in, and you can start creating your own custom Visual Composer elements.
Before you begin building your own elements, make sure that you think through everything that needs to happen within your element. Also, keep in mind that while the point of VC as a whole is to give the user total control over their content, you don’t necessarily need to provide options for every single thing in the element. Chances are the user will not need to change the colors or sizes of every font in in the element, so don’t muddy up the screen by adding those options unless explicitly requested.
For our purposes, we’ll be creating a simple VC element which allows for an image, title, content, and a button. Take a look at the code below:
[snippet slug=visual-composer-plugin-custom-element lang=php]
On line 30, we are hooking into vc_before_init to register our element. Let’s scoot on down to line 43 and see what’s happening there.
[snippet slug=visual-composer-plugin-custom-element-fields lang=php]
This is the basic setup for creating a custom element. There are a list of available field types in VC’s online documentation.
Once you’ve added one field type, you can basically add any field type. The structure doesn’t change and all you’ve got to do is remember to include all of the necessary details (like name, type, heading, and an optional description).
One thing to note is the textarea_html field type. There can only be one of these items within a single element and its contents are passed into our output as the $content variable rather than a field within the $data array. You’ll see this in use once we get to building our output a bit later on.
Just below the field registration is the element registration:
[snippet slug=visual-composer-plugin-custom-element-settings lang=php]
Here we are able to set the name of the element itself as well as useful information such as a Category. This allows us to lump our custom elements into our own custom tabs like so:
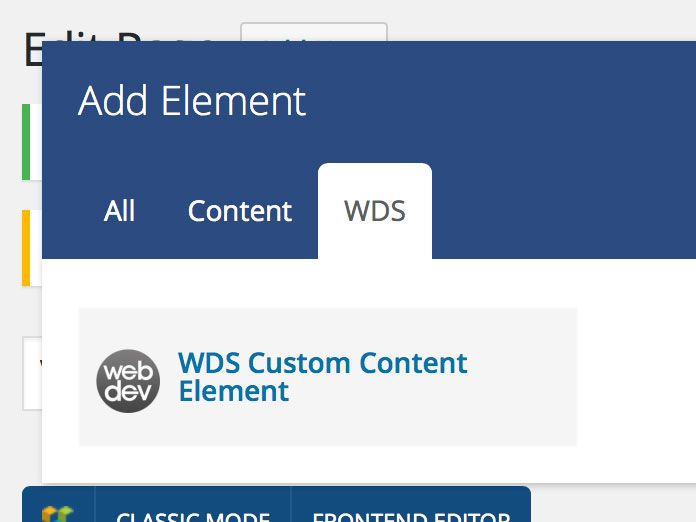

Neat! Adding a category for your element is not required, though we like to do it so we can have all of our custom fields living together under a single tab. You don’t need to register the Category anywhere else; you only have to set it when you’re registering your element.
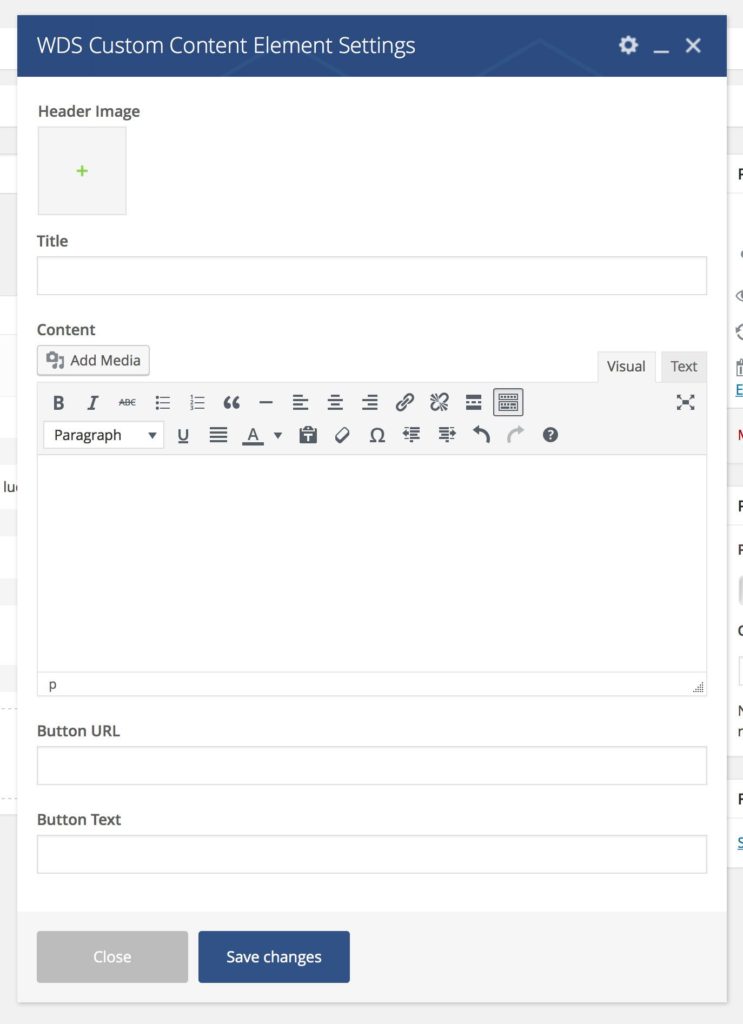
Adding the element to your page will give you this slick little set of fields:
Further down on line 91 is where we’ll see the output for this element:
[snippet slug=visual-composer-plugin-custom-element-output lang=php]
Here, we can set default values within our wp_parse_args array if we wish. They will be overwritten by any value saved to a field when editing on the backend. There is some basic HTML in here as well to build a simple output for our element, which you can see here:
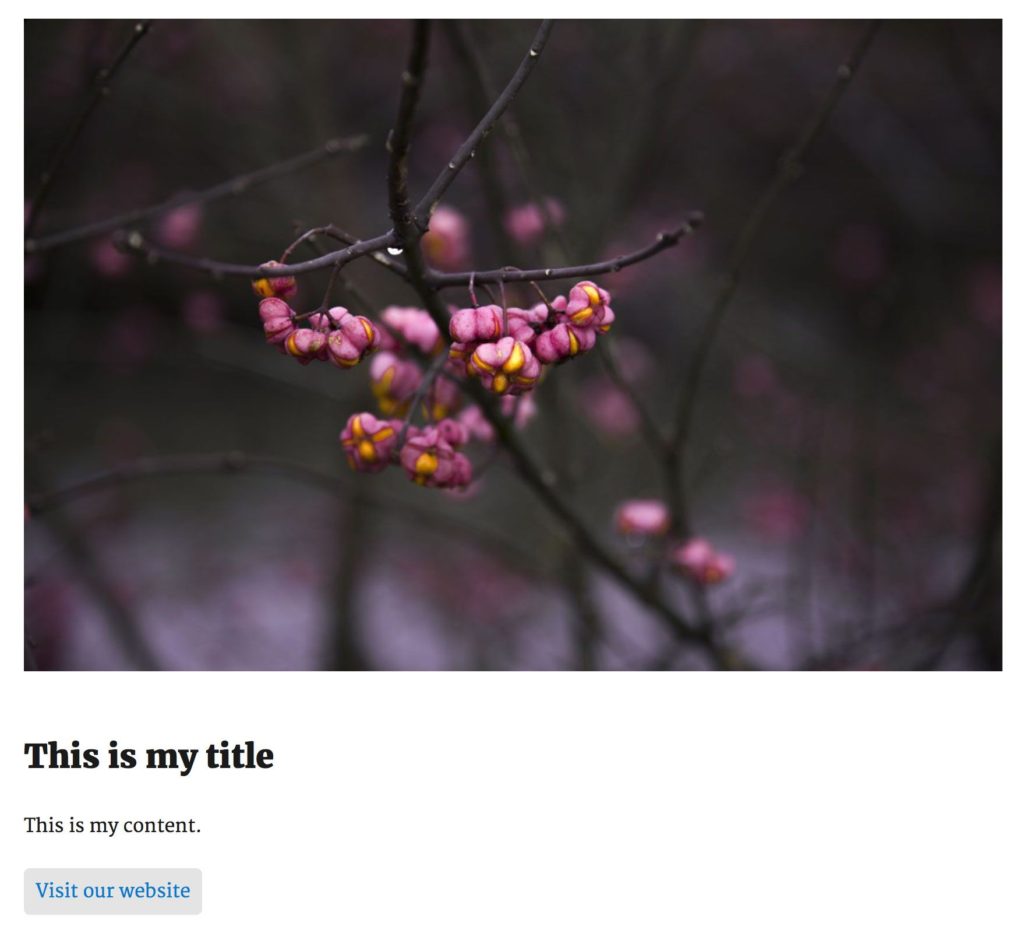

And that’s it!
I know, I know. It’s a lot to take in at once. I have the fortune of working with an amazing team of back-end and front-end developers who have all worked together to fine-tune our Visual Composer process. Will it be the process we use forever? Maybe not. Any process can always be improved upon, and as VC itself grows and expands so must the code we write to work with and customize it.
Have you worked with Visual Composer or other page building options in WordPress? Leave your notes in the comments and let us know what you’ve used and your experience with each plugin.