
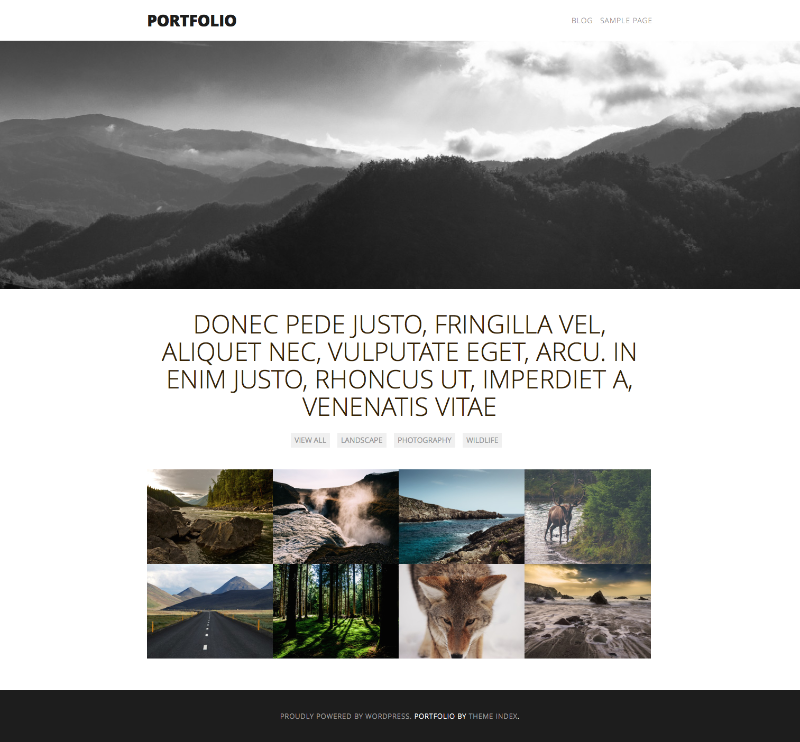
Have you ever wanted to add a filterable portfolio to your personal site to showcase your content? In this post, we’re going to include simple scripts for you to add to your existing theme to help make it easy to add a filterable portfolio to your project.
Tools you’ll need:
- WordPress, installed and ready to go
- Jetpack by WordPress.com plugin installed and activated
- Isotope for filtering
Notes on Isotope:
The great thing about Isotope is that it is GPL licensed for Open Source projects. However, if your site is a commercial project, I would highly recommend purchasing a commercial license. This will help the developer to continue to support Isotope.
Step 1:
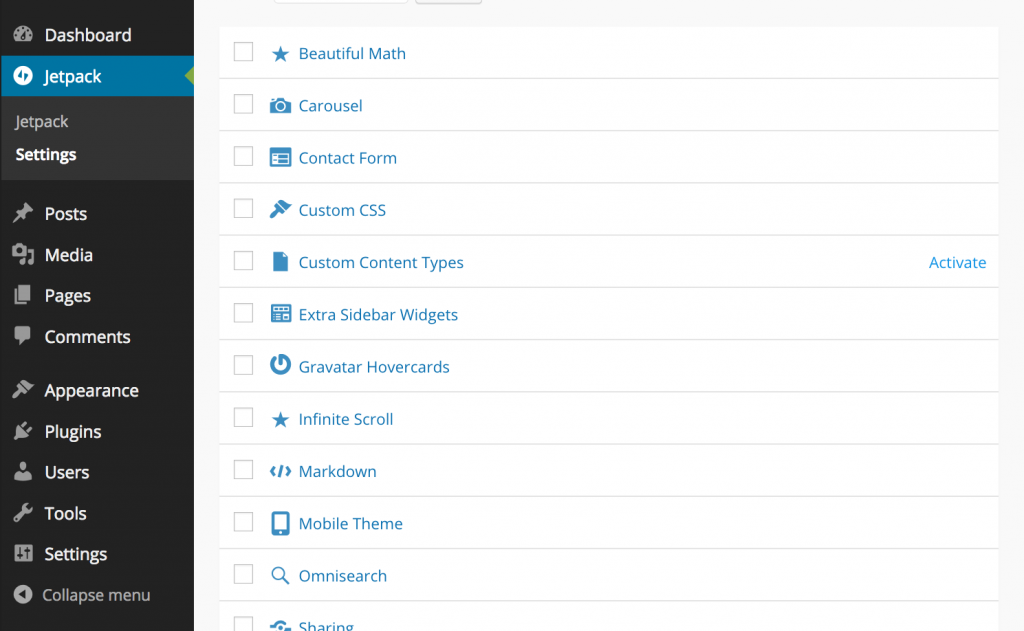
The first thing we need to do is setup Jetpack and enable the ‘Portfolio Custom Content Type’. To do this, while in your WordPress dashboard, go to Jetpack > Settings and activate the ‘Custom Content Type’ module.

Next, we need to make sure your theme supports the Portfolio Custom Content Type. To do this, we need to add the following code to your theme, during after_setup_theme:
add_theme_support( 'jetpack-portfolio' );
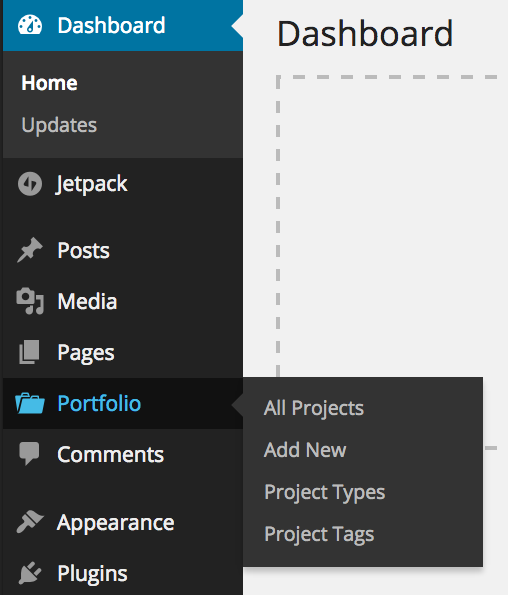
Once that is added, you’ll see that a new menu item has been added to your WordPress dashboard:

Step 2:
We’ll need to properly enqueue all needed files for your theme. You can add this to wherever your theme is already enqueuing files.
wp_register_script( 'wds-isotope', get_template_directory_uri() . '/js/isotope.pkgd.min.js', array( 'jquery' ), $version, true );
wp_register_script( 'wds-portfolio', get_template_directory_uri() . '/js/wds-portfolio.js', array( 'jquery' ), $version, true );

if ( is_page_template( 'homepage-template.php' ) ) {
    wp_enqueue_script( 'wds-isotope' );
    wp_enqueue_script( 'wds-portfolio' );
}
Notice that we are using a conditional to only enqueue our scripts on any page using our ‘homepage-template.php’ page template. This is so that we are not enqueuing our JS files site wide. Now that they have been enqueued, download Isotope and add it to your theme’s JavaScript folder. Make sure this folder is named ‘js’. If not, you’ll need to update the above script and change the location of where it is being enqueued. Once you have added the Isotope file to your JS folder, create a new file and name it ‘wds-portfolio.js’. Add the following jQuery code and save the file into your ‘js’ folder.
/**
 * Portfolio functions
 */
( function( $ ) {
     $( window ).load( function() {

        // Portfolio filtering
        var $container = $( '.portfolio' );

        $container.isotope( {
            filter: '*',
            layoutMode: 'fitRows',
            resizable: true,
          } );

        // filter items when filter link is clicked
        $( '.portfolio-filter li' ).click( function(){
            var selector = $( this ).attr( 'data-filter' );
                $container.isotope( {
                    filter: selector,
                } );
          return false;
        } );
    } );
} )( jQuery );
Step 3:
Now that we have enqueued your files, let’s create a page template that is specific for your portfolio, and one to show everything on the homepage.
Create a new file and name it ‘homepage-template.php’. Copy and paste the following code:
<?php
/*
* Template Name: Homepage Template
*
* @package wds_portfolio
*/
get_header();
?>
<div id="page" class="hfeed site">
<div id="main" class="site-main">
<?php if ( ! get_theme_mod( 'wds_portfolio_hide_portfolio_page_content' ) ) : ?>
<?php while ( have_posts() ) : the_post(); ?>
<?php the_title( '<header class="page-header"><h1 class="page-title">', '</h1></header>' ); ?>
<div class="page-content">
<?php
the_content();
wp_link_pages( array(
'before' => '<div class="page-links"><span class="page-links-title">' . __( 'Pages:', 'wds_portfolio' ) . '</span>',
'after' => '</div>',
'link_before' => '<span>',
'link_after' => '</span>',
) );
?>
</div><!-- .page-content -->
<?php endwhile; // end of the loop. ?>
<?php endif; ?>
<div class="portfolio-filter">
<ul>
<li id="filter--all" class="filter active" data-filter="*"><?php _e( 'View All', 'wds_portfolio' ) ?></li>
<?php
// list terms in a given taxonomy
$taxonomy = 'jetpack-portfolio-type';
$tax_terms = get_terms( $taxonomy );
foreach ( $tax_terms as $tax_term ) {
echo '<li class="filter" data-filter=".'. $tax_term->slug.'">' . $tax_term->slug .'</li>';
}
?>
</ul>
</div>
<div class="portfolio">
<?php
if ( get_query_var( 'paged' ) ) :
$paged = get_query_var( 'paged' );
elseif ( get_query_var( 'page' ) ) :
$paged = get_query_var( 'page' );
else :
$paged = -1;
endif;
$posts_per_page = get_option( 'jetpack_portfolio_posts_per_page', '-1' );
$args = array(
'post_type' => 'jetpack-portfolio',
'paged' => $paged,
'posts_per_page' => $posts_per_page,
);
$project_query = new WP_Query ( $args );
if ( post_type_exists( 'jetpack-portfolio' ) && $project_query -> have_posts() ) :
while ( $project_query -> have_posts() ) : $project_query -> the_post();
get_template_part( 'content', 'portfolio' );
endwhile;
wds_portfolio_paging_nav( $project_query->max_num_pages );
wp_reset_postdata();
else :
?>
<section class="no-results not-found">
<header class="page-header">
<h1 class="page-title"><?php _e( 'No Project Found', 'wds_portfolio' ); ?></h1>
</header><!-- .page-header -->
<div class="page-content">
<?php if ( current_user_can( 'publish_posts' ) ) : ?>
<p><?php printf( __( 'Ready to publish your first project? <a href="%1$s">Get started here</a>.', 'wds_portfolio' ), esc_url( admin_url( 'post-new.php?post_type=jetpack-portfolio' ) ) ); ?></p>
<?php else : ?>
<p><?php _e( 'It seems we can’t find what you’re looking for. Perhaps searching can help.', 'wds_portfolio' ); ?></p>
<?php endif; ?>
</div><!-- .page-content -->
</section><!-- .no-results -->
<?php endif; ?>
</div><!-- .portfolio -->
<?php get_footer(); ?>
Next, we’ll need to create a ‘content-portfolio.php’ template file so we know what portfolio item to grab. Create a new file and name it ‘content-portfolio.php’. Here is our code for the content file:
Edit: See Stefan’s comment for necessary change for line 19.
<?php
/**
 * The template for displaying Projects on index view
 *
 * @package wds-portfolio
 */

// get Jetpack Portfolio taxonomy terms for portfolio filtering
$terms = get_the_terms( $post->ID, 'jetpack-portfolio-type' );

if ( $terms && ! is_wp_error( $terms ) ) :

    $filtering_links = array();

    foreach ( $terms as $term ) {
        $filtering_links[] = $term->slug;
    }

    $filtering = join( ", ", $filtering_links );
?>

<article id="post-<?php the_ID(); ?>" <?php post_class( $filtering ); ?>>
    <a href="<?php the_permalink(); ?>" rel="bookmark" class="image-link" tabindex="-1">
        <?php  if ( '' != get_the_post_thumbnail() ) : ?>
                <?php the_post_thumbnail( 'wds-portfolio-img' ); ?>
        <?php endif; ?>
    </a>
</article><!-- #post-## -->

<?php
endif;
What this code does is include the page content of whatever the page you create that uses this page template. We are also grabbing all content that is published with the Portfolio Custom Content Type.
The following sections are necessary for filtering our portfolio items.
<div class="portfolio-filter">
    <ul>
        <li id="filter--all" class="filter active" data-filter="*"><?php _e( 'View All', 'wds_portfolio' ) ?></li>
        <?php
            // list terms in a given taxonomy
            $taxonomy = 'jetpack-portfolio-type';
            $tax_terms = get_terms( $taxonomy );

            foreach ( $tax_terms as $tax_term ) {
            echo '<li class="filter" data-filter=".'. $tax_term->slug.'">' . $tax_term->slug .'</li>';
            }
        ?>
    </ul>
</div>
The above code block grabs all taxonomy terms from the Portfolio Custom Content Type in a list. This will allow us to filter our portfolio items.
The next block of code will display our portfolio posts:
<div class="portfolio">
<?php
if ( get_query_var( 'paged' ) ) :
$paged = get_query_var( 'paged' );
elseif ( get_query_var( 'page' ) ) :
$paged = get_query_var( 'page' );
else :
$paged = 1;
endif;
$posts_per_page = get_option( 'jetpack_portfolio_posts_per_page', '-1' );
$args = array(
'post_type' => 'jetpack-portfolio',
'paged' => $paged,
'posts_per_page' => $posts_per_page,
);
$project_query = new WP_Query ( $args );
if ( post_type_exists( 'jetpack-portfolio' ) && $project_query -> have_posts() ) :
while ( $project_query -> have_posts() ) : $project_query -> the_post();
get_template_part( 'content', 'portfolio' );
endwhile;
wds_portfolio_paging_nav( $project_query->max_num_pages );
wp_reset_postdata();
else :
?>
<section class="no-results not-found">
<header class="page-header">
<h1 class="page-title"><?php _e( 'No Project Found', 'wds_portfolio' ); ?></h1>
</header><!-- .page-header -->
<div class="page-content">
<?php if ( current_user_can( 'publish_posts' ) ) : ?>
<p><?php printf( __( 'Ready to publish your first project? <a href="%1$s">Get started here</a>.', 'wds_portfolio' ), esc_url( admin_url( 'post-new.php?post_type=jetpack-portfolio' ) ) ); ?></p>
<?php else : ?>
<p><?php _e( 'It seems we can’t find what you’re looking for. Perhaps searching can help.', 'wds_portfolio' ); ?></p>
<?php endif; ?>
</div><!-- .page-content -->
</section><!-- .no-results -->
<?php endif; ?>
</div><!-- .portfolio -->
The key to the above block are the class names. The ‘portfolio’ class is being called in our wds-portfolio.js file. This tells our jQuery that all posts under this class are to be filtered.
The above code block also includes a specific query that grabs all posts from our ‘Portfolio Custom Content Type’.
Step 4:
Now it’s time to add some styling. The following styling will cover the filter list items and your portfolio items. Feel free to adjust it to match the look of your website.
.portfolio-filter {
  font-size: 14px;
  font-size: 1.4rem;
  overflow: hidden;
  text-transform: uppercase;
}

.portfolio-filter ul {
  margin: 0 0 2em;
  padding: 0;
  text-align: center;
  width: 100%;
}

.portfolio-filter ul li {
  background: #f0f0f0;
  color: #999;
  cursor: pointer;
  display: inline-block;
  list-style-type: none;
  margin: 0 1em 1em 0;
  padding: .2em .5em;
  text-align: center;
}

.portfolio-filter ul li:first-child {
  margin-right: .8em;
}

.portfolio-filter ul li:focus, .portfolio-filter ul li:hover {
  color: #000;
}

.portfolio .type-jetpack-portfolio {
  float: left;
  margin: 0 -1px -1px 0;
  width: 100%;
}

@media screen and (min-width: 480px) {
  .portfolio .type-jetpack-portfolio {
    max-width: 100%;
    min-height: inherit;
  }
}

@media screen and (min-width: 768px) {
  .portfolio .type-jetpack-portfolio {
    max-width: 239px;
    max-height: 180px;
  }
}

.portfolio .type-jetpack-portfolio img {
  display: block;
}

.portfolio .type-jetpack-portfolio:hover {
  background: #000;
  opacity: .6;
  transition: all .4s ease-in-out;
  -webkit-transition: all .4s ease-in-out;
  -moz-transition: all .4s ease-in-out;
  -o-transition: all .4s ease-in-out;
}
Step 5:
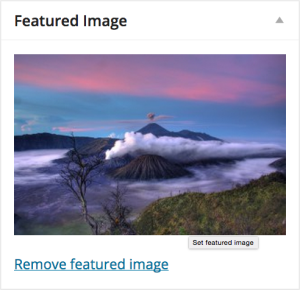
Now that all code and files are added to our theme, let’s go back into our WordPress dashboard to start publishing items in our Portfolio Custom Content Type. When publishing a new portfolio, be sure to add ‘Project Types’ to your posts. This will categorize your posts and your page will show the project types as fitlerable items–which will help in filtering your portfolio.

Added Bonus!
If you are running into any issues, we have included a free theme that you can download. You can compare your code with the files with this theme. This will help you debug any possible issues.

Like our free theme?
It’s on GitHub! Pull requests are welcome to help improve our theme.
Further Theme Development Resources
WordPress Theme Development Standards
All WebDevStudios’ posts on Theme Development and Designing