WordPress filters are used to modify data before being rendered to the browser or saved to the database, and WordPress plugins typically provide filters to modify plugin behavior. Gravity forms is an extremely powerful form plugin that has many filters available. These filters can be used for validating form data, creating custom redirects, and even tying form data to other WordPress tables. The filter you hook into for validating submitted form data is the gform_validation filter.
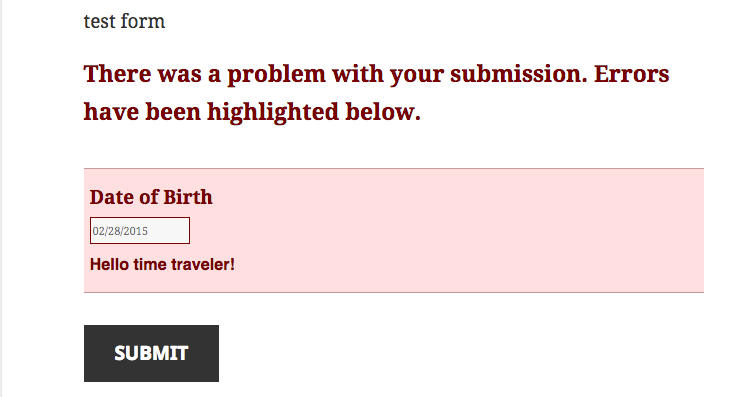
An example of how to use a Gravity Forms filter is validating a birthdate against a minimum age requirement. To do this, you first need to loop through the $validation_result to get the form details before diving into the $_POST data.
add_filter( 'gform_validation', 'wds_validate_birthdate' );

function wds_validate_birthdate( $validation_result ) {
    $form = $validation_result['form'];

    $minimum_age = 18;

    // loop through form fields
    foreach( $form['fields'] as &$field ) {

        // do we have a date field with “birth” in the label
        if(
            stristr( $field['label'], 'birth' )
            && ( 'date' == $field['type'] )
        ) {
            // check to make sure $_POST data is available for the field
            if( isset( $_POST['input_' . $field['id']] ) ) {

                // if this is an array, we’re using dropdowns for the date
                if( is_array( $_POST['input_'.$field['id']] ) ) {
                    $birthArr = $_POST['input_'.$field['id']];

                    // did they fill in the birthdate?
                    if( '' == $birthArr[0] ) {
                        $validation_result['is_valid'] = false;
                        $field['failed_validation'] = true;
                        $field['validation_message'] = 'Your birthdate is required!';
                    }

                    // Format date - month/day/year
                    $birthdate = $birthArr[0] . '/'. $birthArr[1] . '/' . $birthArr[2];
                } else {
                    $birthdate = $_POST['input_'.$field['id']];

                    // Fail validation when datepicker field is null
                    if( '' == $birthdate ) {
                        $validation_result['is_valid'] = false;
                        $field['failed_validation'] = true;
                        $field['validation_message'] = 'Your birthdate is required!';
                    }
                }

                // Were they born in the future?
                if(
                    empty( $field['validation_message'] )
                    && strtotime( $birthdate ) > strtotime( 'now' )
                ) {
                    $validation_result['is_valid'] = false;
                    $field['failed_validation'] = true;
                    $field['validation_message'] = 'Hello time traveler!';
                }

                //  Check against the minimum age requirement
                if(
                    empty( $field['validation_message'] )
                    && ! wds_check_minimum_age( $birthdate, $minimum_age )
                ) {
                    $validation_result['is_valid'] = false;
                    $field['failed_validation'] = true;
                    $field['validation_message'] = "You must be {$minimum_age} years or older!";
                }

            }
        }
    }

    $validation_result['form'] = $form;
    return $validation_result;
}

function wds_check_minimum_age( $birthdate, $minimum_age = 18 ) {
    $age = DateTime::createFromFormat( 'm/d/Y', $birthdate )->diff( new DateTime( 'now' ) )->y;

    if ( $age >= $minimum_age ) {
        return true;
    } else {
        return false;
    }
}
In the above example, we looped through the form fields and check to see if the field’s label contains ‘birth’ and has a type of date. Once we found the correct label and type, we searched for the submitted value in $_POST using the field’s ID. Once we had the submitted value, we had to determine which type was submitted so we could put it in the correct format before making sure the date wasn’t before today’s date and validating the date against the minimum age requirement.

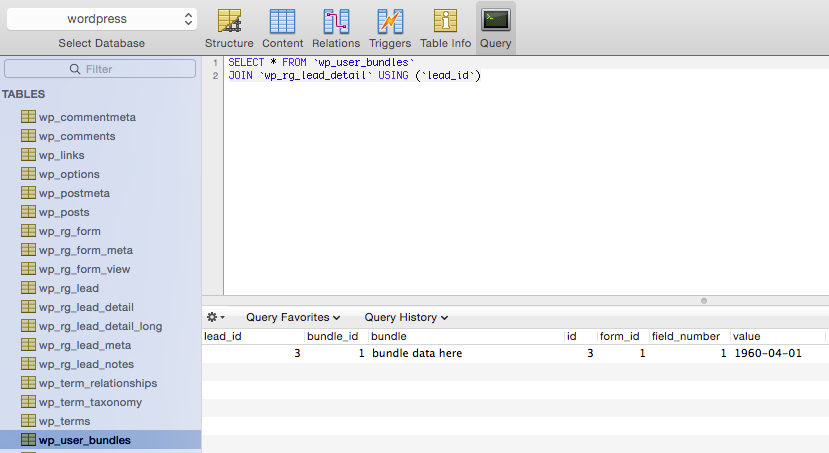
Another example of using a Gravity Forms filter: Let’s say your user creating a bundle of articles, and you want to save the lead ID from the form to a separate table. The reason you might want to do this could be that your client wants you to run a report that shows what was submitted via form, and what was created when saving the user’s bundle to a separate table. For this, you would use the gform_confirmation filter.
// GF confirmation
add_filter( 'gform_confirmation', 'wds_custom_gform_confirmation', 10, 4 );

function wds_custom_gform_confirmation( $confirmation, $form, $lead, $ajax ) {
    global $post, $wpdb;

    if( isset( $_GET['bundle_id'] ) ) {

        // update the bundle data with the lead id
        $query = $wpdb->prepare(
            "
            UPDATE {$wpdb->prefix}user_bundles
            SET lead_id = %d
            WHERE bundle_id = %d
            ", $lead['id'], $_GET['bundle_id'] );

        // Do the query and check for errors
        if ( false === $wpdb->query( $query ) ) {
            if( $wp_error ) {
                return new WP_Error( 'db_query_error',
                    __( 'Could not execute query' ), $wpdb->last_error );
            }
        }

        // Redirect to confirmation page
        wp_redirect( '/bundle-confirmation-page/?bundle_id=' . $_GET['bundle_id']);

    }

    return $confirmation;
}
In the above example, we are hooking into the filter that runs after the form has already submitted successfully. We first check to make sure the page has a bundle_id query parameter, then update the database table to also include the lead id from the “rg_lead_detail” table, and lastly we did a custom redirect to a confirmation page. Querying the data is as simple as joining two tables and looping through the results to index by either bundle_id or lead_id.

Gravity forms is a valuable asset to any WordPress site and has a lot of awesome hooks to make life easier. These filters can be used to manipulate how a form is displayed, register additional scripts, modify field error messages, pass data to third-party applications, and many other things.
How do you use Gravity forms?
Hey, thanks for this articles, it has been troublesome to find good resources or samplez about the gform filters. However I would like to know if u guys can point me to an article or turorial where the gform-validation filter is used to acomplish a custom redirect in the case of validation failure. I bet is not that hard to code, but as a php newbee its has been really painful