Getting started on a new project is always exciting, but it often includes a lot of repetitive work, such as setting up the basics of your code that you need for any plugin, or downloading a boilerplate and filling in your project’s details.
Yeoman is a Node.js based project scaffolding tool for web development. Using generators availiable on npm, you can quickly get started with a wide variety of project types, including WordPress plugins and themes, Backbone.js apps, and even your own Yeoman generators (generator-generator).
By answering a few simple questions you can have your project up, running, and integrated with other tools like Grunt and Bower.
Installing Yeoman and Generators
To get started, install yo, the Yeoman command line client using npm. If you don’t have Node.js (which includes npm) installed, what are you waiting for!
npm install -g yo
Once this is installed, you can’t really do anything until you install a generator, I’m going to show you our plugin generator, so let’s install that:
npm install -g generator-plugin-wp
In both of these commands the -g stands for global, meaning that rather than installing the package locally in the node_modules folder as is the npm default, it installs the package in your PATH so you can run it globally from the command line.
My First Plugin
Now that we’ve got everything we need installed, let’s give the generator a try! First open a terminal and cd into the plugins folder of the WordPress site you want to create the plugin for. Then run:
yo plugin-wp
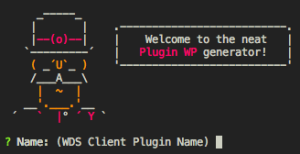
This dapper dude will say hi, and then ask you a few questions about your new plugin, such as the plugin name, website, description, version, author info, and more. The last question it asks is about what autoloader you would like to use, if you are familiar with Composer go ahead and select that, but otherwise stick with Basic for now. Autoloaders are a PHP system for letting PHP know where to find specific classes so that instead of having to manually include files, PHP can automatically include files based on what classes are used. Composer integrates this with it’s package management system for even greater convenience, and the basic autoloader is a very simple custom system based on the plugin generator’s file and class naming conventions.
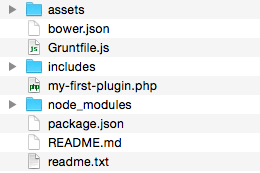
Once you finish answering all the questions Yeoman will go to town, first creating your files, then installing dependencies from npm. After the command line task finishes running go ahead and open up the new folder that was created, where you will see something like:
We’ve got a simple main plugin.php file, empty assets and includes folders, a basic Gruntfile, a couple readmes, and a couple .json config files (along with npm’s node_modules folder).

Let’s take a quick look at the main plugin PHP file (you can also check out the template version here). At the top, we’ve got the theme details for WordPress in the big comment block all filled in with your prompt answers. Below that, we’ve got the autoloader you chose in the prompts, then the main plugin class starts.
The main plugin class is a singleton with several convenience functions and boilerplate functions for you to fill in. The plugin_classes function is meant for adding your plugin’s sub-classes from include files and includes an example of the suggested way of attaching it. The hooks function includes setting up activation and deactivation hooks, runs the init class function on the init action, and is ready for any other actions and filters you need to hook into. The init function checks to make sure the plugin’s requirements are met and if not outputs an error message to the dashboard and deactivates the plugin, it also establishes the plugin’s text domain.
At the bottom of the main plugin file, we have a basic template tag for getting accessing the plugin singleton.
Adding More – Sub-Generators
At this point, you can go to town with your new plugin and fill it out however you want, but there are also a few extra things you can do with the new plugin you just generated. Yeoman has an additional feature called sub-generators which are sort of additional mini generators. generator-plugin-wp has three sub-generators: include, js, and CSS (and we’re working on more!).

The include sub-generator is used for creating additional PHP includes, integrating with the themes existing settings. To run it open up the root directory of your plugin in terminal and run yo plugin-wp:include file-name where file-name is the name of the new include file. This will create a new file in the includes folder with a simple class skeleton for you to build out! If you included an autoloader in your original plugin choices it will automatically include the new class when that class is used.
The js sub-generator is for setting up your plugin’s javascript. Just like the include sub-generator, in your plugin’s root directory run yo plugin-wp:js it will ask you how you would like your Javascript configured: Browserify, concat, or basic (only uglify). Once you answer the question it will create a quick starting point for your plugin’s javascript and add tasks to your Gruntfile.
The CSS sub-generator is very similar to the javascript generator, it creates a starting point for your plugin’s CSS and adds the proper tasks for your Gruntfile. Just like before the command is yo plugin-wp:css and the sub-generator will prompt you for if you want to use SASS.
Now you’ve got a plugin with an easy system for adding more files and features, super simple!
More Info
- generator-plugin-wp Github Repo – Let us know if you have any issues!
- Yeoman homepage – Learn more about how Yeoman works
- More Yeoman generators – Find more awesome generators
- generator-generator – Generate your own generators!


This is pretty sweet. I’ve always been partial to Gulp instead of Grunt and am so embedded in that I wouldn’t want to switch right now but I really like this generator and have been looking at Yeoman recently for help with theme and plugin setups.
Anyways… cool. thanks. cheers.