Editor’s Note: The following is Part 1 in a two-part series titled, “Headless WordPress with React and NextJS.” You can read Part 2 here. Keep in mind that this article was published in 2019. Code samples are now outdated. If you’re interested in current Next.js related content, please click here for updated content. For current content on Headless CMS and Headless WordPress, click here. Visit the WebDevStudios GitHub to access our Next.js WordPress Starter.
A little disclaimer: I refer to some of the things below as “easy.” To clarify, none of this is “easy,” but relative to the alternatives they could be considered “easier.”
The future of web development is JavaScript. It’s only natural when you consider the advancements in technology, device speed, and general user desire for more of an all-around, app-like experience. Libraries like Vue.js and React, among others, are leading the charge. You might be thinking that this sounds great. Why aren’t we all doing this? Let’s make the internet better, faster… we have the technology.

Limitations
There are, as is the case with any new technology, limitations. Using JavaScript to build an app for something like a Google Chrome extension or an iPhone/Android or Desktop app is fairly simple all things, considered.
- You have an idea.
- You build the thing.
- You use something like Electron or React Native to get your project in the hands of users.
I say “fairly simple” because you don’t have to necessarily worry about things that are required for a website to exist and for Google or Bing to find it, index it, and validate it.
Currently, Google requires a website to render on the server side in order to crawl the site for content, images, etc., which a pure JavaScript application does not do out of the box—although admittedly, Google is making strides to accommodate JavaScript apps. Also required are metadata, descriptions, title, etc., which isn’t available in the framework by default. I’m of the opinion that reactive JavaScript technology never intended to be used to build a website and only ever expected to be used as an application.
The Benefits of Headless
Other limitations are time and money. We don’t always have the ability to completely rebuild a website infrastructure and database(s) from the ground up. In an ideal world, a clean slate would be the way to go, but for the website that’s been around for 10 years and only needs a face lift, you’re going to spend more time trying to clean up the database than it’s probably worth, truth be told.
Enter the “headlessness” of it all. A headless website means just that—unlike a WordPress website handling the content and site rendering, the database and backend are decoupled from the frontend. More simply, your data lives in one place; your website lives in another. This can be a fantastic way to use your existing website data with a brand new shiny JavaScript website on the frontend. Most web platforms have an API that can be used to access your website’s data, from there, it’s a matter of manipulating that data to your whim. WordPress, for example, has its own Rest API baked into the core which makes it easy to display posts and pages without much fuss.
Of course, downsides exist with a headless setup. Let’s talk WordPress: widgets, themes or settings inside the admin for modifying your website are now void. If you want that feature, you have to build your own thing. If you want access to a plugin or menu data and those don’t have an API endpoint already, you need to make one. Those devs on GitHub that came before offer solutions, or plugins, or code snippets to help you along, but you can say goodbye to a simple ready-to-launch website out of the box. This will now take work.
Is It Worth the time?
I would argue yes. It’s ultimately up to you. If you’re not getting a lot of website traffic, or the entirety of your website consists of four pages and five blog posts, then the answer is no. If you’re consistently looking to improve your ever-increasing site traffic, user experience, speed, and interactivity, then yes.
In either case, if you’re thinking about going headless and decoupling your website in favor of a more future-proof, app-like website, then you should work smart, plan everything, and know what you’re getting into. So, let’s get started.
The Setup
We’ll be building a super-simple decoupled headless website using WordPress and React. In building a website, we have a couple of requirements we need to meet before pressing forward.
- Must be server-side rendered so that our website is relevant to Google
- Needs to be able to route pages the same way we would on any other website
- Needs to be efficient and pass Google Lighthouse testing
Anything else I realize up front, like SEO considerations, we will need to build. I’ll touch on that a little bit, but we’ll save that for another blog post.
Given these requirements of the project, I’ve decided to use WordPress as my decoupled backend CMS and React alongside Next.js to handle the frontend app, SSR, performance, and routing. It’ll be a bit of work, but the payoff will be more than worth it.
Let’s Get Started
First things first, you’ll need to set up a WordPress install either online or locally. You can do that fairly quickly using Local by Flywheel. I won’t get into details here, but there are many options for doing this and many hosting providers that allow you spin up a new WordPress website in a matter of minutes, like WP Engine, for example.
For our new app, we’ll make a new folder so that we can get everything running in a different location from our WordPress install. There are repos and frameworks out there that have been pre-built or pre-configured to handle all of this setup for you, but we’re going to walk through the app step-by-step so that we can fully understand what’s going on.
Let’s get started! Create a new folder and install everything we need and then jump into that folder:
$ mkdir nextjs
$ cd nextjs
$ npm init
$ npm install --save next react react-dom axios
After running those commands you should see a package.json, package-lock.json file, and a node_modules folder.
We’ll replace the test script with some simple scripts inside our package.json file to allow us to easily start our project and build our necessary files.
"scripts": {
    "dev": "next -p 8080",
  "build": "next build",
  "start": "next start -p 8080"
},
NOTE: The -p 8080 specifies that we’ll be using port 8080 instead of 3000 to make sure our app is secure.
At this point, we basically have everything we need to get started. In the next few steps, we’re going to set up our folder structure, set up routing, configure our API request to get posts, and finally toward the end, talk about dealing with metadata.
Folder Structure
Anything inside a pages directory will be treated as a page. Anything inside components will be treated as a component (a non-rendered element). So, let’s add both.
Similarly, although we won’t set this up today, the styles folder could be used to add and compile any new CSS, SCSS, Sass, or LESS files on the fly.
Inside pages let’s add an empty file named index.js which we’ll use as our entry point. At this point, let’s test things out and make sure they are working as expected. Inside that file, let’s add one line of code (longhand):
export default () => {
return <h1>Your new server-side rendered React.js app!</h1>
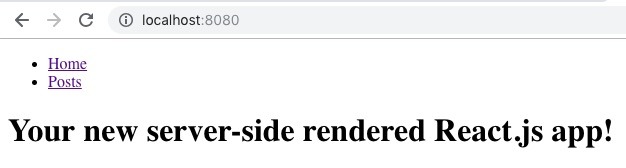
}From there, let’s run the command npm run dev that we added above and visit http://localhost:8080/. If all went well, we should see:

Excellent! Now, let’s move on.
Routing
We’re going to make this pretty simple and just shove everything into a single component for now. Inside our components folder, let’s add a new file and name it Navigation.js. Inside this file we’ll setup our routes. For now, we’ll just provide access to our homepage, our index.js file, and our page of posts that we’ve yet to create. Let’s do that now. Inside pages let’s add a new file called posts.js and add a similar bit of code to separate it from our index.js file.
export default () => {
return}
We’ll change this up later, but for now, we’ll use this to make sure our routes are working once they’re set up.
Here’s the final result for our simple Navigation.js router.
import Link from 'next/link'

export default () => (
    <ul>
        <li><Link href="/"><a href="/">Home</a></Link></li>
        <li><Link href="/posts"><a href="/posts">Posts</a></Link></li>
    </ul>
)
We’ll import Link from next/link which is already baked into Next.js. It operates in much the same way that Link from react-router-dom would. We’ll wrap the <a href> in the Link component as directly adding a string to a Link was deprecated, so we avoid some errors here, although, omitting it would still technically work. This is pretty simple now, but we’ll get a little more complicated later on.
Now that that’s done, let’s go back to our index.js and posts.js files inside the pages directory and make some updates.
import Navigation from '../components/Navigation'
import { Fragment } from 'react'

export default () => (
  <Fragment>
      <Navigation/>
      <h1>Your new server-side rendered React.js app!</h1>
  </Fragment>
)
and
import Navigation from '../components/Navigation'
import { Fragment } from 'react'

export default () => (
  <Fragment>
    <Navigation/>
    <h1>Our Posts Page!</h1>
  </Fragment>
)
I like to use Fragment whenever I can to avoid unnecessary extra markup. The function only needs a wrapping parent element, but a div would work just fine.
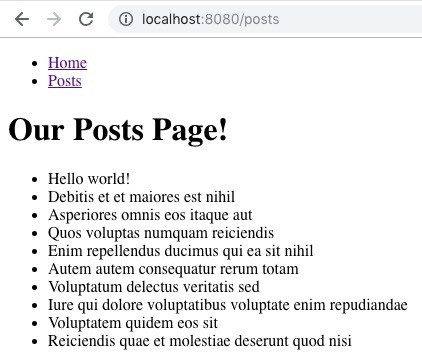
We end up with something like this:
Not pretty, feel free to add some style objects to make that a bit nicer, but for now, it works, so we’ll go with it. If you’re still running your project via npm run dev you’ll find that if you click “Posts” you’ll see your posts page you created earlier:

Our URL is updated and our content is dynamically updated. This is a fairly simple use of routing and all we need to get things working. I’d suggest, however, to avoid having to call your Navigation component on every new page you make, look into the React Router Docs to see how you might be able to extend its functionality.
Let’s Get Our Data
So we’ve set up our simple app, we’re rending both server- and client-side and we’re routing, very simply. Before we can get into building our app further, we need to get our data from our WordPress install we set up at the top.
Now, I’m going to use a package called Axios to make API requests. React docs recommend using fetch, but I’m not a huge fan specifically since there are some compatibility issues and some extra steps involved in those requests. Axios has graceful fallbacks for older browsers and takes the guesswork out of making an API request. It makes things more, for lack of a better term, simple.
We’ll be making our API request inside the posts.js file we created.
First, I’ll import axios and react:
import axios from 'axios'
import React, { Component } from 'react'
If I were building a more complex website, I’d probably think about writing reusable functions for things like this, but for sake of clarity, I’m going to have each route make a request.
Next, I’m going to convert my default function into a class that extents React.component so that we can set our initial props (our API data) and render our component—the stuff we’ve already built.
import Navigation from '../components/Navigation'
import React, { Component, Fragment } from 'react'
import axios from 'axios'

export default class extends Component {

  // Resolve promise and set initial props.
  static async getInitialProps () {

    // Make request for posts.
    const response = await axios.get( 'https://wordpress.test/wp-json/wp/v2/posts')

    // Return response to posts object in props.
    return {
      posts: response.data
    }
  }

  render() {
    return (
      <Fragment>
        <Navigation/>
        <h1>Our Posts Page!</h1>
      </Fragment>
    )
  }
}
I’ve moved my original default function into the render function.
Let’s break down the API request.
// Resolve promise and set initial props.
static async getInitialProps () {

  // Make request for posts.
  const response = await axios.get( 'https://wordpress.test/wp-json/wp/v2/posts')

  // Return response to posts object in props.
  return {
    posts: response.data
  }
}
I need to make sure to make an async request, and resolve the promise we’ll get via axios and then assign that data value to a prop that we can access inside our render function.
We will then access that data inside our render function as this.props.posts. And we’ll use some JSX to output each post title into a list.
render() {
    return (
      <Fragment>
        <Navigation/>
        <h1>Our Posts Page!</h1>
        <ul>
          {
            this.props.posts.map( post => {
              return (
                <li key={ post.id }>{ post.title.rendered }</li>
              )
            })
          }
        </ul>
      </Fragment>
    )
 }
For now, we’ll just output a simple list of rendered titles and end up with something like this:
Fantastic! So let’s take a look at our final posts.js file:
import Navigation from '../components/Navigation'
import React, { Component, Fragment } from 'react'
import axios from 'axios'

export default class extends Component {

  // Resolve promise and set initial props.
  static async getInitialProps() {

    // Make request for posts.
    const response = await axios.get( 'https://wordpress.test/wp-json/wp/v2/posts' )

    // Return response to posts object in props.
    return {
      posts: response.data
    }
  }

  render() {
    return (
      <Fragment>
        <Navigation/>
        <h1>hOur Posts Page!</h1>
        <ul>
          {
            this.props.posts.map( post => {
              return (
                <li key={ post.id }>{ post.title.rendered }</li>
              )
            })
          }
        </ul>
      </Fragment>
    )
  }
}
What’s Next?
From here, we’ve done what we aimed to. Headless application? Check. Server-side rendered? Check. Routing? Check. That said, what we’ve built really doesn’t provide a final product, something like what you would expect to see. You might, for example, expect to be able to click one of those posts and read the content or expect the title in the tab to change based on your route, or for the head description to change, or for any content that exists behind the scenes update as we navigate through our app.
We’ll take a look at that in Part 2.
Just found this and it looks great. Scanning over it I have one question:
What’s happening at the beginning of the “Routing” section? With those empty boxes I mean. Is something missing?
I plan to jump on this over the weekend, excited to see how it all connects. Thanks!
Hi there! Fixed that up for you; looked like a case of the missing semicolon. Good luck!
Just awesome!
Exactly what was looking for! Thanks for a great job, Jo!
Did you wonder about using graphql with this as well? =)
Small type in code – `hOur Posts Page!`. Extra `h` within h1 tag.
Thanks for finding that typo!
Things like GraphQL or Firebase or anything we can do to make our request faster or more dynamic would certainly help speed up the front-end of an app like this. I haven’t thought about it for this demo specifically, but that is certainly something worth writing about.
Hey
Awesome tutorial! Very helpful for me.
I have a question regarding the static method getInitialProps(). I don’t understand where this method is being called?
Hey, Michael!
Jo’s example in the posts.js file define’s for NextJS what the initial properties should be. NextJS is responsible for calling that method on the Component object. You can see one example inside the library here: https://github.com/zeit/next.js/blob/b88addfcd5d3d305664ff95a709b4a4df7e0cbcf/packages/next-server/lib/utils.js#L38), where the getIntialProps method is called on the component.
Hi
just wanted to tell you about my project doing the same thing with Vue.js/Nuxt.js. It’s a complete dockerized dev environment. Maybe you’ve got some feedback?
https://github.com/northosts/wuxt
Got 404 on localhost:8080/posts
How do I debug it?
Ignore my last comment…
I got 404 for putting posts in wrong place…
Hello, thanks for your post. One doubt: why port 8000 would be safer than port 3000?
Hello,
I would like to deliver WordPress Content “embedded” on another website.
The content is an interactive calculator.
iframe isn’t that good looking. Also I would prefer to disable the WordPress Frontend to make the content only visible at the destination URL.
Is headless cms the way to go or am I wrong?
Best Regards
Hello Chris,
Headless CMS is overkill if you have only one calculator or such content to be embedded.
If you want to exclude the header and footer and show just the calculator via iframe, try using a separate page template. [https://stackoverflow.com/a/51504775]
Using this approach, you can control the calculator’s design and embed it anywhere via iframe.
Also, make sure that the style and script tags are loading the resources. You can add the calculator site as a trusted oembed provider using this hook wp_oembed_add_provider.