It’s a classic situation. You’re contributing to a project, filed your pull request, and gotten it approved by your peers. You’re all ready to merge your code and add your humble contribution to the project when, out of nowhere, GitHub gives you this:

How do you go about doing this, especially when you’ve already committed your work and pushed it to the server? How do you retroactively sign your Git commits? We’ll do this in six steps:
- Gather Information
- Install GPG
- Create or use a key
- Set up Git to sign commits using GPG
- Rebase your commits
- Overwrite your branch with your newly signed commits
There’s a lot to unpack, so we’re going to need six steps. Also, these instructions are for macOS; Windows and Linux users may have different commands.
Step 1: Gather Information
I’m self-aware enough to know that I’m the kind of person to just skip straight to the doing, but a quick moment here will save you from having to duplicate effort later. In particular, you can avoid this ‘gotcha’ that has gotten more than one person at the end of this process:
The name and email on your GPG key must match the name and email on the Git commits!
For those of us fortunate enough to be employed as software engineers, it can be all too easy to get our work and personal emails and keys mixed up. If the emails don’t match up, then Git will not verify the commit. So, don’t make my mistake, and check what email you’re using first. In your Git repository, type git log. This will show you the most recent commits in this branch:
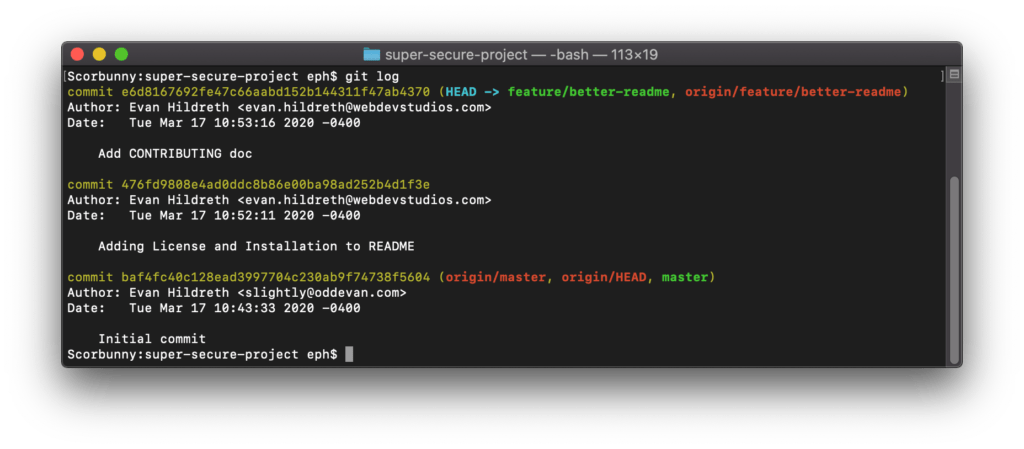
You want to make note of two things here. First, find out how many commits you need to sign. Second, note the name and email address attached to those commits. We’ll want to use the same name and email when setting up our GPG key.
Step 2: Install GPG
If you’re not sure if you’ve installed GPG, run the command which gpg. If you get any result at all, it is installed. If not, it’s easily installed using Homebrew: brew install gpg
If you install GPG using Homebrew, make sure you have added your GPG key to your bash profile as mentioned in the GitHub knowledgebase using this command:
echo 'export GPG_TTY=$(tty)' >> ~/.bash_profile
Step 3: Create a New Key (Or, Use an Existing One)
Detailed instructions for this step can be found in GitHub’s documentation. To go over it in brief:
- Check for existing keys with the command
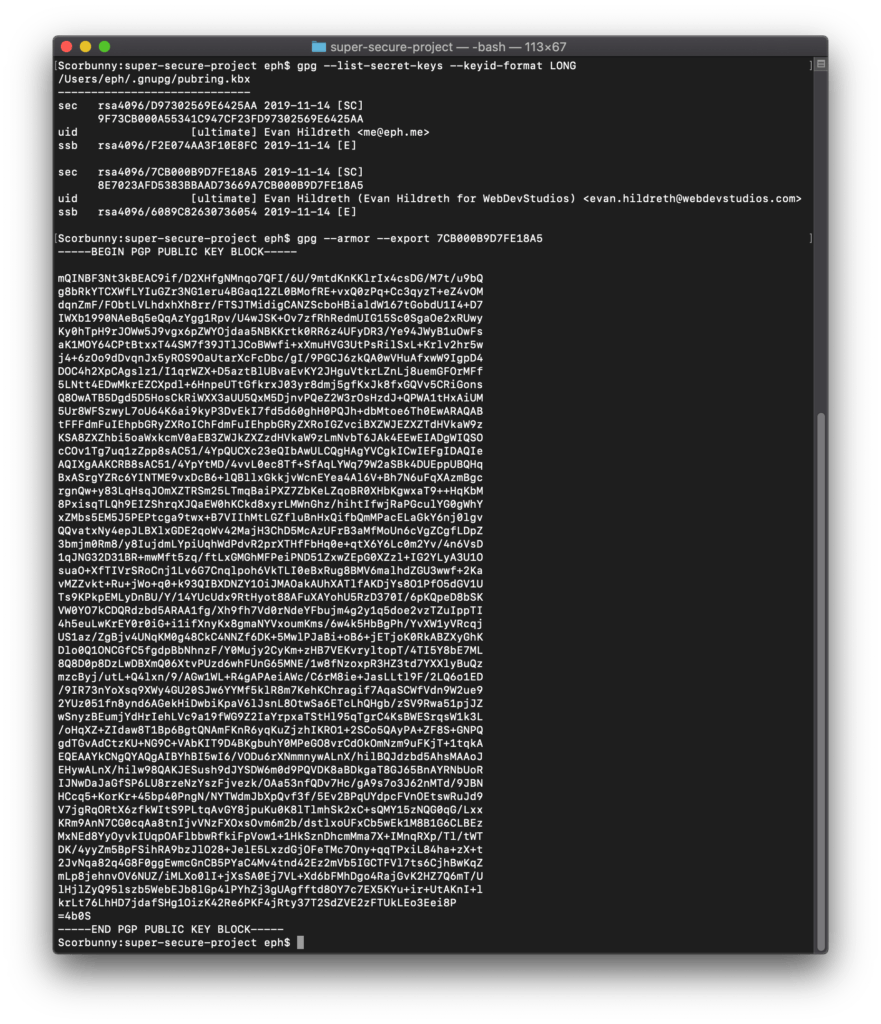
gpg --list-secret-keys --keyid-format LONG - If no keys are listed, create a new GPG key. Remember to use the email address you used for your commits.
- Choose the key that matches your email address and copy the ID. It will be the part listed after the ‘/’ in the list (emphasized in bold font in the example here:
sec rsa4096/7CB000B9D7FE18A5 2019-11-14 [SC] - Paste it into the command below to print the public key to the screen:
gpg --armor --export 7CB000B9D7FE18A5
Step 4: Add the Key to Git and GitHub
You will need to add the public key to your GitHub profile and set up Git on your computer to use your key to sign commits. For GitHub, follow their instructions to copy the key you printed in the last step into your GitHub profile.
For Git on your computer, copy the ID of the key (7CB000B9D7FE18A5 in the example above) and use it in this command: git config user.signingkey 7CB000B9D7FE18A5. Then tell Git to sign commits using this command: git config commit.gpgsign true.
Aside: If you want to sign all commits across all of your repos add the --global flag:
git config --global user.signingkey 7CB000B9D7FE18A5git config --global commit.gpgsign true
Step 5: Rebase
Now that you’ve created a key and set it up in both Git and GitHub, it’s time to rebase your commits. This will essentially undo and redo your commits, but signed with your new key.
First off, let’s run git log again:
In this example, we can see that there are two commits in the feature/better-readme branch (our current branch) that we need to sign. To recreate these commits, use this command:
git rebase -i HEAD~2
This tells Git we want to interactively rebase the last two commits. It will launch the Vim text editor to let us proceed:
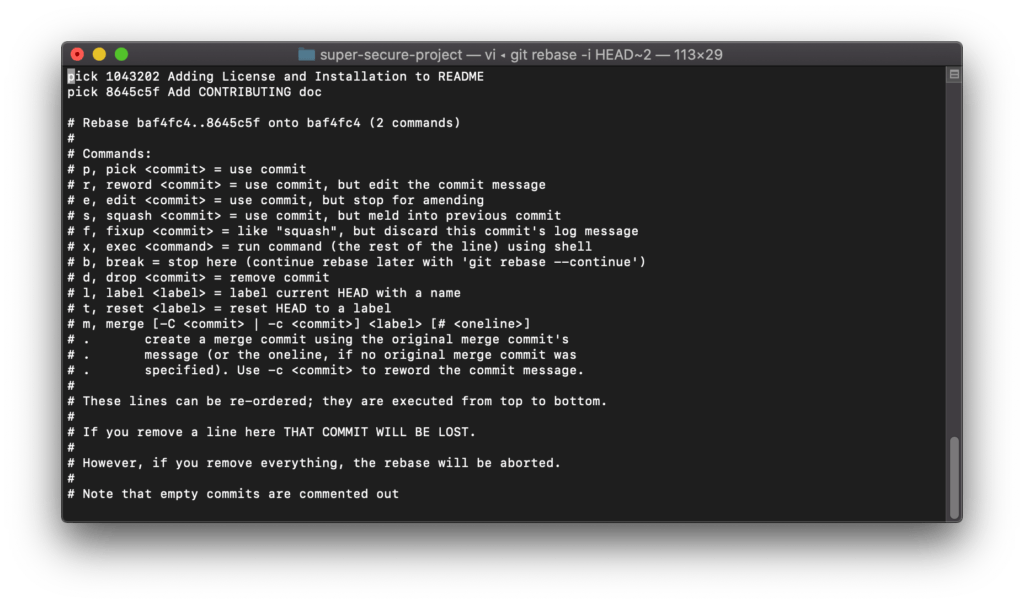
For this rebase, we want to ‘reword’ the commits. Even if we don’t change the commit message at all, it will still force Git to recreate the commit and sign it. If you know your way around Vim, just change ‘pick’ in each line to ‘r’ (for ‘reword’). If you want instructions, here’s one way to do this:
- Type
:%substitute/^pick/reword/and press Enter to replace all instances of the word ‘pick’ to ‘reword.’ - Type
:wqcommand (for ‘write and quit’), then press Enter.
(To explain: : brings up the Vim command prompt. %substitute begins a find-and-replace on every line, with ^pick matching any line that begins with ‘pick.’)
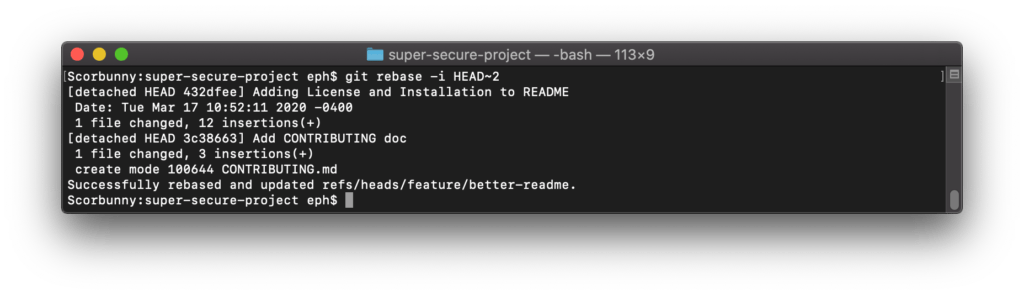
This will kick off your rebase. For each commit, a new Vim editor will open. You can make changes here if you want, but you will likely just want to type :wq and press Enter for each one. When that’s done, Git will show you the results:
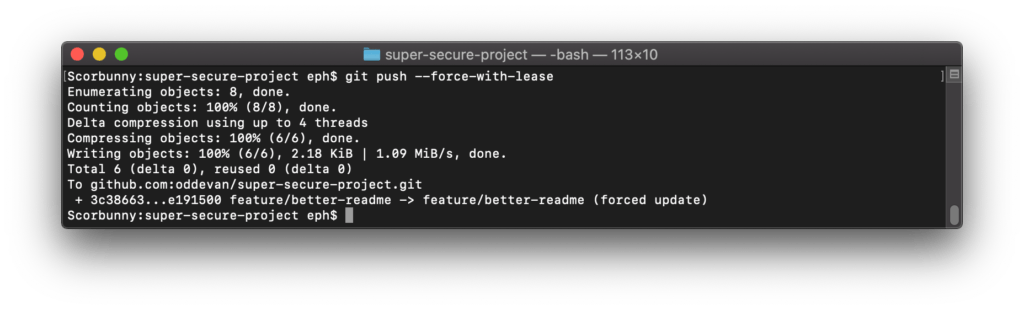
Step 6: Git, Please
The last step is to force these changes up to the server. Since we rewrote commits, we want to replace the commits on GitHub with the ones on our computer. The command (which should be used very judiciously—as in this is the only time I have ever used this command) is git push --force-with-lease.
For more on this particular Git command, our own Sal Ferrarello has an article on the subject. Once you’ve done that, your pull request should look a lot more shiny:

Need more web development tips and tricks? Keep up with our blog and scroll below to sign up for the WebDevStudios email newsletter.
Thank you so much for this! probably one of the most clearly written Git problem solving articles i’ve ever read. 🙂
Thank you! Lifesaver article! Clear and concise. Well done.
Thank your article.
Very concise and clear.
This was a life saver, very easy to follow, thank you!