Remember back in 2009/2010, when @font-face was introduced? Developers rejoiced, because they no longer were they forced to use a (small) handful of fonts!
There were some caveats though…browser support was just okay. To make @font-face work across Chrome, Safari, Firefox, IE, and mobile, you had to enqueue a bunch of different font file types…then do things like, “Bulletproof the @font-face syntax.” All of this introduced a bunch of extra HTTP requests and overhead.
Soon after, Google Fonts and TypeKit came along. Developers once again rejoiced because these services made it super easy to use custom fonts; without all the “@font-face overhead”. Those services are still relevant today, and a GREAT way to serve custom fonts. But…
…what if a client needs a custom font not listed on Google Fonts or Typekit?
In 2010, developers would have needed to enqueue five different fonts files, e.g.;.eot, .svg, .ttf, .woff, and maybe .otf.
In 2016, I will show you how to enqueue–and use–a single font file type: the .woff.
Introduction
For this demonstration, I’ll be using Fenton. It’s a free font from Fatih Güneş, licensed under CC v4.0. Which means I’m free to use however I want (as long as I give reference). This is important, because not all fonts are licensed this way! Make sure that fonts ARE ALLOWED to be used on the web!
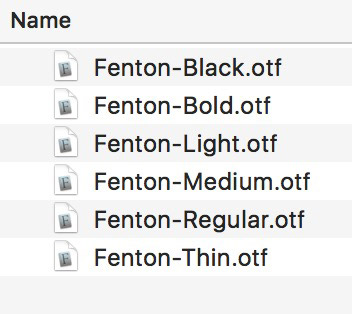
Here are all the available Fenton fonts:

For the rest of this demonstration, I’ll be using Fenton Light, Regular, and Bold.
Generate Web Fonts
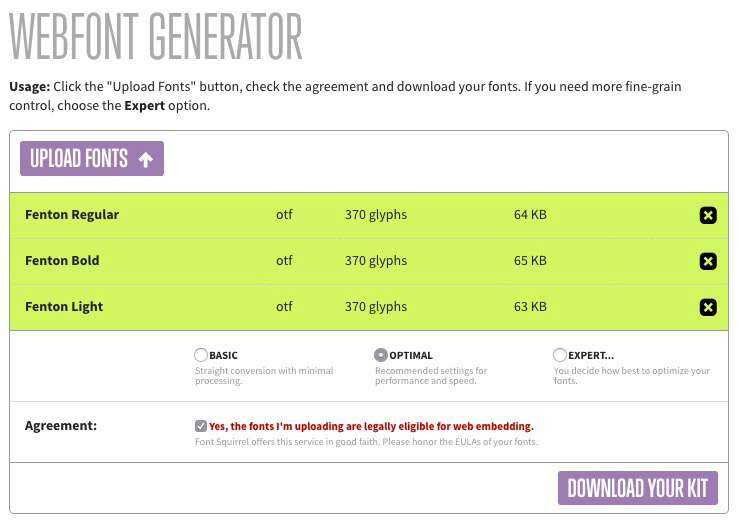
Font Squirrel is the go to @font-face generator. It can take any (normal) desktop font file, and convert it to a web ready “@font-face” font.

Generally, I just select “optimal” and let Font Squirrel do its thing. Font Squirrel will give us those five familiar font file types: .eot, .svg, .ttf, .woff, and the new .woff2
Define Browser Requirements
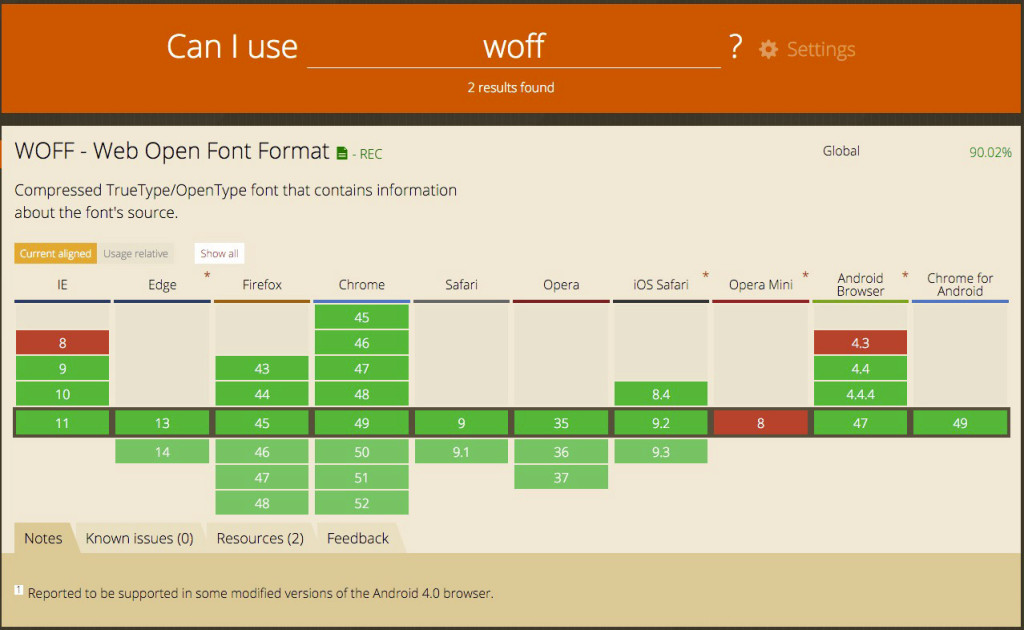
Now that we have our web-friendly fonts, what are the browser requirements? For this demonstration, we only need to support IE9+. Let’s look at the browser support for each font file type:

Source: caniuse.com
By this logic alone, you can see that the .woff file type will work in all browsers, including IE 9.

Note: Opera Mini doesn’t support @font-face. Like, at all. So make sure you declare a backup font like “sans-serif” or “serif” in your font stack!
woff vs woff2
According to the W3C, .woff is the “Web Open Font Format” and as you can see from the graphic above, has excellent browser support. According to Wikipedia, .woff2 has a “30% reduction in file size…” In other words, .woff2 has better compression, but according to caniuse.com, browsers like IE 11 wont and Safari only supports it on El Capitan and above.
All this aside, you will be just fine using .woff!
Enqueue The Custom Font
Now it’s time to enqueue our fonts. Let’s take a cue from Google; this is how they enqueue Open Sans:
@font-face {
  font-family: 'Open Sans';
  font-style: normal;
  font-weight: 400;
  src: local('Open Sans'), local('OpenSans'), url(https://fonts.gstatic.com/s/opensans/v13/cJZKeOuBrn4kERxqtaUH3bO3LdcAZYWl9Si6vvxL-qU.woff) format('woff');
}
They’re declaring a font-family, the style, the weight, and specifying the source. But what’s really going on?

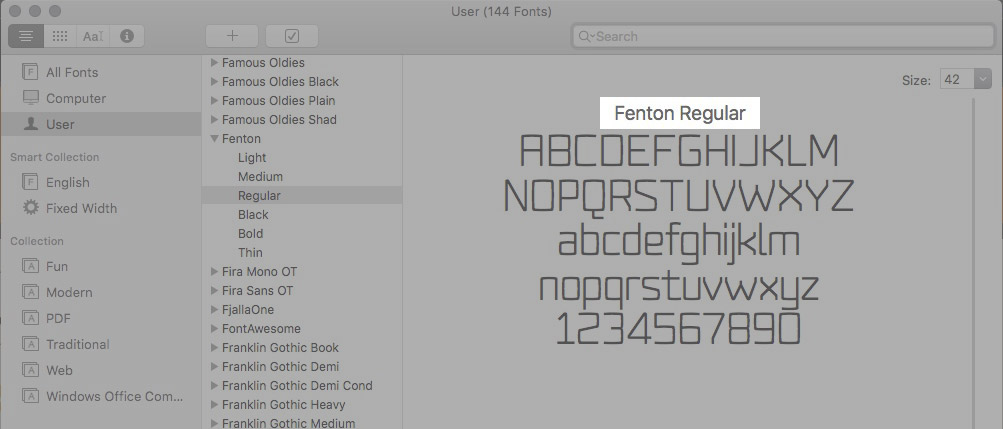
Basically, the @font-face declaration is looking for the font on the user’s computer first. If it’s not there, it will download that font. What about the “different spelling thing?” Let’s look at how FontBook displays Fenton:

Notice how it’s “Fenton Regular.” Sometimes this might read, “Fenton-Regular” or “fentonregular.” By checking for different variations in spelling, we’re just covering all the bases. Moving on…
Awesome, we’ve knocked our custom font down to only three HTTP requests, once for each variation. Furthermore, if the user already has this font installed, then there won’t be any extra HTTP requests! Boom!
Finally, Using A Custom Font
Let’s move each font with the .woff file extension into our theme:
/cool-theme
  /assets
    /fonts
      fenton-bold-webfont.woff
      fenton-light-webfont.woff
      fenton-regular-webfont.woff
style.css
Then in style.css, we’ll declare our @font-face:
// Fenton Light - 300
@font-face {
 font-family: 'Fenton';
 font-style: normal;
 font-weight: 300;
 src: local('Fenton Light'), local('Fenton-Light'), url(assets/fonts/fenton-light-webfont.woff) format('woff');
}

// Fenton Regular - 400
@font-face {
 font-family: 'Fenton';
 font-style: normal;
 font-weight: 400;
 src: local('Fenton Regular'), local('Fenton-Regular'), url(assets/fonts/fenton-regular-webfont.woff) format('woff');
}

// Fenton Bold - 700
@font-face {
 font-family: 'Fenton';
 font-style: normal;
 font-weight: 700;
 src: local('Fenton Bold'), local('Fenton-Bold'), url(assets/fonts/fenton-bold-webfont.woff) format('woff');
}
Now, we can actually start using our font:
body {
  font-family: Fenton, sans-serif;   // Try to load Fenton, if all else fails, load the operating systems default sans-serif font.
  font-weight: 400;   // This will load "Fenton Regular".
}

h1 {
  font-weight: 700;   // This will load "Fenton Bold".
}

p {
  font-weight: 300;   // This will load "Fenton Light"
}
By declaring the font-weight, we’re telling the browser to use a different font. That’s it!
No need to mess with font stacks! What’s better is, no more “bulletproofing” or expensive HTTP requests.
Conclusion
I’ve shown you an updated way to work with custom fonts. If you don’t need to support IE8 or older Android browsers, this method will speed up your website by reducing HTTP requests and serving an optimized font file (.woff).
If you’ve got any tips or tricks to expand on this, please leave a comment below.
In the interest of ‘future-proofing,’ would it make sense to load both woff & woff2 for now?