In Part 1 of this series, I introduced you to the terminal, Node.js, and we spun up the Hello World Example from Next.js. In Part 2, we’re going use a code editor to create a React component, maybe even style it, then finally view it in a web browser.
Note: There are dozens and dozens of code editors out there. Don’t be afraid to experiment until you find the one that you like best. For this article, we’ll be using the wildly popular and open-source code editor VS Code from Microsoft.
Install VS Code
Visit Code.VisualStudio.com/Download.
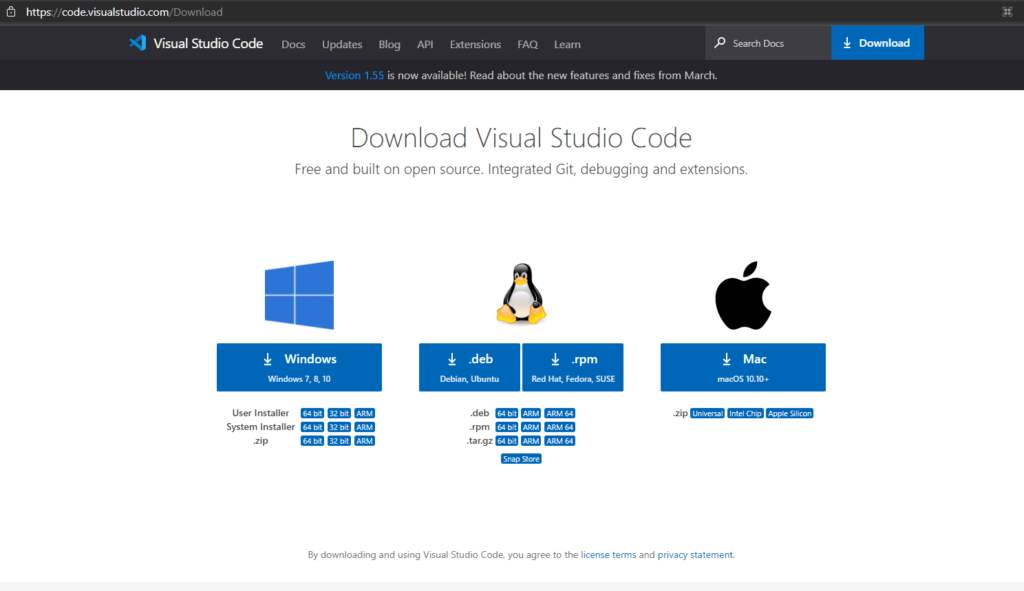
Click the blue button that matches your Operating System. For this article, I’ll be clicking Windows 7, 8, 10.
Once the file finishes downloading, double-click to run the installer. When prompted, select all the boxes:
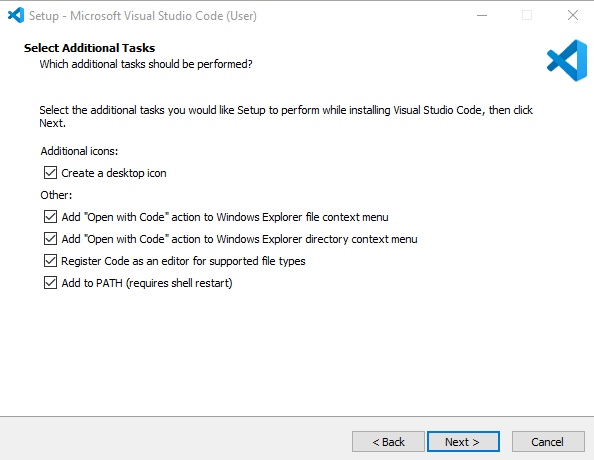
Continue to click Next until VS Code has successfully been installed.
Open VS Code and the Hello World Folder
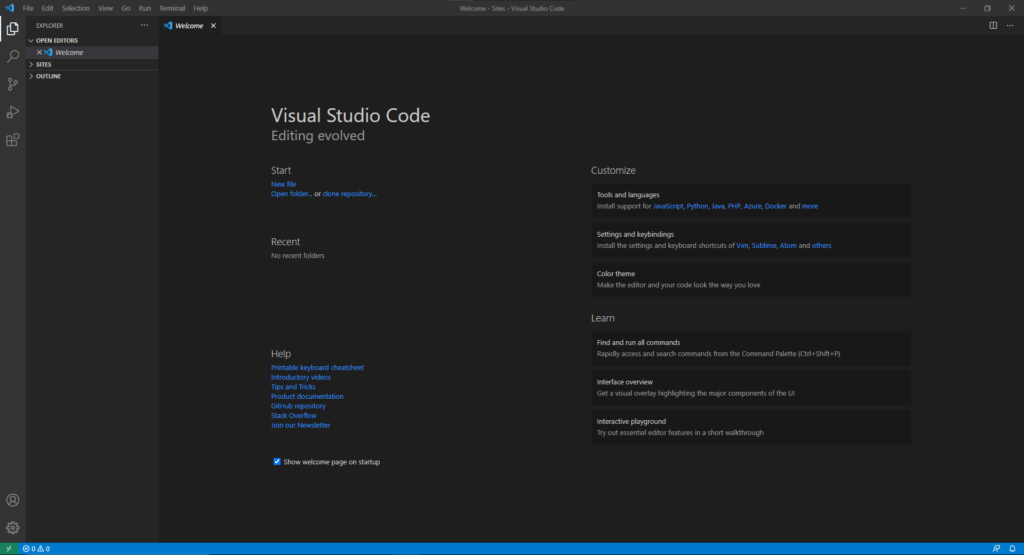
Now that VS Code is installed on your computer, double-click the icon on your desktop to open:
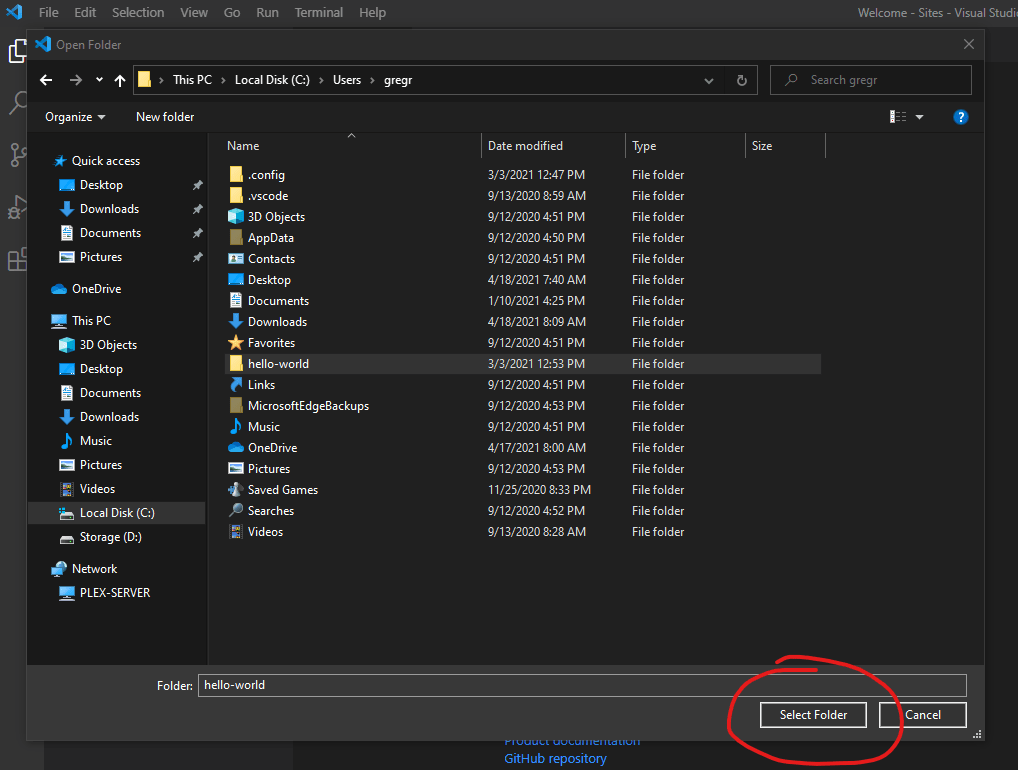
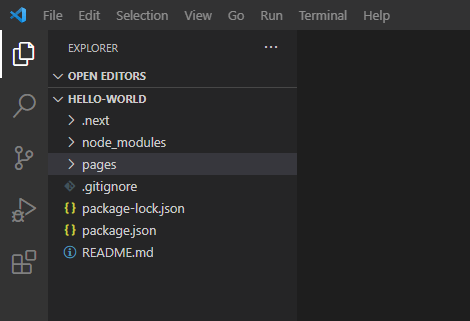
Next, we’re going to find the hello-world folder we created in Part 1 of this series. It should be located in your User directory:

Using your mouse, click on the hello-world folder, and then click the Select Folder button:
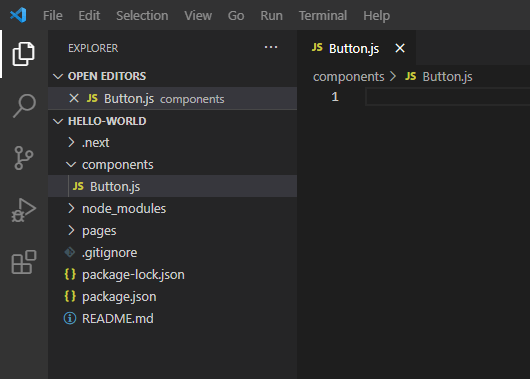
You can safely close the Welcome dialog in VS Code. The following folders and files should be in the sidebar:
If you’ve made it this far, great! If not, be sure to catch up on Part 1 of this series.
Open the Integrated Terminal
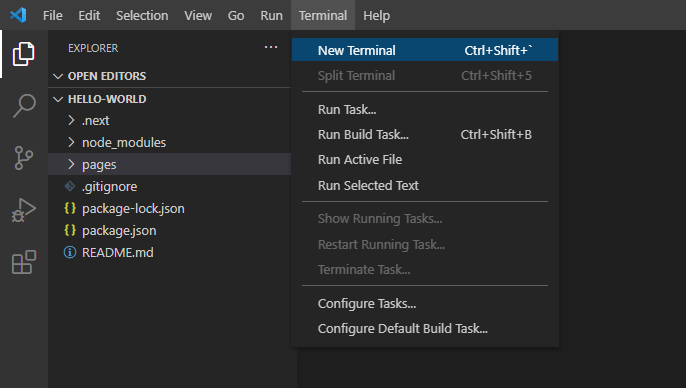
One of my favorite features of VS Code is the integrated terminal. This feature allows you to use the terminal without app switching.
In the menu bar, click Terminal and then New Terminal:
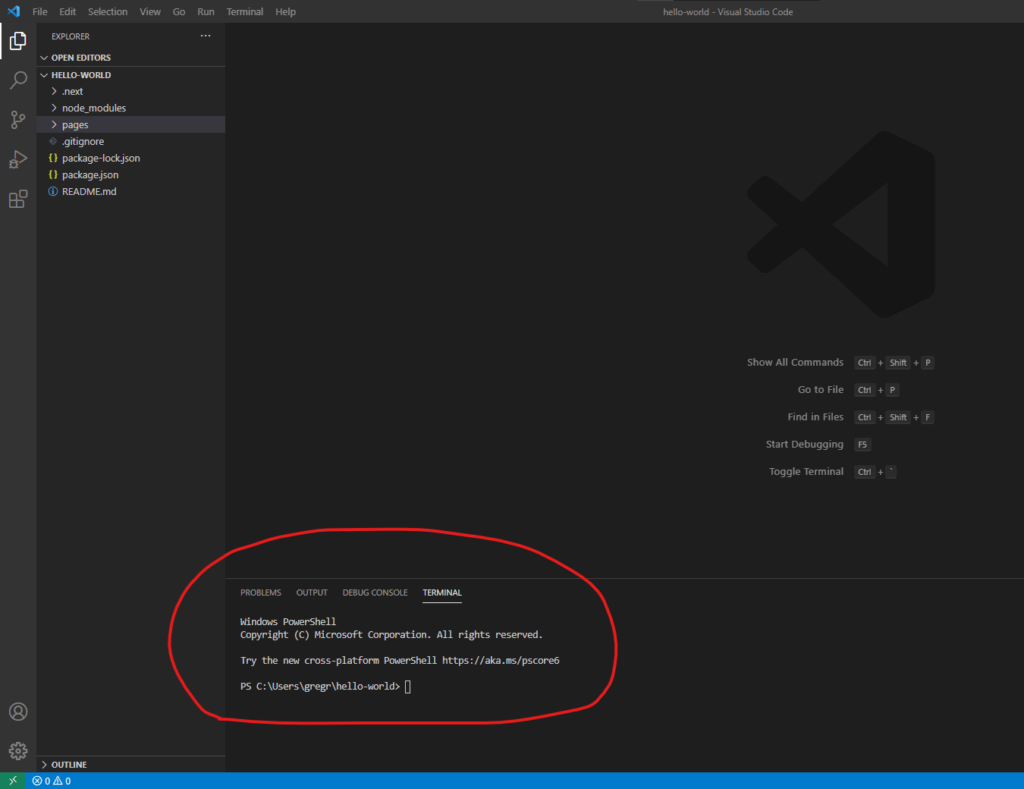
You should now see the Terminal at the bottom of your screen:
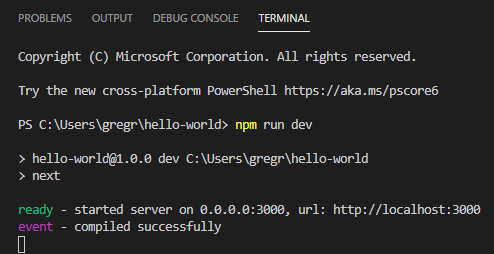
Type the following (or copy and paste) into your Terminal, and press Enter:
npm run dev
After a few seconds, you should see the following text appear:
Finally, open up your favorite web browser. In the address bar, type:
http://localhost:3000
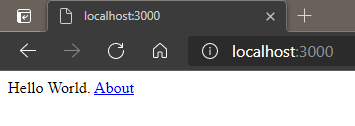
Nicely done. You’re now set up! Behind the scenes, Webpack is watching for file changes and will automatically recompile the homepage when they’re detected.
Your First Component
Now that your development environment is up and running, let’s jump in and create your first component.
Create the Component Folder and File
In VS Code, click the New Folder icon in the sidebar:
![]()
Name the folder components.
Click the components folder with your mouse, and then click the New File icon:
![]()
Name the file Button.js.
Create the Button Component
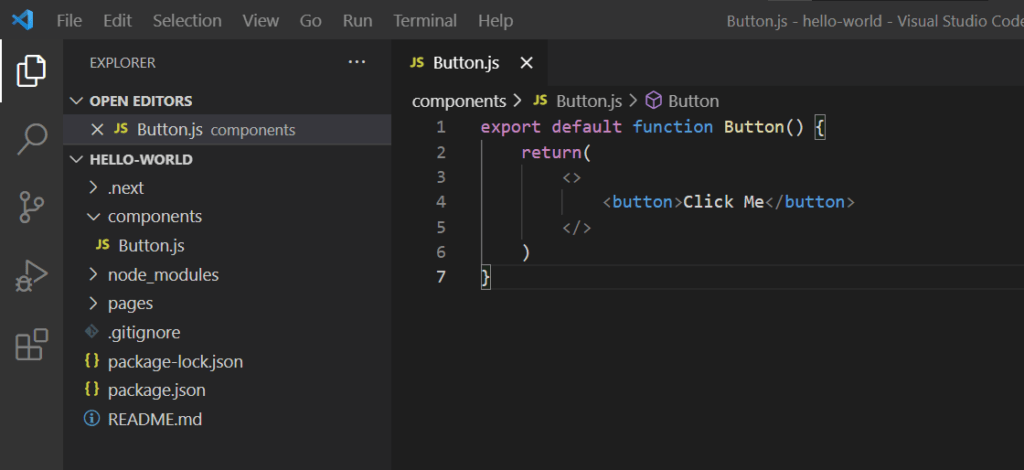
I’m not going to dive into how React or import work. For now, focus on creating a simple component. Feel free to type this out, or copy and paste, into Button.js
export default function Button() {
    return(
        <>
            <button>Click Me</button>
        </>
    )
}
VS Code should look exactly like:
Now save this file by clicking File and then Save.
Import Button Component
Now that you have a component (yay!), you’ll need to import it into the homepage.
In the sidebar, navigate to /pages/index.js and double-click your mouse on index.js to open.
VS Code should look similar to this:
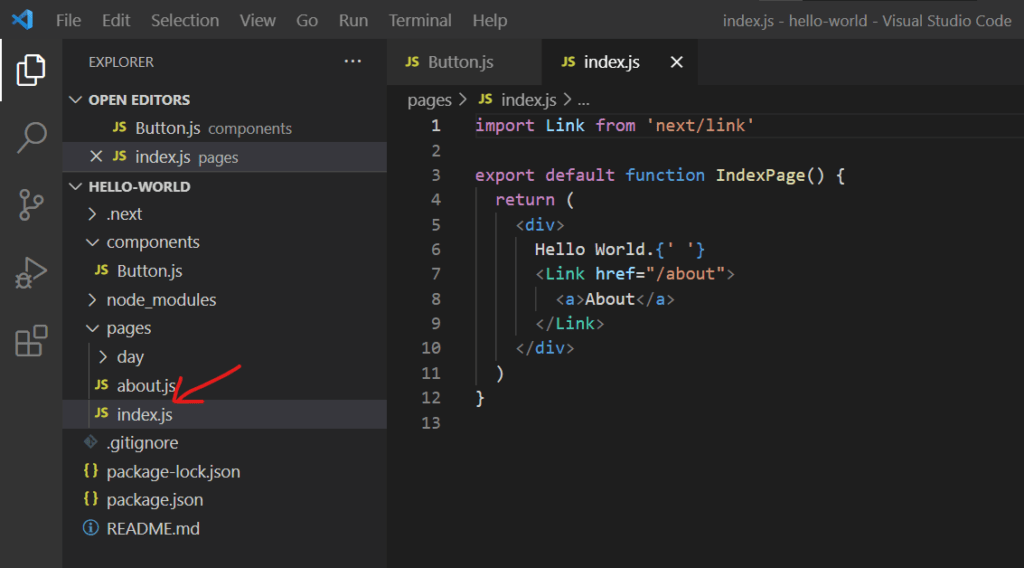
At the top of the index.js file, type (or copy and paste) the following:
import Button from '../components/Button'

After the </Link> component on line 10, click insert your mouse cursor, then create a new line by pressing Enter on your keyboard.
Now type:
<Button />
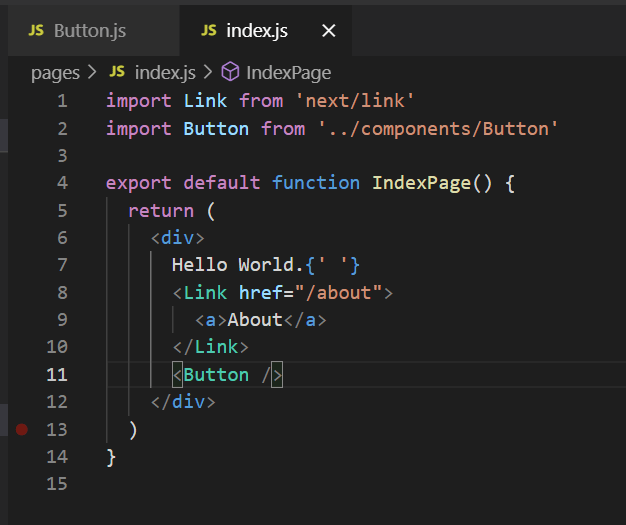
Save this file by clicking File and then Save.
View the Button Component
Go back to your web browser. and you should already see:
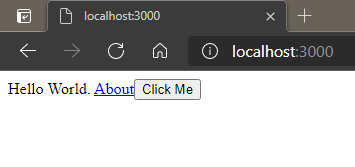
You now know how to create and import a React component. Great work!
Extra Credit: Style Button Component
That button don’t exactly pop; so let’s take one more step together and style the button using a common approach in React: CSS Modules. Next.js has native support for CSS Modules, so there’s nothing else to set up.
Create CSS Module
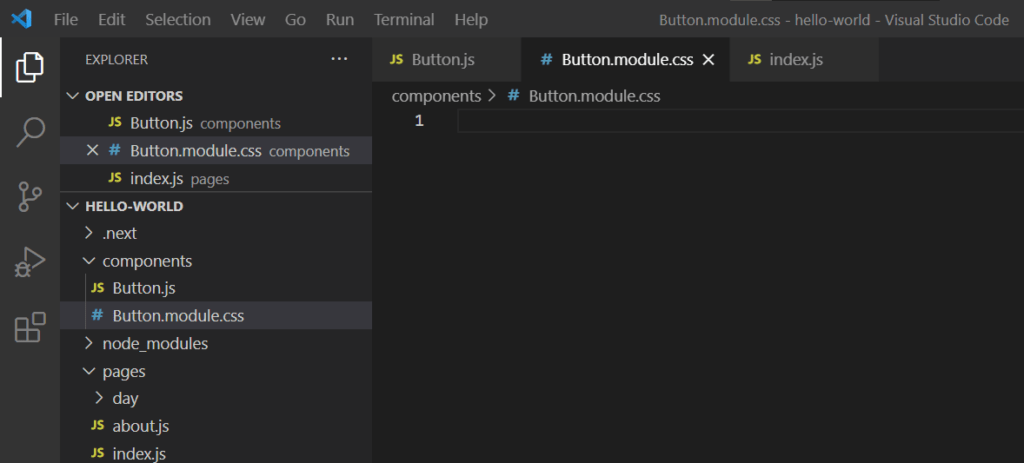
In the sidebar of VS Code, click on the components folder again, and click the New File icon.
Name the file Button.module.css.
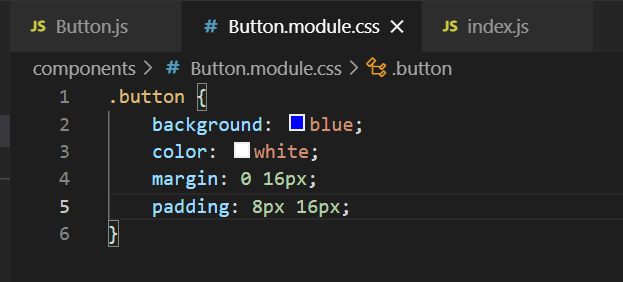
Type (or copy and paste) the following into Button.modules.css:
.button {
  background: blue;
  color: white;
  margin: 0 16px;
  padding: 8px 16px;
}
Save the file by clicking File and then Save.
Import CSS Module
You’ve already imported a file before, so let’s reinforce that knowledge and do it again.
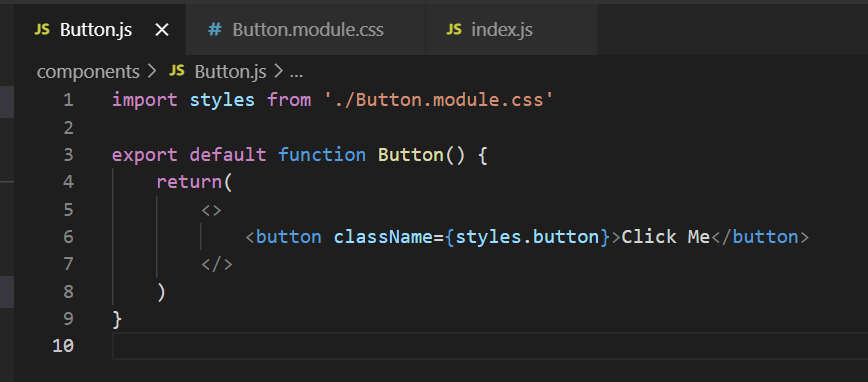
Double click the Button.js tab in VS Code to switch to it. At the top of the file, type (or copy and paste) the following:
import styles from './Button.module.css'

Nice. The last thing to do is use the styles in the button. Type (or copy and paste) the following inside the first <Button> tag:
className={styles.button}

The Button.js file should look exactly like this:
Save the file by clicking File and then Save.
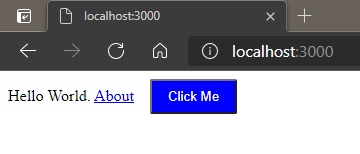
Switch to your web browser, and both Webpack and Next.js should have already compiled your CSS. So, it’s ready to view:
Wrap Up
Congratulations! You’ve taken some very important first steps toward building modern apps with React and Next.js. Now that you’ve got the basics, you should take the official Learn Next.js course. Watch Lee Robinson’s YouTube playlist titled, “Learn Next.js,” and view our other articles about Next.js.
Finally, if you’re looking for an experienced web development agency to handle your next Headless WordPress project, get in touch with us today.