Do you have content you want to write once but share everywhere? Headless WordPress (also known as WordPress API) may just be the answer for you!
 If you aren’t familiar with what Headless WordPress is, check out the article I wrote titled Headless WordPress: Taking Posts Anywhere to get started. The article you’re reading now picks up where the prior ended, bringing us to the point where we can now take a more technical, in-depth look at the various endpoints WordPress offers us.
From what you’ve learned from my first Headless WordPress blog post, you can develop your own unique solutions to fetch and publish post content to any platform be it Medium.com, Facebook, Twitter, or another WordPress site. Once you learn how to fetch and send data to WordPress site you can create whatever solution you desire through the power of APIs.
Tooling

At its core, Headless WordPress is just a series of restful API endpoints. If you are not familiar with what REST API is, check out this great video over REST API concepts and examples.
When working with any API system, it is highly recommended to first get familiar with the endpoints you are working with before trying to integrate them into any existing project you are working on. This allows you to focus just on the fundamentals of the API instead of the complexities of getting it to work with your existing code.
One way you can begin working with REST APIs is to use a restful API client—dedicated clients such as Postman (All platforms), Insomnia (All platforms), or my personal favorite Paw (Mac only).
Review Common Endpoints

A good visual I use for understanding the purpose of REST APIs is thinking of them in terms of pipes that connect our code with other websites and servers. Just like a city pipe can carry water, sewage, and power to your house, an API can carry data to and from our WordPress site, but unlike a utility company, the other end is yet another website.
While there are hundreds of endpoints built into WordPress and thousands more that can be added through the use of plugins, we’ll cover some of the most common ones in regards to posts. For an exhaustive list of endpoints, a great place to visit is the WordPress Codex over endpoint references.
Endpoint Primer
Before we explore some example endpoints, it’ll help to understand how the various endpoints are structured. Pictured below is what your average endpoint will look like broken into its core parts.
- The first section (pictured in green) is the domain of where your website is hosted. In our case, that would be blog.myepiscopal.com. However, if your WordPress is installed at a directory on the domain, say example.com/blog, your endpoint would be
example.com/blog/wp-json/... - The second section (pictured in yellow) is the main path where all WordPress APIs start from.
/wp-json/tells WordPress the incoming request is meant for the REST API and not a normal user visiting your website. - The third section (pictured in red) is the namespace of the endpoint you are working with. In our case,
/wp/v2/is the endpoint where all of WordPress’ core endpoints are registered to. However, third-party plugins can register their own. For example, the plugin API Bearer Auth registers the namespace/api-bearer-auth/v1/. So, its example path will look likeexample.com/wp-json/api-bearer-auth/v1/. - The fourth section (pictured in blue) is the action in the namespace we want to make. For example, the
/posts/endpoint in WordPress tells the site we want to interact with posts. - The fifth and final section (pictured in pink) are any additional URL parameters we want to pass to the endpoint action. In the case of this example, we are telling WordPress to return posts 100 at a time.

Fetching Content
Note: When fetching content, unless a website’s API has intentionally been locked down, you should not have to authenticate to make any non-destructive requests.
Fetching Posts
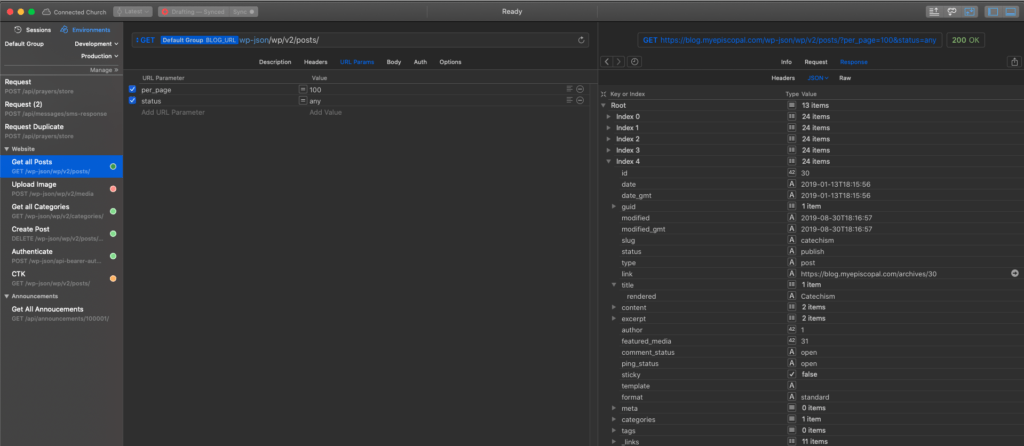
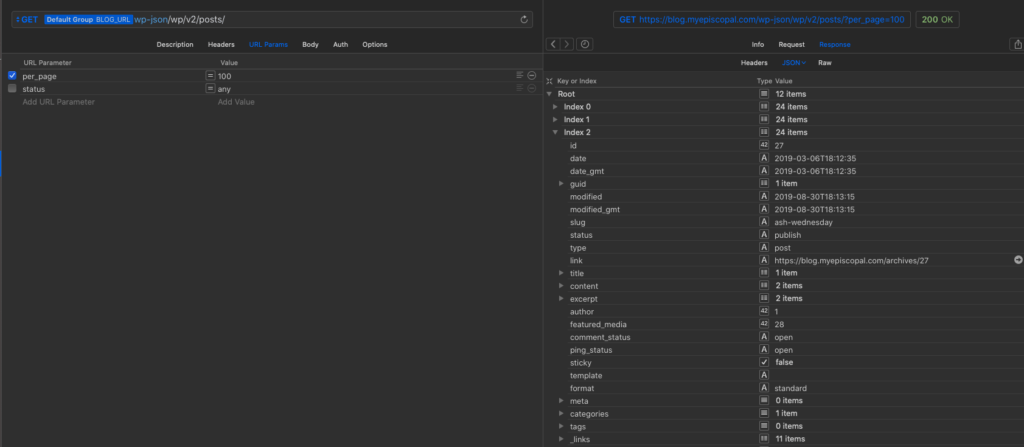
Now that we have an understanding, let’s start fetching some posts. To get a full page of posts, simply hit https:example.com/wp-jon/wp/v2/posts and you should get the latest posts from that WordPress website. Below is what that can look like in PAW. From the response, we can see WordPress returns a JSON array of post data.
Special Fields
- id – This is the ID of the post stored in WordPress. We can use this to fetch the post by itself in a future request.
- date – This is the date the post was published on.
- title->rendered – This is the user-readable title of the post.
- content->rendered – This is the rendered html of the post’s content which can be used to display the contents of the post; or, if combined with TinyMCE, you can develop your own post author interface in your existing software application.
- featured_media – This is the ID of the featured image for the given post. We can use this to fetch the image asset on a future request.
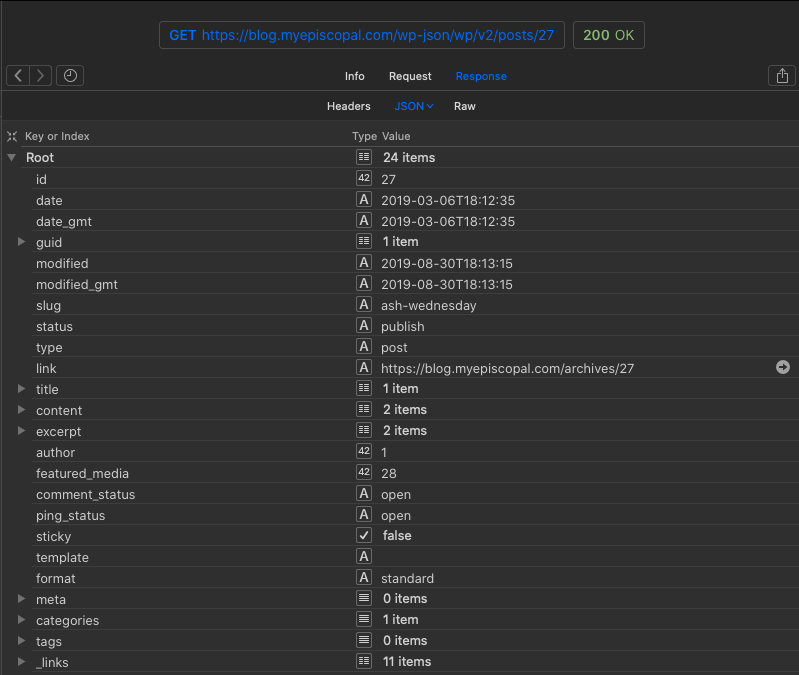
Fetching A Single Post
Fetching a single post is done very much in the same way as querying for many posts. All we do is add the post ID we want to query /wp/v2/posts/<id>. This is what it would look like if we are looking for a post with ID 27 https:example.com/wp-jon/wp/v2/posts/27. The main difference is instead of returning a JSON, array we simply receive the post data with the same fields.
Special Fields (Same as Posts)
- date – This is the date the post was published on.
- title->rendered – This is the user-readable title of the post.
- content->rendered – This is the rendered HTML of the post’s content which can be used to display the contents of the post; or if combined with TinyMCE, you can develop your own post author interface in your existing software application.
- featured_media – This is the ID of the featured image for the given post. We can use this to fetch the image asset on a future request.
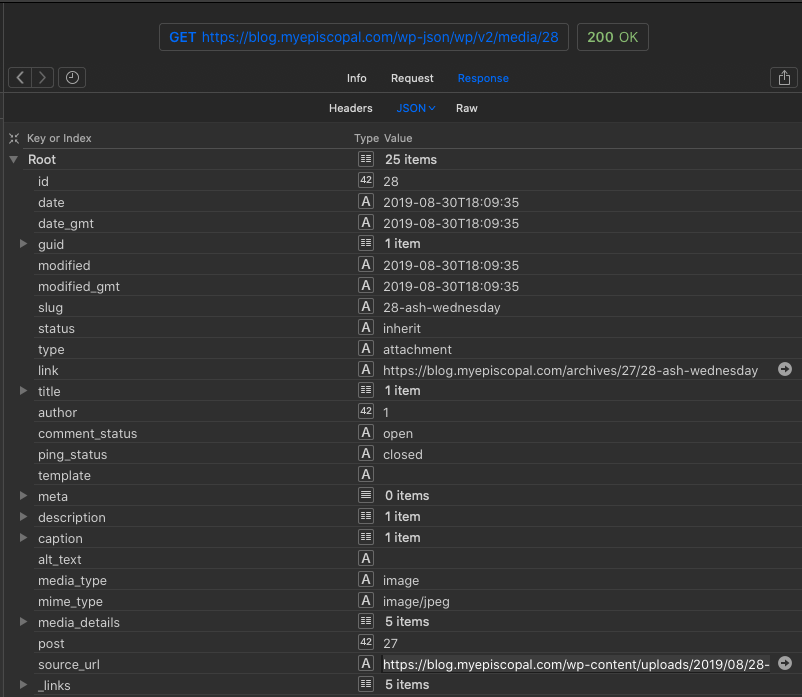
Fetching a Featured Image

Once we have the featured image ID from our two previous queries, we can fetch its rendered URL (so we can display it) by using the /wp/v2/media/<id> endpoint. If we are searching for a featured image by ID 28, it looks like this: https:example.com/wp-jon/wp/v2/media/28.
Special Fields
- mime_type – This is the type of file (JPEG, PNG, etc.).
- alt_text – This represents any alternative text provided for the image for accessibility purposes.
- source_url – This is the URL for the image. This URL can be placed directly in the src of an image tag to display the image.
Authentication
Note: In order to create, edit, or delete posts, you’ll need to have some form of endpoint authentication installed on your site. While there are many options out there, the one we will be using for this tutorial is API Bearer Auth.
Authenticating

In order to make any destructive requests (create, update, or delete) of post or image content, we must first authenticate as a site user. With API Bearer Auth installed, we simply need to pass our username and password in a request body to the endpoint api-bearer-auth/v1/login.
When making any POST or DELETE requests to WordPress API, make sure in the request header you set Authorization: [authentication-code-here]. If you do not, you’ll get a 401 error saying you are not authorized.
Special Fields
access_token – This is the token we will use to authenticate ourselves for any update style requests.


Updating and Creating Content

Creating a Post
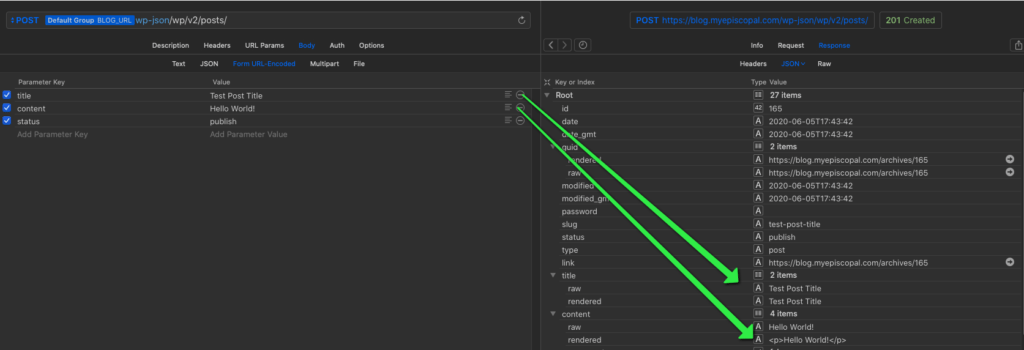
When creating a post, there are countless options we have at our disposal to fully create a post through the REST API. Check out the codex for a full list of post arguments you can pass. Today, we will focus on the bare minimum: title, content, and status.
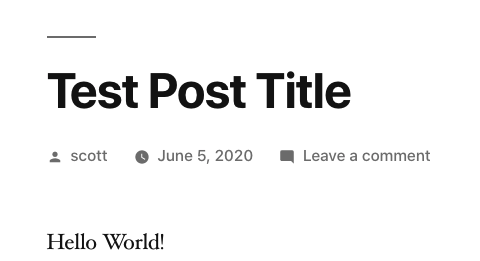
To create our post, simply send a POST request to the /wp/v2/posts/ endpoint with our arguments filled out in the form body and that’s it! You should receive the post body returned in JSON format like the /wp/v2/posts/<id> route.
Remember to include your authorization token!
Special Fields
status – Make sure this is set to publish if you want the post to publish automatically otherwise the post will be saved as a draft.
Updating a Post
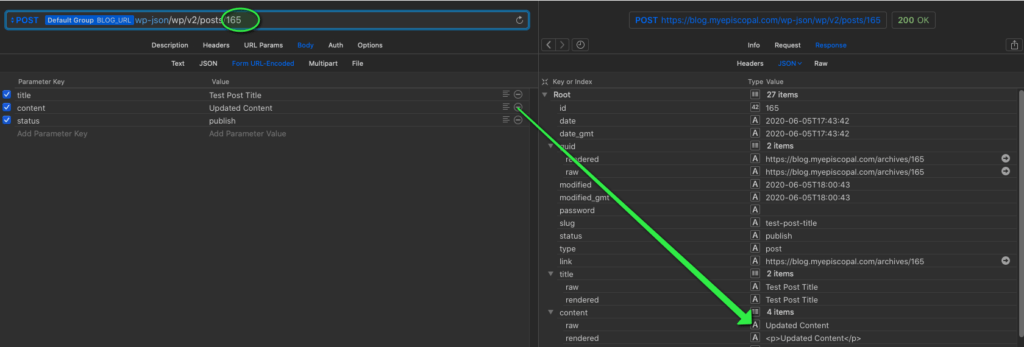
Phew! We made it this far now, but how do we update an existing post? When updating a post, simply act like you’re creating it. Just include the desired post’s ID in your request /wp/v2/posts/<id>.

Deleting a Post

To get rid of the evidence, instead of making a POST request to /wp/v2/posts/<id>, we will send a DELETE request that simple! Bye-bye, posty.

Uploading Media

Up to this point, we’ve found out how easy it to create, read, update, and delete posts. Surely, updating photos is an easy task? WRONG! WRONG! WRONG!
Okay it’s not really that hard, but it took me an embarrassing amount of time to get it working. This one endpoint is the primary catalyst for why this post exists (documenting frustration). I was, unfortunately, unable to get a media item to upload via a REST client, however, as a lover of PHP that’s how I got it to work.
Step One: Expand Your Header
Unlike all other API requests, media upload requires additional settings in your request header in order for your upload to work. Specifically, we must define the Content-Dispostion and Content-Type field in our header request. Within the Content-Disposition field, simply update the filename to whatever you want it to be saved as in WordPress. The Content-Type is the file file-mime type you are uploading.
$this->headers = [

'Authorization' => 'Bearer ' . $response->access_token,

'Accept'        => 'application/json',

'Content-Disposition' => 'attachment; filename=testing.jpeg',


'Content-Type' => 'image/png',

];
Step Two: Form Body
With our updated request header, we simply need to make a POST request to the /wp/v2/media endpoint. For the form request, simply use the file contents (bits) form in PHP. We can use the file_get_contents() method. A successful submission should return a JSON payload of the media like that from /wp/v2/media/<id>.
All Together
Let’s Put Headless WordPress to Use
Do you have an existing Software as a Service (SAS) or project you’d like to integrate with WordPress? Watch as we take a walk through what it takes to do just that. In our project example, we create a simple frontend form that allows us to publish a post to our existing WordPress website using many of the routes we explored above.
Note the purpose of this demo is to just show you how easy it is to work with Headless WordPress. Once you know how to send form data, you can easily integrate your business logic in place or a simple form to populate your website. Find the code on GitHub.
Keep Exploring Headless WordPress

I hope this WordPress API primer was helpful in giving you the tools you need to start integrating your existing projects with Headless WordPress. The world of coding is an exciting field with new APIs being added every day.
Perhaps your next goal is to have internal statistics or products published to your corporate website from an internal tool, or displaying NASA launch updates to your space blog automatically. With Headless WordPress, the sky’s the limit!
Interested in working with a WordPress agency comprised of WordPress API experts ready to integrate your exiting website with Headless WordPress? Contact us! We’d love to talk about your ideas for your next web project.