A lot has changed since the last time I wrote about Full Site Editor. With the arrival of WordPress 6.0, the Full Site Editor (FSE) has matured for the better. Perhaps the most obvious update is the UI, along with a new set of blocks, on top of other improvements.
The minimum requirements to create a custom theme and how some of the new blocks work for the page creation have also been tweaked. Before 6.0, we needed to have the Gutenberg plugin installed and a block-based theme. Now, we only need a block-based theme.
You can start downloading an empty starter. Begin with this GitHub repo. This starter theme was made by Carolina Nymark. She has really great material on FSE. Check out her other work.
Open your favorite IDE and open your theme files. If you use localWP, you can spin up a local WordPress install. Now, add your theme and activate it.
We are going to build a simple home page for our theme, with a minimum amount of code. Thanks to theme.json and the Full Site Editor, let’s look at what we are going to build. This is a basic mockup I made with Figma:
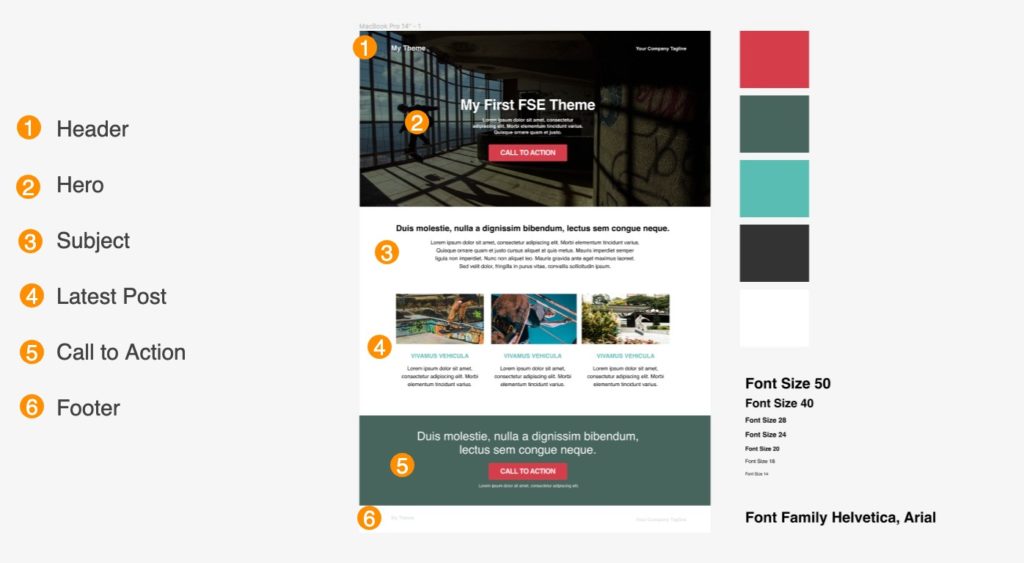
We have a Header, a Footer, and some common sections that we will turn into Template Parts and Block Patterns, as well as our colors, font sizes, and font family—all of which we are going to add to our theme.json.
theme.json
The first step, once we got our blank theme up and running, is to set our global styles. Let’s add some colors and font styles.
If it’s your first time working with theme.json, I encourage you, before you continue, to check the official documentation and get a grasp of what you can do.
Our color palette will look like this:

So on our theme.json, we do the following: on the settings object, we have our colors object. Let’s add our primary color:
This results in the generation of the CSS variable in the body of the website: --wp--preset--color--black: #D63E4B;. Follow the same pattern and add the rest of the colors ( Secondary: #48655E, Tertiary: #59BDB4, Black: #333333, and White: #FFFFFF ).
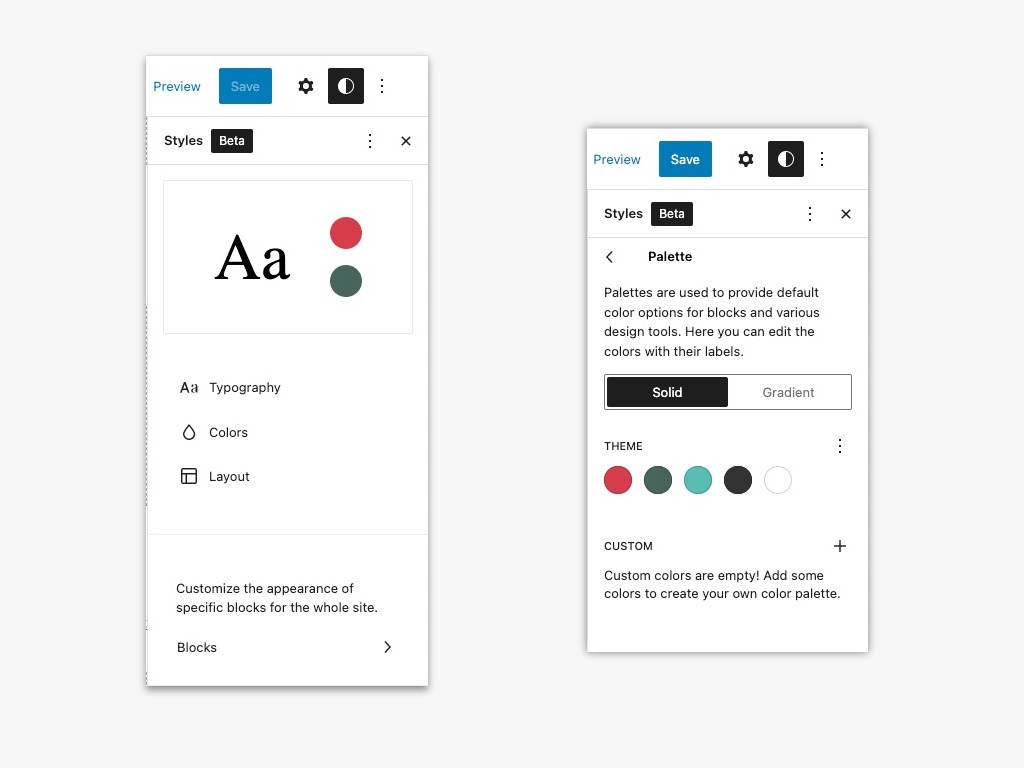
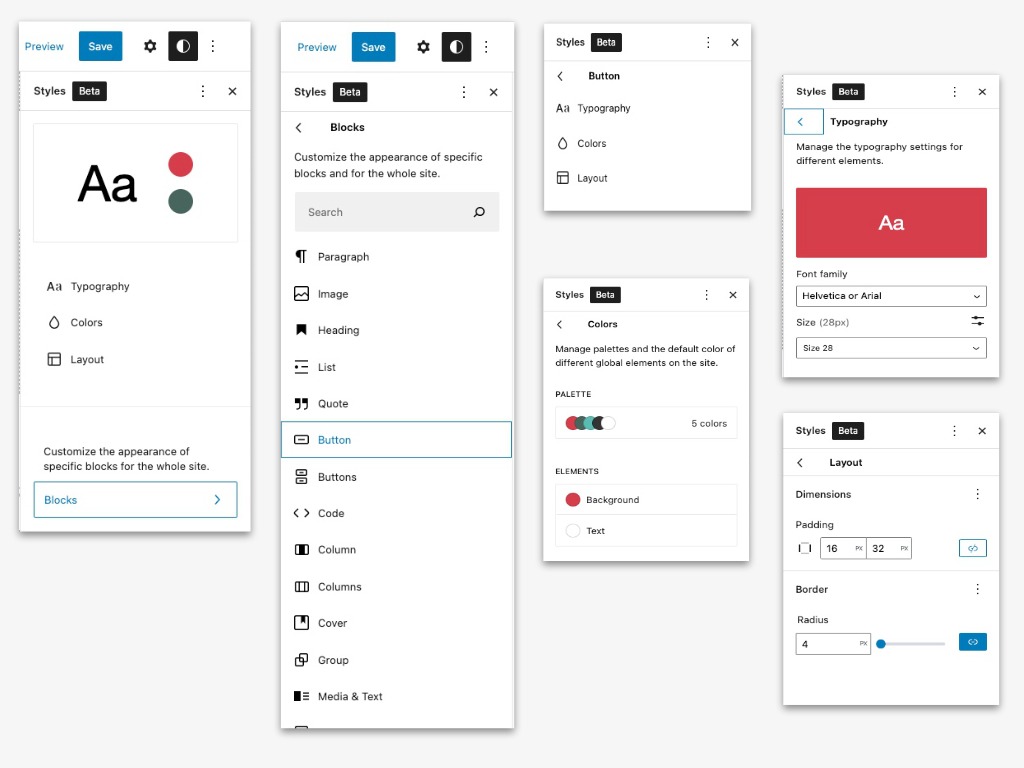
This will generate our color palette. Go to your dashboard and open your Full Site Editor. Open the styles toolbar and click on the colors tab. There is our theme color palette:
We can also disable the default and custom colors by adding this "defaultPalette": false,"custom":false, to the colors object. Setting up our font sizes and styles is similar to how we add our colors. We will update the typography object on our theme file.
As with the colors, WordPress programmatically will create --wp--preset--font-family--helvetica-arial: Helvetica Neue, Helvetica, Arial, sans-serif; will generate the CSS Variable on the body of our website, and on the Full Site Editor, our typography is registered.
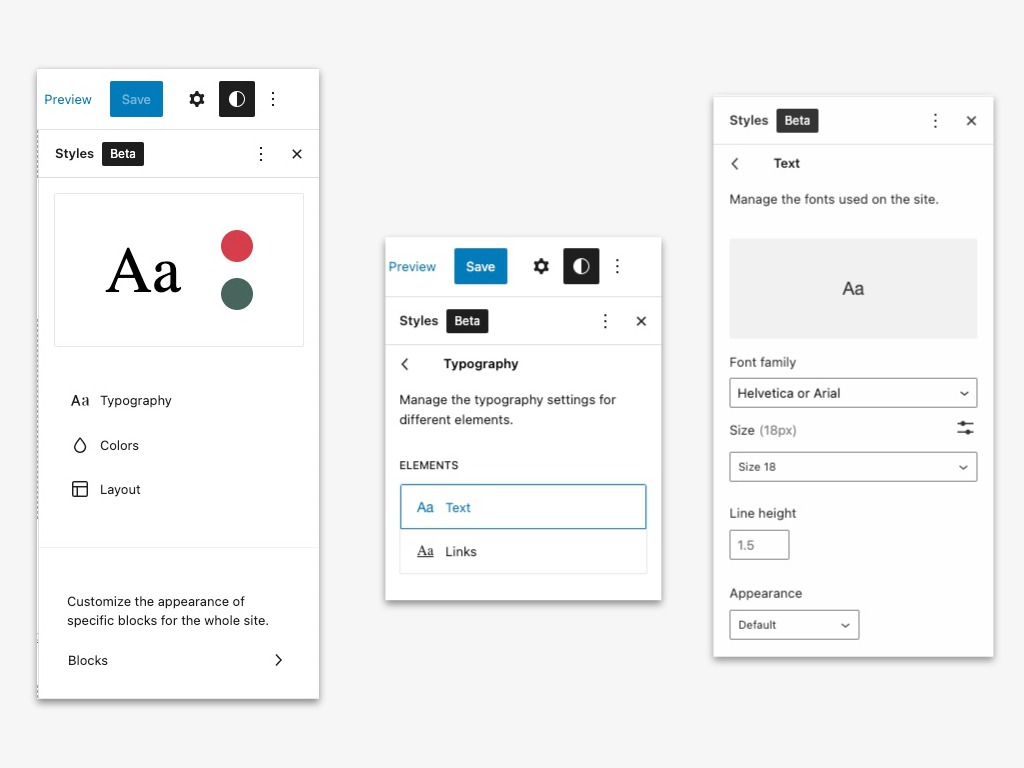
Follow the same pattern and add these sizes: 14, 18, 20, 24, 28, and 40px. When ready, save your theme.json file and open your Full Site Editor. Open the styles bar, and you will get your font family and font sizes.
Let’s take a look what theme.json has created for us. On your website, open the inspector tool. On the Styles Panel, take a look on your body element properties.
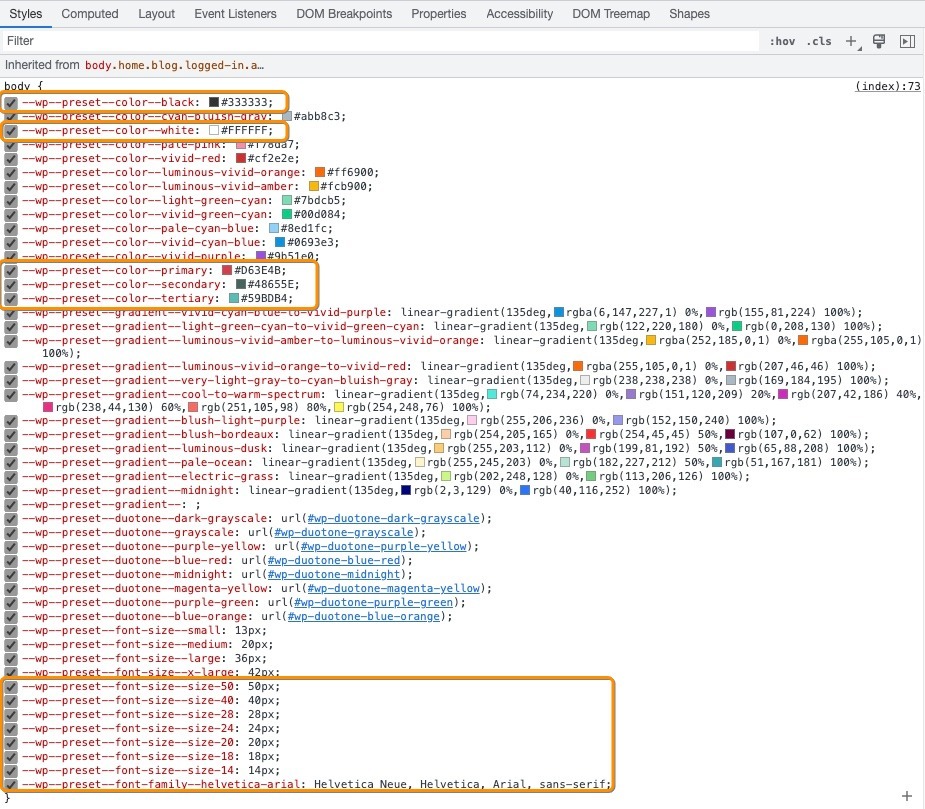
Excellent! We now have CSS variables with our values, globally available, fonts and colors, and there are more settings for gradients, duotones, line-heights, borders, etc.
For the sake of this article, we are going to keep it simple. Lets’s take a look at how we can apply these styles to our elements and blocks.
First, we go back to our theme.json file on our IDE. We will add some properties to the styles, some spacing to our blocks, our typography, and default font sizes.
If we go back to our inspector tools, we can see the body has now our properties. You can use theme.json to adjust the styles to elements and blocks. Don’t forget to check the documentation to better understand what you can do with it.
Styling Blocks
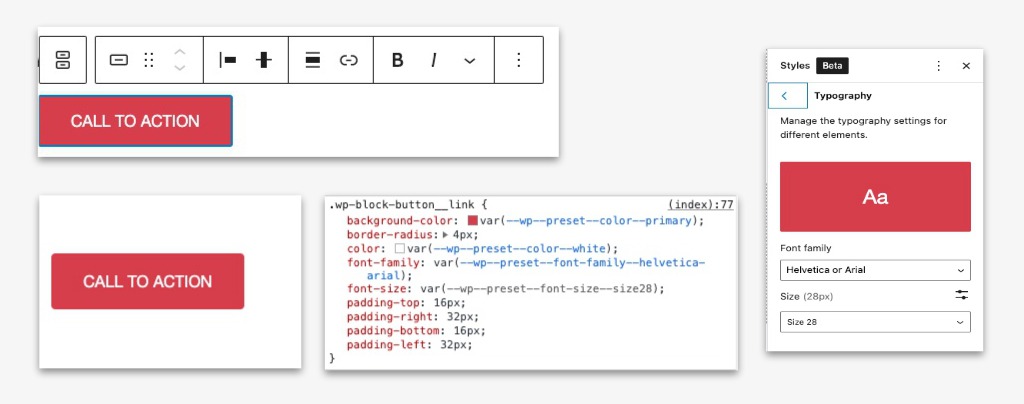
Applying these styles to our blocks can also be done using the FSE editor. Open the styles tab, and let’s add some global styles to our buttons.
Here, we can set the typography, colors, and layout that the buttons will use. Follow the example below. Once you’re ready, hit save. It will let you know you’re adding a custom style. Save again.
So now, our default button is styled and looking like this on the backend/frontend. Using the inspector tool on our website, we can check the generated styles and our CSS Variables:
You can apply these styles to your blocks also on your theme.json. Following the same pattern, open your IDE, and on the styles object:
Now that we get to know better theme.json , we can now focus on our Block Patterns.
Block Patterns
Our Hero, the Latest Post section, and our Call To Action section can be patterns. So, first of all, what are patterns?
Block Patterns are predefined block layouts available from the patterns tab of the block inserter. Once inserted into content, the blocks are ready for additional or modified content and configuration.
This feature in WordPress is super handy and it also has its own library. So, you can grab and use it, similar to how you add a theme or a plugin.
To build the Hero, we are going to use the cover block. With an inner group block, add a Heading (H1) a Paragraph, and a Button. Remember, we already set up all our styles via theme.json. All the settings can be added using the Full Site Editor. It should look similar to this:
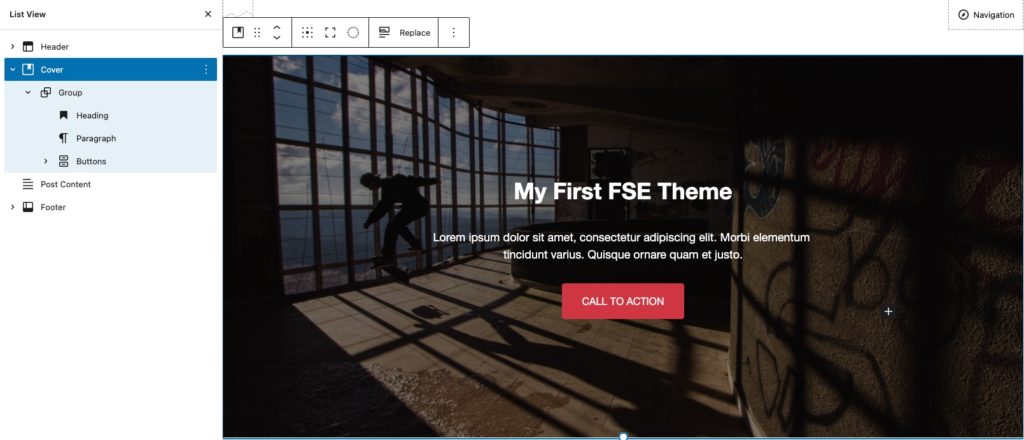
Our pattern looks like the one on our mockup. There is no way we can add the patterns via the editor, similar to how we add template parts or reusable blocks.
You can use a plugin There are a few on the plugin repo or you can create your own programmatically.
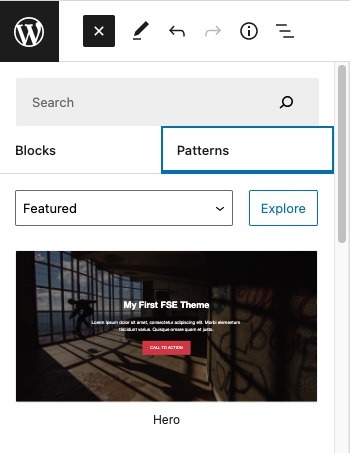
Once your block is ready, select the block. Open the sidebar options on the block options and select copy. This will copy the block markup. Go back to your IDE and open your theme. Create a directory, name it patterns, add a new file hero.php and paste the markup.
Notice that we not only need to add the markup, but we also need to declare our pattern to let WordPress know what to do with this file. Similar to how we declare our templates, we declare the title, the slug, and categories. You can get more details on the official documentation. Click the Block Inserter, and there is our Hero Pattern:
Awesome! There is also one other pretty neat feature on theme.json. You can also declare patterns from the block pattern library. The patterns field is an array of pattern slugs and you can get the pattern slug from the URL in a single pattern view at the Pattern Directory. For example:
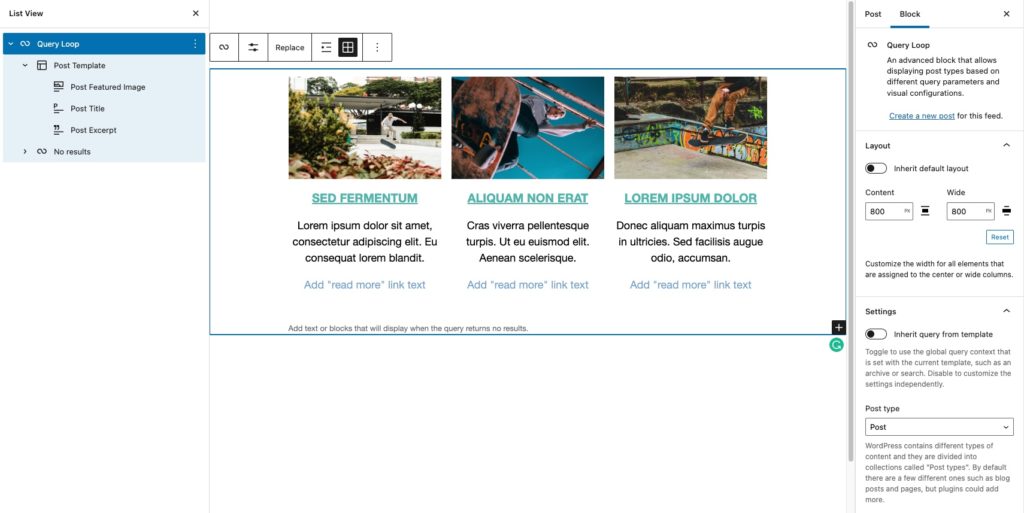
Sweet. Now, that we know how to create patterns, it is time to create the Latest Posts pattern. We are going to use the query loop block to show our three latest posts, with post image, post title, and the excerpt.
To get more on this super handy block, what do we do? Head to the official documentation.
Go ahead and do it yourself with what you learn in our previous example, but here is the gist in case you need it. I’m pretty sure you won’t. Our Latest Posts pattern looks like this:
Go ahead and create the final pattern. Again, you can build it yourself with what you learn so far. In case you need it, here is the gist for our final pattern.
Creating a Template
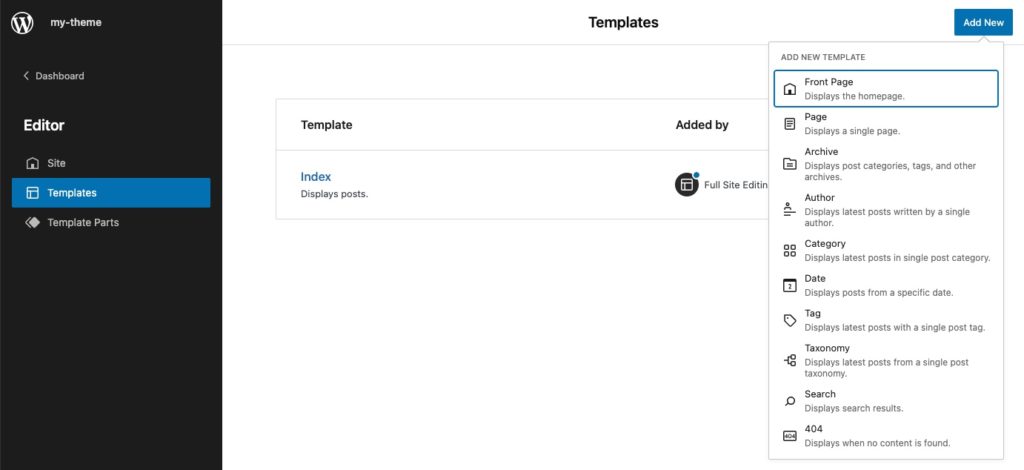
Now that we have our patterns, the next step will be to glue them to our templates. Open your Full Site Editor. Under templates, we have the index from our theme files.
We are going to create a new template by clicking on the Add New button. It will display a list of options that follows the WordPress Template Hierarchy. Select Front Page.
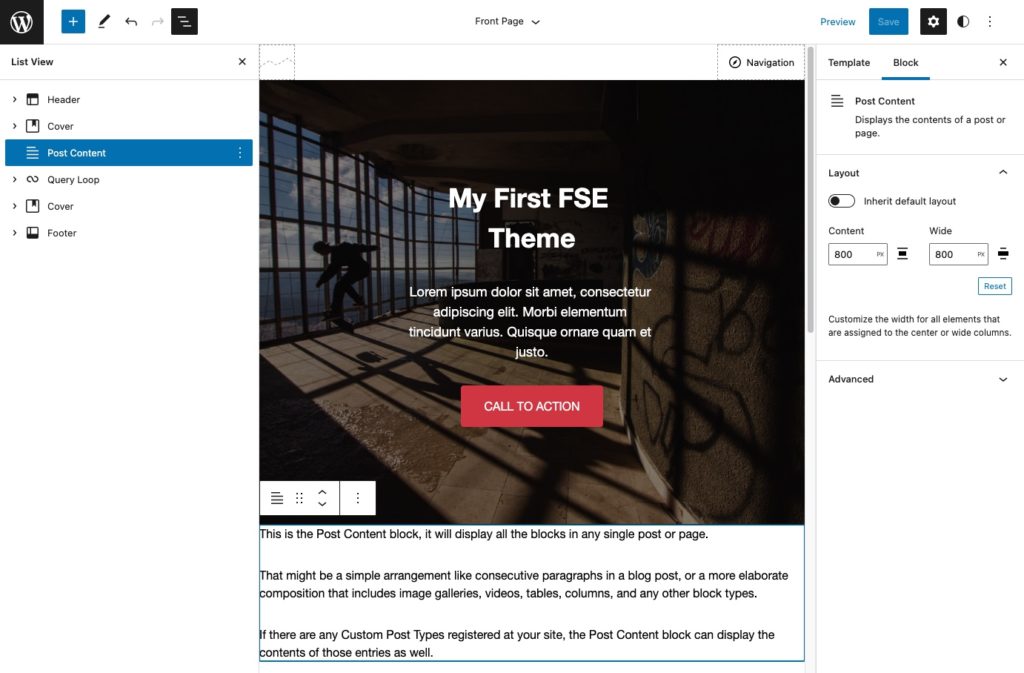
The first thing we are going to do is add our Template Parts, our Heading, and Footer. We have these parts already on our theme files, and most importantly, the Post Content Block.

Following our mockup design, click on the Block Inserter. On Patterns, add our own. It will look like this:
Now, we need to add some content to our homepage for the Subject of the page. Open a page and add your content. Copy what we have on the mockup.
Once that is ready, save it. Go to the dashboard, click on Settings > Reading > then select your new page as Homepage. Save it and open your website.
We are getting closer… really close. I will say, we need to add a few styles here and there, but we manage to get really close to the mockup without a single line of CSS.
With the help of theme.json we add global styles, colors, fonts. And with the help of the Full Site Editor and the Block Patterns, we create our template and some patterns that we can use across our site—not only when templating, but also when creating posts and pages.
So far, we have just created the Front Page template, but is up to you to create the rest of the templates needed for your theme.
Exporting My Theme
Yes, you can build themes locally with the help of the Full Site Editor and also export it and ship it. Since we are creating a theme, before exporting, we still need to enqueue some custom styles that we need for our theme.
From here, there are many options. You can add wp-scripts or any task runner to your theme. For now, I will only enqueue a basic stylesheet.
Back to your IDE. Create a new directory for our styles. Name it css. Create a CSS file (named as you like) and paste these styles. To enqueue styles on a block-based theme, use the traditional way and add it to your theme’s functions.php file.
Now, here is our theme with the styles. Pretty good.
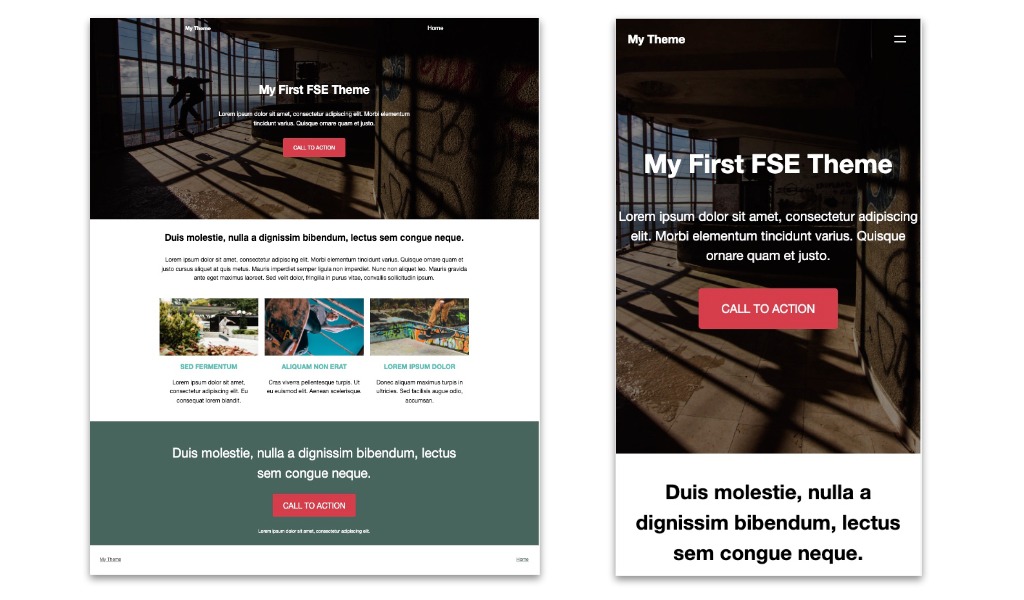
Great! We just completed our task, created our landing page, and it is also responsive by default. Now, let’s export our theme.
On the Full Site Editor, click on the three dots on the top bar to open the settings bar. Click on the option to export your site:
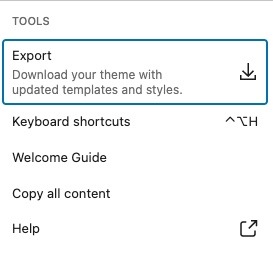
This will generate a .zip file ready to ship. Go ahead and add your theme and try it out. Here is the repo of the generated theme.
This is just a basic example of what you can do with the new Full Site Editor. I’m really excited about this new way of building themes. There are a lot of documentation, tutorials, and humans that are doing really great things with WordPress.
Thank you for taking the time to read this article. See you next time!
Where is the starter theme? The GitHub repository is empty?
Hi, Jeff. Thank you for bringing that broken link to our attention. It has been updated and here it is now: https://github.com/carolinan/fullsiteediting/tree/course/Starter%20themes/empty-60.
Thanks again.