This article addresses how to migrate subsite content within a multisite network. It doesn’t focus on migrating a whole network.
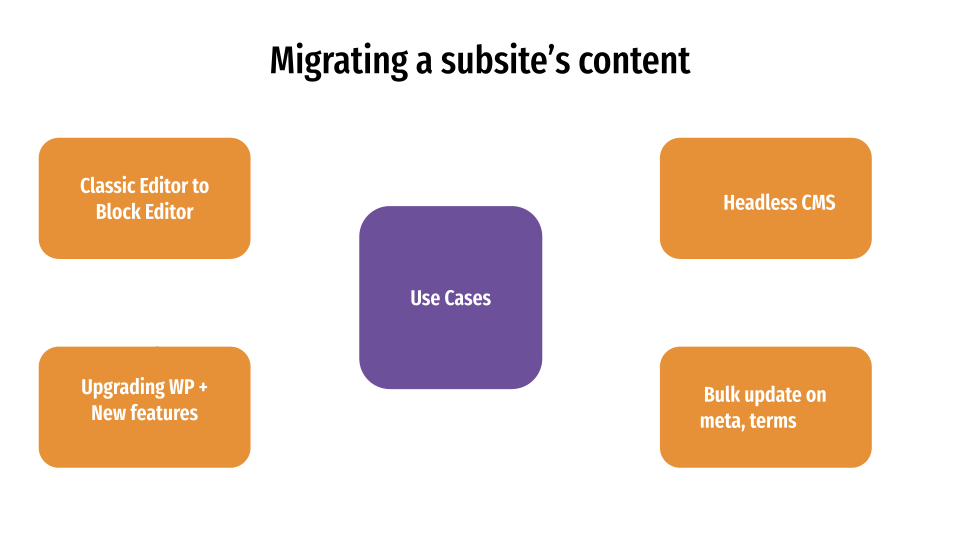
This type of migration is applicable when you are adding new features to your subsite and want to migrate only the content. For example, moving classic editor content to the block editor or sending data to a headless content management system (CMS).
Let’s take a look at how you can export and import content by adding your own WP CLI commands. Define the goals and objectives to be achieved with the migration.
Here are some examples of goals
- Retain the post IDs
- Retain the taxonomies
- Rename certain post meta fields
- Add new post meta fields
- Rename some old custom post types to new ones
- Replace site domain or URLs
Sometimes the clients may have unrealistic expectations about how to migrate subsite content to a multisite network. There are also times when requirements cannot be fulfilled technically.
So, it is important to discuss the requirements and the possible solutions with the engineering team and the clients. Submit the proposal on what could be done and how long it will take and get approval from the client. Then, start working on the solution.
Leverage the WP CLI
WP CLI makes it easy to export and import data of any size. Extend the WP CLI class and create your own commands.
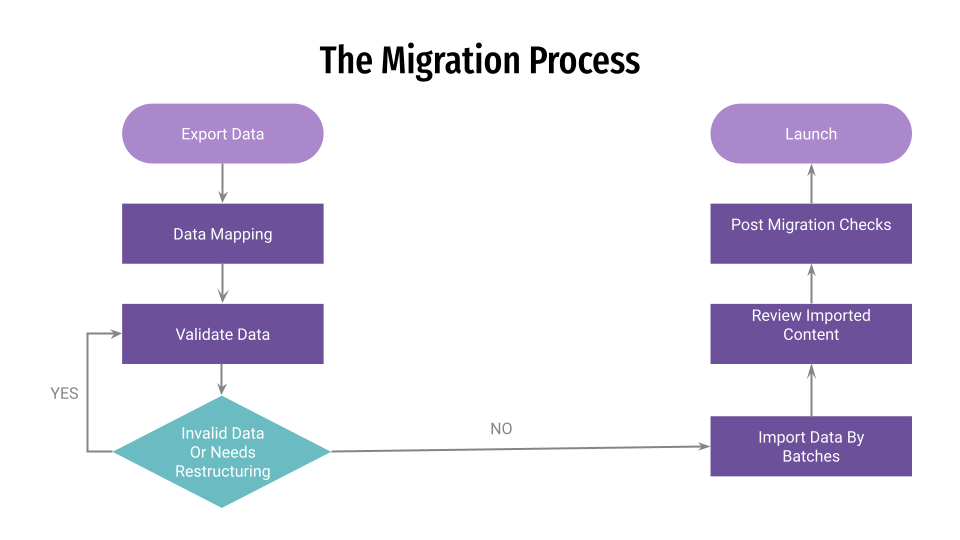
Here is an overview of the whole migration process.
Replicate the live environment locally to write and test the CLI commands. Add separate commands for export and import.
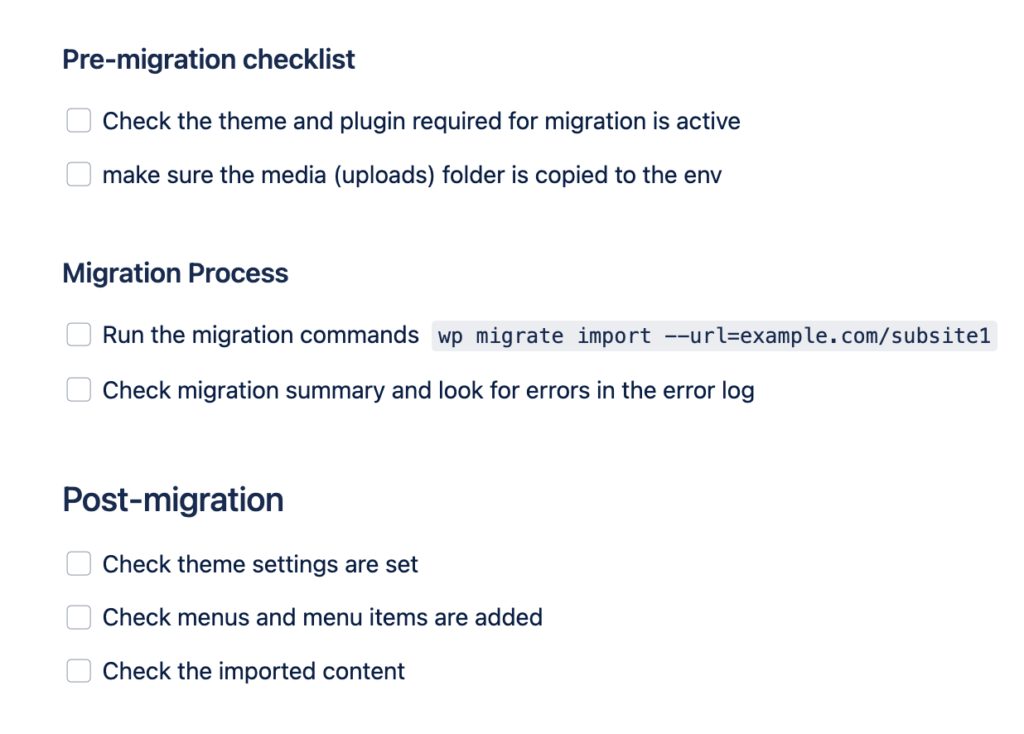
Make sure the site URL is passed every time you run the commands to avoid running commands on the default blog.
wp migrate import –url=http://mywebsite.com/blog2
Add a command to rerun export or import content by passing an array of post IDs, terms, or meta. This allows you to fix the errors during migration without running the whole process.
Pro tip: Use the progress bar utility to display the status of the export and import process.
Prerequisites
Migration requires a lot of planning and preparation. Discuss with the client and discover the data that needs to be migrated.
Content Freeze
There should be a content freeze for keeping the data intact. Whether it is backend content entry or the frontend contact forms, user registration, etc, to be stopped during the migration. Make the site read-only.
Exporting Content
You can export data as SQL, XML, or JSON files. This example exports content as JSON files in batches. This way you don’t have to worry about MySQL timeout and you can include any data you want to export.
Include terms, metadata, and any associated data to each post item. Store the exported files in their respective folders inside the main migration folder.
The path could be something like /migration/{post-type}/1.json, where the post type refers to post type slug, and numeric 1 refers to the first batch of the exported content.
Data Mapping
Map the corresponding post meta fields of each post type carefully. In some cases, you may want to rename the meta keys.
The best advice here is to keep the old meta keys and add new ones. This way you can review the new keys and values after migration.
For example, if you want to rename customer_ip_address to customer_ip, keep old ones and add new ones.
| Old meta key | New meta key | Meta value |
| customer_ip_address | customer_ip | 104.24.x.x |
| contact_num_2 | phone_2 | 98192xxxxx |
Importing Content
Take a full backup of the site including files and database before running your migration commands on production. Get the exported data, do the mapping, validate it and then proceed with the import.
Import each type of data separately, like terms, post types, post meta and menus, and so on. Whether you are overwriting data or creating new records, add a log to keep track of the status. Test the commands on the local environment and make sure they work without errors.
Logs
Catch the errors during the migration process and log them. Log error messages to a separate file, this helps to isolate and check the migration-related errors.
Add preview links to the migration summary on the terminal, this helps you to quickly navigate different content types and check the content.
Pro tip: A table of results can be helpful to view the total number of migrated items.
Migration Runbook
List out the action items for each team with instructions and commands in hierarchical order. Discuss the process with the engineering team, DevOps, and content team. This allows everyone to be on the same page.
Divide the runbook into pre-migration, migration, and post-migration. Then, add the respective steps.
Pro tip: Do a dry run on a staging environment that mimics the production environment; this helps you to find any errors and tweak the migration script.
Run migration
Prepare the production environment for the migration process. Follow the runbook that you created, then test the output.
Testing
Review the imported content, and look for any missing or incorrect data. Check if all the items are imported to their corresponding taxonomy terms.
You could find more clues in the migration logs. If there are any errors and warnings, follow that trail and confirm that data has been imported.
Rerun the commands if needed and repeat the testing process. Once you feel confident that the content migrated correctly, do the clean-up, like removing any temporary database tables, files, etc.
Finish the items on the post-migration checklist and launch the site.
Conclusion
Each site is different, which means the process to migrate subsite content to multisite could be different as well. We hope that this article sheds some light on the migration process to make it easier.
What are the challenges that you encountered during the migration and how did you overcome them? Let us know in the comments below.
Looking for help? Let WebDevStudios handle the migration, contact us now!
Further reading: WP CLI commands cookbook .