If you’re a designer with some online experience, you have probably already created a landing page or two in your time. Obviously, without a proper strategy your lander won’t convert, but for the sake of this tutorial, we’re going to assume you already know that, and have the experience to handle that. This tutorial is going to focus on landing page workflow, as opposed to high level strategy and discovery, which is just as important.
Step #1: Understand the Value Proposition.
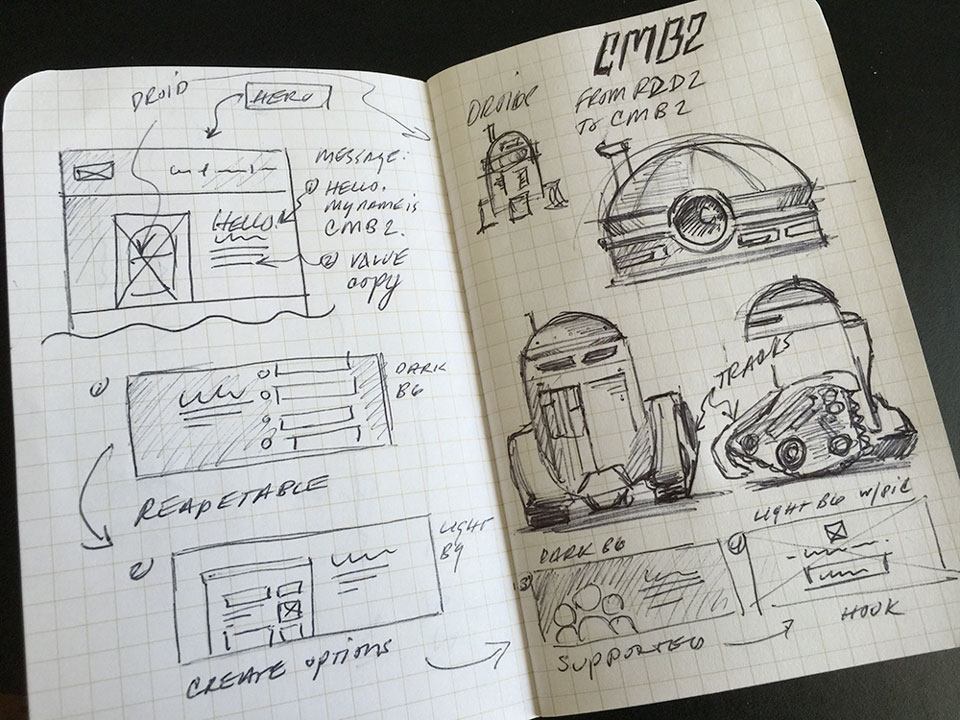
It’s critical that you understand value proposition and the competitive context of what ever you are trying to sell. For this exercise, I will be creating a Landing page for CMB2, a popular WordPress plugin created by the rockstars here at WebDevStudios. The purpose of the following steps is to create what we’ll call blocks from a hero, features, and a call to action. We want to communicate the value prop by displaying distinguishing features, and have a call to action linked to the download in the WordPress repo and Github repo.
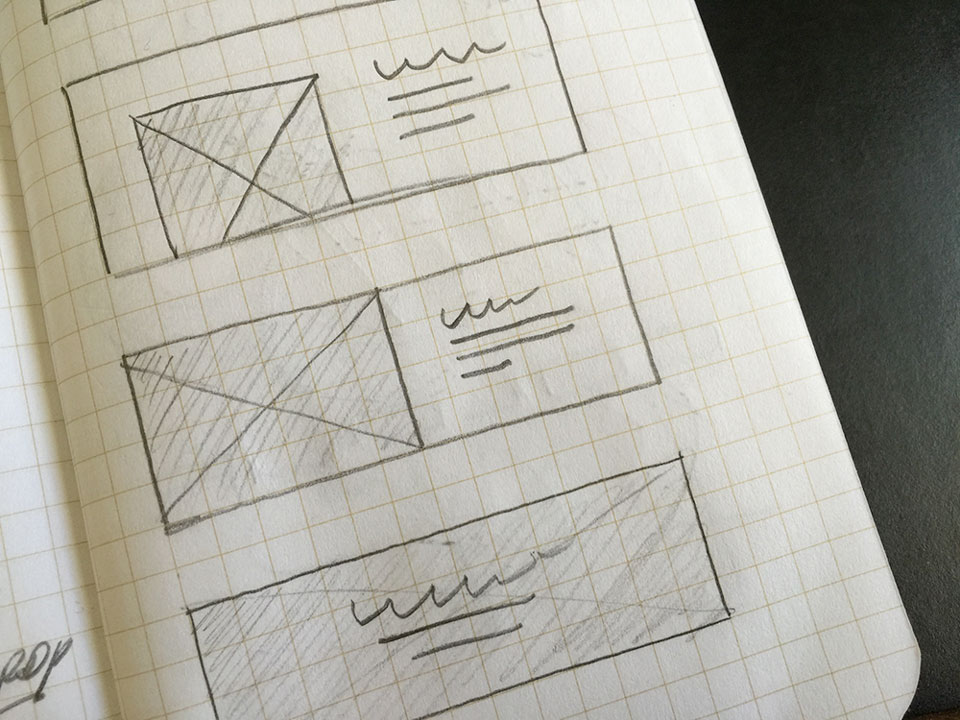
Step #2: Start with Sketches.
My recommendation is to always sketch out your ideas. If you’re too busy to sketch, then you’re too busy to get it right. Many designers go straight into Illustrator or Photoshop. While that may still produce an acceptable result, don’t kid yourself–going straight for the mouse is not the most effective way to get to a design solution. You must discover the solution and that takes research driven by sketching; you must thoughtfully go through the value prop and encapsulate what you believe will get users converting. You need a broad set of ideas to choose from. You can get those ideas quicker by sketching them.
Need more convincing? Think about it from the perspective of different industries. Sketching is a requirement in architecture, print design, industrial design, film, animation, photography, and alike, because this form of creative processing and brainstorming is known for being effective at laying groundwork for the end result. Throw on some solid tunes, grab your pencil or pen and start sketching. Make these sketches exploratory and loose.
Here are my sketches starting with the hero and ending with the hook:
Step #3: Have some Photoshop manners, will ya!
The next step is implementing some of these blocks in Photoshop. Make sure to use smart objects when needed. As well, anything that is a vector will eventually be an SVG so make sure to prep that as smart objects that connect to illustrator. Time is of the essence, but that doesn’t mean work should ever be sloppy. Assume others will review your PSDs, so etiquette is a must. Name your layers and group stuff in folders, etc.
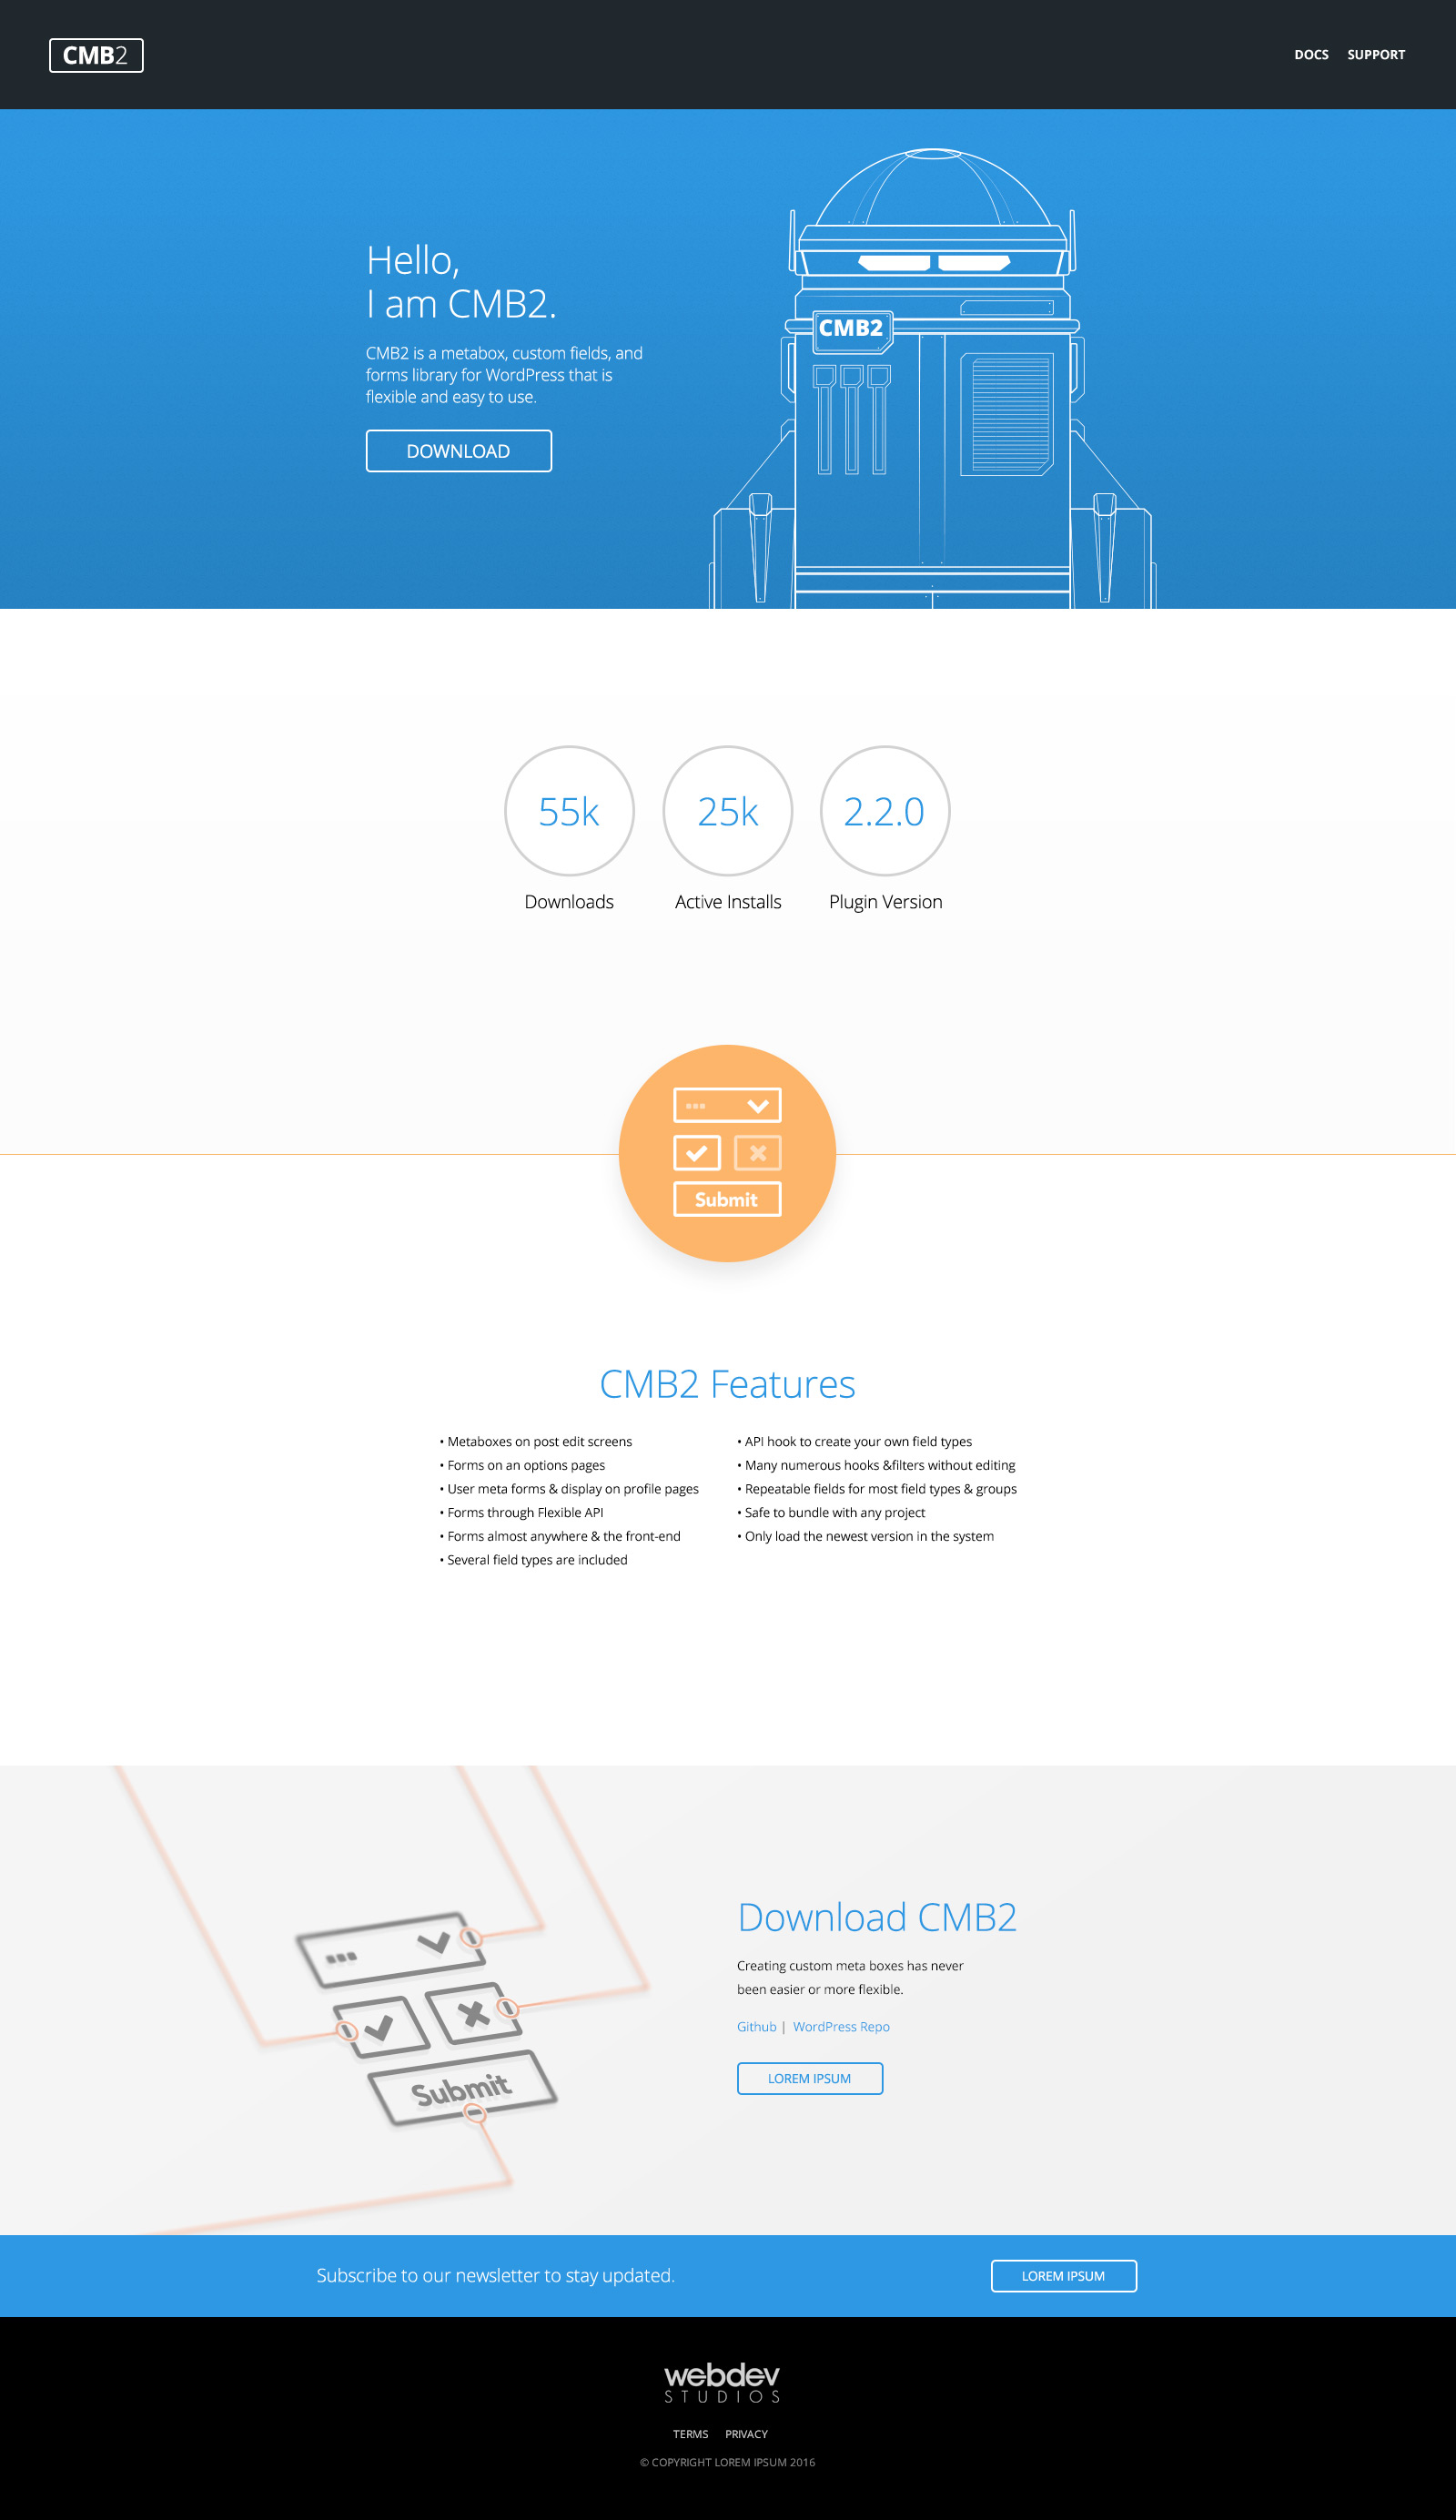
We are going to use 320 pixels as our baseline number. To create the different sizes (width) of the blocks, we will be using 320px as a multiple. For example, 1280 / 4 = 320, which means the hero will be 1280 x 960. I created a document and called it “hero.” Let’s set up a twelve column, 960 grid. Give twenty pixels of gutter.
The hero will have a main message “Hello, I am CMB2,” and secondary supporting copy. We’ll use what’s already in the repo as the supporting copy, which is “CMB2 is a metabox, custom fields, and forms library for WordPress that will blow your mind.” Also, I was thinking about creating a droid character called CMB2 as an homage to R2D2 of Star Wars fame.
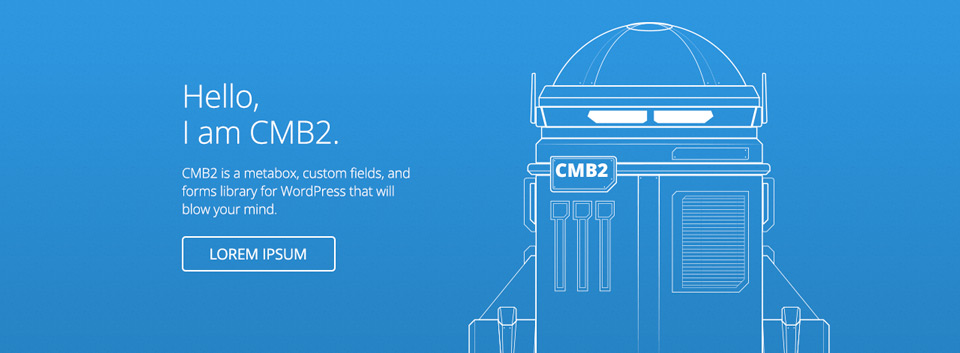
In total, we are going to create four blocks. I am creating a hero, download stats, features, and the call to action. Take your time on the hero. While all blocks are critical, the hero starts it all–and is the very first impression you make on a visitor.
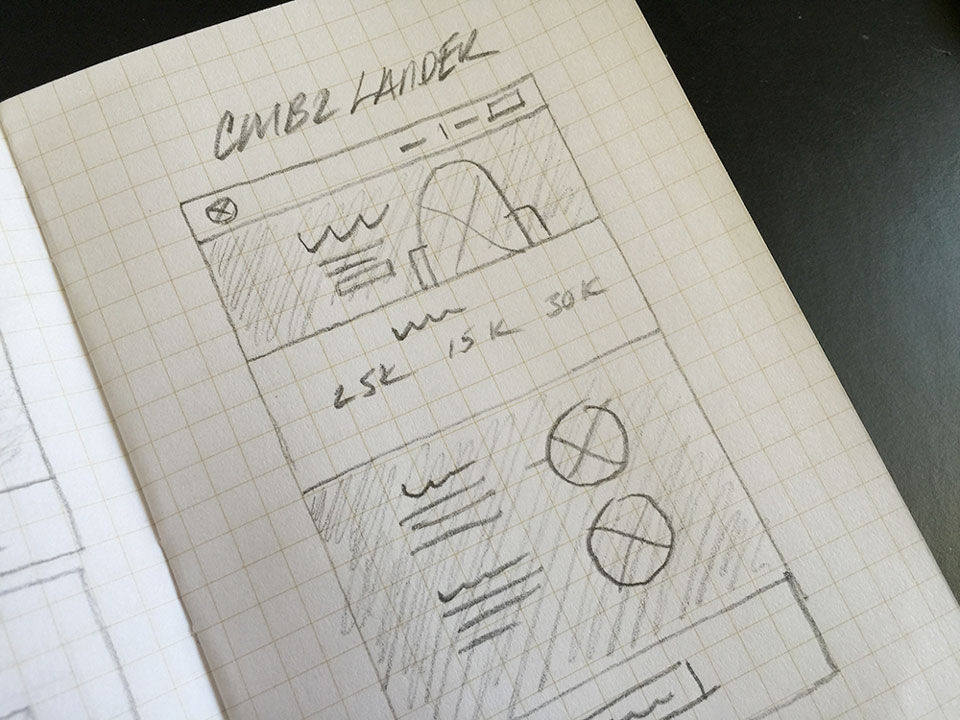
Step #4: Connect the PSD dots the right way.
I created a new Photoshop document called “CMB2-lander.” I made this document 1600 pixels wide and a to-be-determined height depending on the sum of all blocks. You will be placing linked blocks in this page–smart objects only, please! Label your layers–always. This is where your header and footer smart objects will go. Here’s all the blocks, in context, in the comp:
Step #5: Design what you can build.
If you are the unicorn I know you are, you design like a boss and can build it yourself. But, before we go further, it’s important to make sure that you can, in fact, build what you design. Don’t go rogue and design something that you (or someone else) can’t create. That doesn’t mean play it safe; that means know your craft well enough create things that can be executed. It will force you to level up–both by upping your awareness and expanding your skill set.
Here’s my toolset.
The tools I use to build a website are a pencil, a pad, Terminal, Sublime, MAMP Pro, SourceTree, using a starter theme like WD_S, and, finally, life. Day to day life is the most inspirational place I know, and I tap into it for ideas more than anything else. Look up at the sky. Look at the stars…we are surrounded by things both good and bad–by things that are empty and full of wonder. Tap into your creative center and design something wonderful, even if it is just a landing page. If you do it right, it’s not just a landing page; it’s art.
Pay attention grasshopper!
“Don’t concentrate on the finger or you will miss all that heavenly glory!”
Creating a product landing page can be easy when you have a system that you go back to–over and over again. Just like a corporation or small business, systems are critical. Over time, I came to understand that value drives visuals in the most successful landing pages. A landing page’s beauty is purposeful and there is no dissonance between message and design. This isn’t about design just for the sake of design! You’re telling a story by tapping into your skill and your surroundings. This is about knowing your craft in order to stimulate the behavior you want from users–conversion.
May your users convert the heck out of your next beautiful landing page!
A quick note from your resident editor: This post was created and written by Simon before he moved on to greener pastures, but it was so good we still wanted to share it. That said, please take a moment to follow Simon @SimonWebDesign and check out his website. He’s an incredible designer and colleague, and if you like this post, you’ll probably like his other work too.