Goal
The goal of this blog post is to dive into the existing Gutenberg content blocks and document some useful examples for all skill levels. Let’s see what’s possible by simply configuring existing blocks to make clean, quick, functional layouts and spicing up your WordPress site with Gutenberg content block recipes. No code required.
Who benefits from Gutenberg Content Block Recipes?
Chances are, if you’re a WordPress developer, you’ve experimented with Gutenberg content blocks to some degree. However, if you’re like me, you’ve spent a good amount of time rolling your own custom blocks via JavaScript or ACF’s Gutenberg block-building features.
Anyone with a basic understanding of WordPress can build the following examples now. I hope that everyone from non-coders to engineers will appreciate how easy it is to build clean, simple layouts with these exciting features. Seasoned developers may come to realize that they can save time by opting for a solution that’s already baked in, or at least glean some inspiration for making your own custom block that functions in a similar fashion.
The Details
I’m using the Twenty Twenty theme for the remainder of this article. If you’re using Gutenberg content blocks on a different theme, the functionality should be the same, but the appearance will probably change. At the time of writing this, I’m using WordPress 5.3.2.
How to Add Gutenberg Content Blocks to Your Page
Content blocks can be found under the plus symbol on your post or page. Blocks are organized by categories.
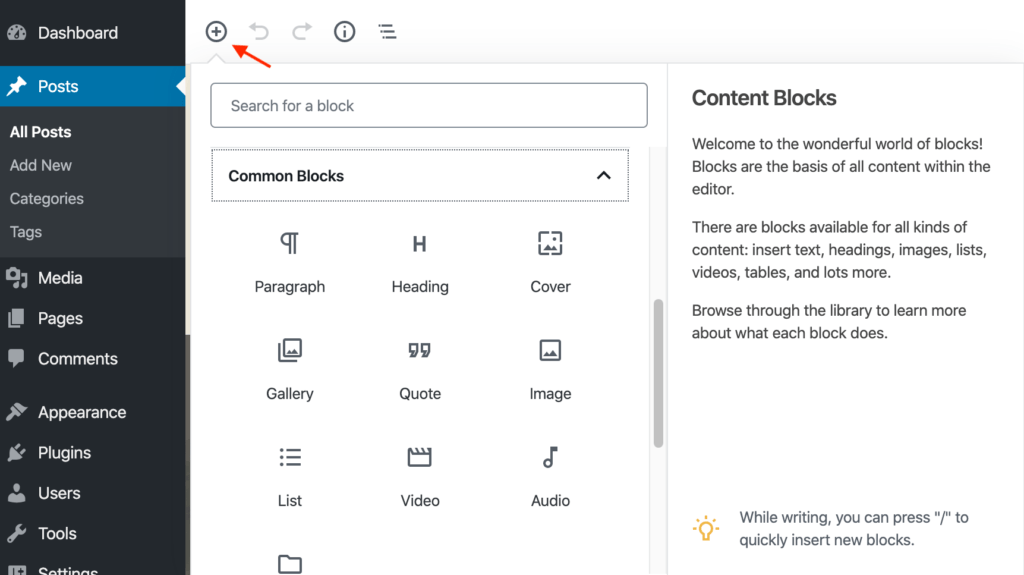
Currently, the default categories in this order are:
- Most Used
- Common Blocks
- Formatting
- Layout Elements
- Widgets
- Embeds.
There’s a large selection of useful blocks, but these recipes below should give you a good starting point for exploring the possibilities.
Here’s a list of the Gutenberg content blocks we’ll be using, and where to find them in the WordPress Editor:
Button: Layout Elements → Button
Cover: Common Blocks → Cover
Gallery: Common Blocks → Gallery
Group: Layout Elements → Group
Heading: Common Blocks → Heading
Media & Text: Layout Elements → Media & Text
Paragraph: Common Blocks → Paragraph
Pullquote: Formatting → Pullquote
Latest Posts: Widgets → Latest Posts
Separator: Layout Elements → Separator
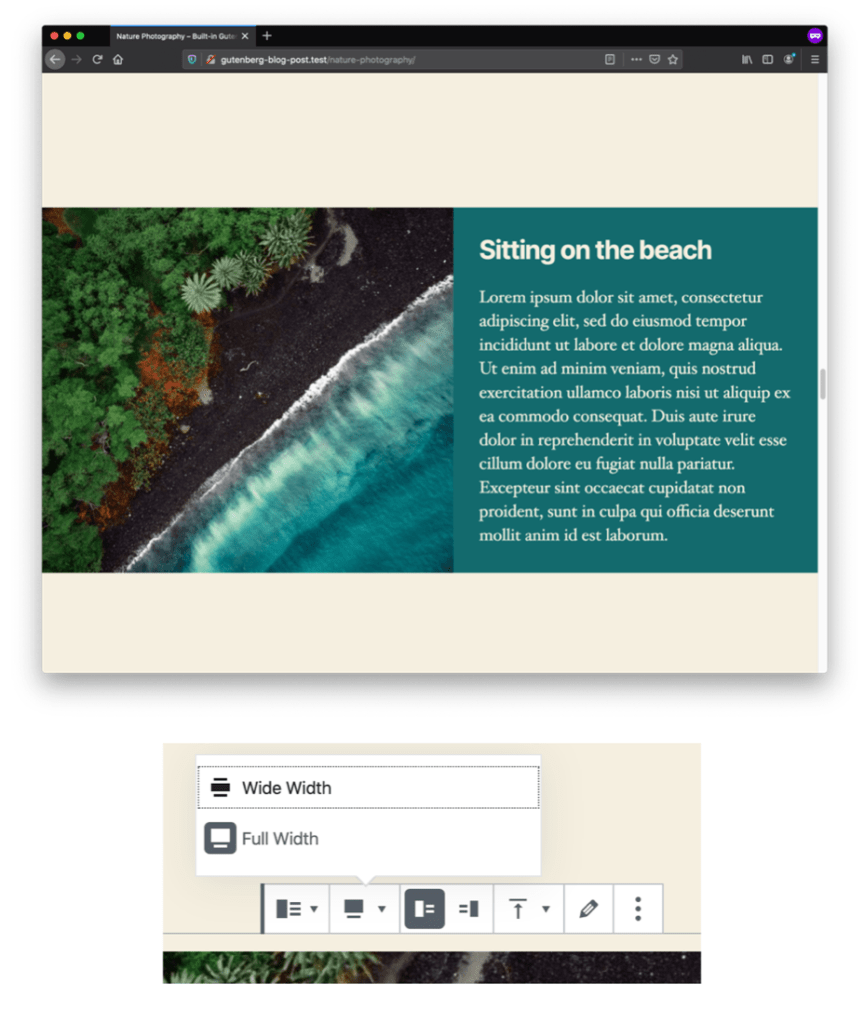
Hero Block with Headline, Text, and Background Image
![]()
Description
Build a classic Hero Block. This technique can be used anywhere emphasis is needed on a page. The Heading Block can be changed to accommodate context H2, H3, etc. Or, just use a paragraph and add some text.
Ingredients (Blocks)
- Cover
- Heading
- Paragraph
Recipe
Begin with a Cover Block. Set the background image to your liking. Insert a Heading Block and a Paragraph Block.
Details: Experiment with Background Opacity and Overlay Color Options in the sidebar. If you select the Fixed Background option, you can create an instant Parallax scrolling style for your block. The focal point picker option allows you to drag the image around, or you can manually set the image positioning with horizontal and vertical positioning fields.
Alternate Version 1 — Divider with Image
![]()
Description
Need something less indulgent? Refactor this block to be a narrow divider with image.
Ingredients (Blocks)
- Cover
- Heading
Recipe
Leave only the Heading Block and adjust overall height. In the sidebar under dimensions, set a minimum height in pixels.
Details: I’m using 175px as the minimum height in pixels, but you’re the chef!
Alternate Version 2 — Divider with Pullquote
![]()
Description
This is a great block for highlighting a quote from someone. Use sparingly.
Ingredients (Blocks)
- Cover
- Pullquote
Recipe
Add a Pullquote to the Cover Block.
Details: I find the author attribution color by default to be a bit faint. Be careful with legibility contrast here.
Gallery Block with Headline and Background Color
![]()
Description
This is a nice way to add some flavor and color with custom adjustments to your photo gallery.
Ingredients (Blocks)
- Group
- Spacer
- Separator
- Heading
- Gallery
Recipe
Start with a Group Block. Add a Gallery Block. Add a Heading Block and a Three Dot Separator Block. Use Spacer Blocks at the top and bottom to create desired negative space.
Details: The number of columns can be set in the sidebar options. You can opt to crop images, which I’ve done here. Or, you can let them scale into the available space. Click on each image in your gallery to add a caption. You’ll see an option to add a link to the caption as well.
Media & Text Block
![]()
Description
Create a Multi-Column Block with the image on one side and the text on the other. This built-in block works great, and with a few tweaks, something very expressive can emerge.
Ingredients (Blocks)
- Media & Text
- Heading
- Paragraph
Recipe
Add a Media & Text Block to your page. Adjust text content area to suit.
Details: Remember that you can nest blocks. Try adding a button or even a gallery, if it makes sense! Select the outer containing block and set the background color for more emphasis. You can drag the vertical bar left to right, in order to set the ratio between image and text. I would recommend using the “stack on mobile” setting to allow for a nice layout when the block is viewed on mobile devices.
Alternate Version — Full Width
Description
Utilize the full-width option to make a bolder impact.
Recipe
Click and select the outermost container. Select the Full Width setting from the toolbar for a more dramatic look.
Recent Posts Block
![]()
Description
This is great if you want to alert your readers to other recent posts on your site.
Ingredients (Blocks)
- Recent Posts Block
Recipe
This one requires only the Recent Posts Block, which looks great right out of the box. There’s a lot of customization possible here; so, read the details below.
Details: The settings for this allow the user to limit the amount of content, show only the excerpt (we’re doing that in this example), or show the full post. You can toggle the date, set filtering order, category, number of items, and columns. In our example, we’ve chosen two columns.
Call-to-Action Block
![]()
Description
Create a call-to-action using the Cover and Button Blocks.
Ingredients (Blocks)
- Cover
- Button
Recipe
It’s super-simple to create a nice call-to-action using existing content blocks. Embed a button in the Cover Block.
Details: Experiment with the button settings. Click directly on your button, then adjust settings in the sidebar. Border Settings will allow you to set the Border Radius for a more rounded appearance. You’ll also find the option to open the linked page in a new tab.
Now It’s Your Turn
I hope these have been inspirational for you, or at least have whet your appetite for what can be done with this useful tool. I encourage you to go see what you can make with what’s already available in WordPress.