
So you want to learn how to start making your own WordPress API endpoints? Great! Today we will be taking a dive into what it takes to write our own restful API endpoints for WordPress starting from the basics and working our way up to practical examples.
If you are unfamiliar with the basics of WordPress API, you’re in luck. I’ve previously written a series of posts just about that. See Headless WordPress: Deeper Dive API Primer and How to Post to Other Platforms for a programmer’s perspective on how to work with existing endpoints. If you’re looking to learn how to get started, check out Headless WordPress: Taking Posts Anywhere to understand why WordPress API is so important.
What’s the Point?

Before explaining how to make a custom endpoint, a better question to start with is, “Why should you make a custom endpoint to begin with?” Baked into all standard WordPress websites, we already get access to dozens of free endpoints with no coding required. I go over some of these in Headless WordPress: Deeper Dive API Primer and How to Post to Other Platforms. To see what routes your site may already provide out of the box, go to https://[insert-website-domain-here]/wp-json/.
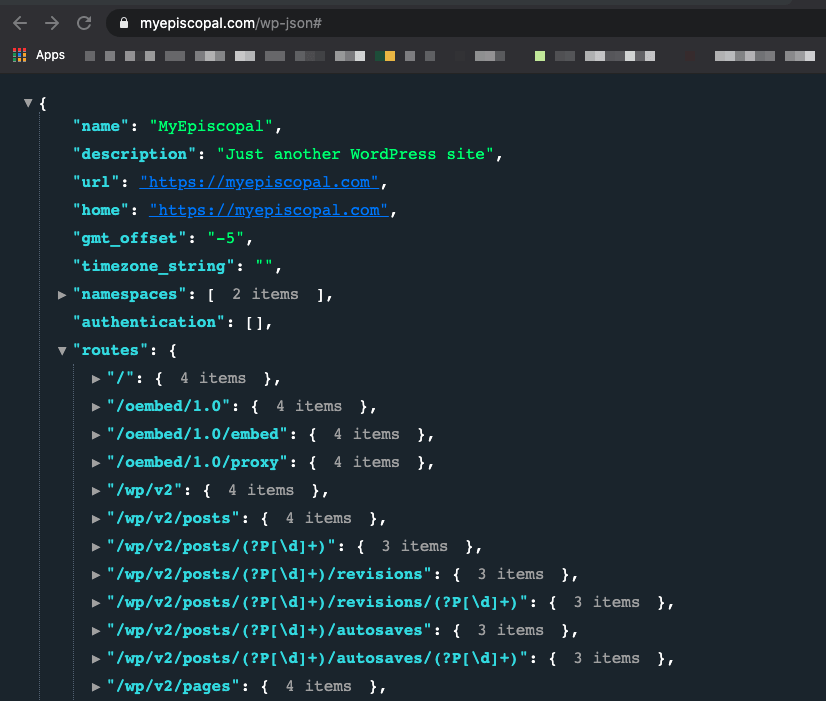
Nugget: I highly recommend the browser extension Awesome JSON Viewer to make reading JSON returned easier to read. Or, access the endpoint with your preferred REST API client.
So, with all these endpoints already provided to us, why should we write our own? The following examples, listed from least to most complex, are great reasons why creating a custom endpoint is the way to go.
Example One: Upvote Button
![]()
WP-Inspire is a website gallery of beautifully-designed WordPress sites meant to inspire others. Designed by WebDevStudios Frontend Engineer, Oliver Harrison, each site featured is simply its own custom post type with a meta field of upvotes.
To make the upvote button work for each site, we implemented a simple REST API endpoint. When the user clicks the upvote button, our custom-endpoint is called via AJAX and is passed the site’s ID. The endpoint then simply updates the site’s meta field by one and returns the new site upvote count. From this example, a custom endpoint simply made it easier to add dynamic updates to our site with AJAX without having to reload the website.
Example Two: Gutenberg Block Fight Logic
In another project, there was a need to display a multi-round competition between multiple teams in a bracket. Each team received votes in a given round. Based on these votes, the next rounds had to automatically be built based on the results and displayed in a custom Gutenberg block. A custom endpoint was made for the project so that the complex fight logic could be done in the backend and simply returned a formatted array of the next round’s entrants that the Gutenberg block could display.
In this example, we were able to decouple the complex data query and structuring in the backend (applying the various match-up logic) to simplify the display logic on the frontend, making the Gutenberg block leaner. Additionally, since the bracket logic was now an endpoint, the data could be used elsewhere such as an external website or even a mobile app.
Example Three: Connecting a Custom SAS with WordPress

Connected Church is a custom SAS developed to help churches manage their organization (think QuickBooks for church). One module in Connected Church allows you to post content to your church’s website and also display a warning banner across the whole site in the event of an emergency.
Additionally, there are multiple forms that a church can embed on their website that will automatically store the data directly into Connected Church, instead of just on the website or email. To allow for each church’s website to communicate with the Connected Church church management system, they wrote a custom plugin that registers multiple custom REST API points specifically to allow the church management systems to automatically update their WordPress sites remotely.
The Coding

First Endpoint
Ready to start writing your own REST endpoints? Let’s get started!
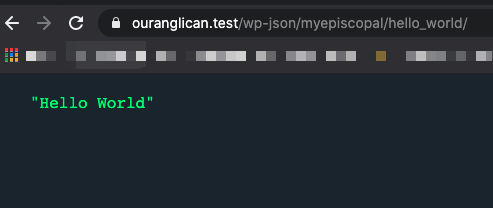
If you have any familiarity with WordPress development, registering your first endpoint should be a fairly straight forward process. Just like registering an action or shortcode, to register an endpoint, all you have to do is call register_rest_route()on the rest_api_init hook and provide a callback method. Seen below is your standard hello_world().
Let’s break down register_rest_route() . It takes in three parameters the namespace, route, and args.
- The namespace is the first URL segment after the rest core prefix. In our case, by choosing myepiscopal,the routes we are registering are actually https://example.com/wp-json/myepiscopal/*
- The route is the URL after our namespace that we want to respond to. In our case, /hello-world/
- The args is a multi-dimensional array that include the method type we want the route to respond to (Get or POST) and the callback function we want to be called with the URL is hit.
Putting it all together by calling https://example.com/wp-json/myepiscopal/hello_world, the hello_world() function is called and returns the string “Hello World!”
Working with URL Parameters
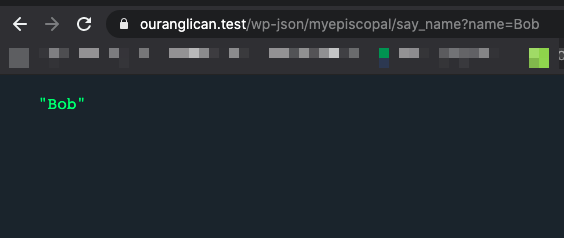
Depending on your use case, you may only need a non-configurable endpoint to trigger some PHP code. However, more likely you’ll want to pass parameters to your endpoint for more advanced responses. Any URL parameters passed with a given request will be accessible through their key in the args object passed to your callback method. For example, ?name=Bob can be called by calling $args[‘name’].
Note: Always remember to sanitize and check parameters before use in any data-sensitive manner, such as data queries.
Let’s Turn it Up

There really isn’t much more to REST API development then there is to any other WordPress coding. The main piece that makes it restful is the initial call to register_rest_route() . From there, you write your existing PHP code with full access to all of WordPress specific assisting functions. The only difference is your function return should be JSON. With that said, let’s attempt a more practical example of something that might be more useful than a simple hello_world().
In our next example, we are going to create a custom endpoint that will allow other applications to post a banner bar across our entire website for special announcements or updates. When done, it should look something like the following image below.

In the following code, we register a simple JavaScript file to display a status bar at the top of that page; and in the PHP file, we register our endpoint and enqueue our script. Now when we hit our custom endpoint with a POST request and form body containing a message and active status, it should display on our website.
Note: This code is entirely for demonstration purposes and should not be used in production. As the endpoint is making changes to our database, you should sanitize the request data first and also add authentication for your incoming requests.
Normally, we’d be making a POST request from our existing third-party SAS, but in this case, we’ll simply make one using our preferred API testing client.


That’s It!

We first learned of a few examples creating our own REST API endpoint that may be useful. Then, we covered the basics of registering and accessing parameters passed to our custom endpoint for use in our various WordPress plugins. Finally, we concluded with a more practical solution for a custom web application that can update content on our WordPress website for us.
The primary takeaway from this lesson is to see that creating our own endpoints should be easy. If you can register a shortcode, you can register your own endpoint. As always, keep learning and comment below with problems you use custom WordPress endpoints to solve.